It’s not often that you get to go snorkeling, so why not learn how to take pictures while snorkeling and capture these memories forever. You may be surprised to learn that you don’t need an expensive camera to take nice photos underwater. How nice the photos turn out depends on the skill of the photographer, and with the tips in this article you can quickly become a decent one.
To preface this, friends, family, and acquaintances often ask me about what underwater camera gear and editing software I used to get the perfect underwater photos.
And while my underwater photos aren’t going to win the Pulitzer prize any time soon, they are good enough that the people that I show them to often ask for advice on how they can do the same. I’m also proud enough of them that I make 11 x 16 prints and hang them on the wall for all guests to see.
(Sometimes I find myself staring at them, daydreaming about the next time I can head back to the Hawaiian Islands again, but I digress.)
Below are some quick tips to help you get great results with any underwater camera without breaking the bank or needing to spend all day color editing a photo.
Don’t Zoom In
If you want to get a closer shot, then actually move closer to take a better photo instead of zooming in from afar. The less distance there is between the camera lens and the subject, the less debris and suspended matter in the water to distort the shot. The closer the lens is to the subject, the sharper the image with less distortions.
Additionally, water produces a natural filter that dulls the sharpness, color, and contrast of your photos. The further away you are from the subject, the blurrier the shot and also there will be a bluish hue to the shot.
Keep in mind that when we say “get closer” we are not encouraging you to get within reach of the sea creatures. They can get scared and some may feel threatened enough to attack you. If you notice the subject is acting oddly, such as suddenly changing its color or movement pattern, then it is stressed out by your presence and about to swim away or attack you.
In the case of some protected marine life such as turtles, it may be illegal to get within even 10 feet of one. Use your discretion to determine how close you should get, but for most marine life try to get around one meter away.
Turn Off the Flash
Many underwater photography guides will recommend using a flash or two, however those articles are geared towards scuba divers who are deep underwater in poorly lit conditions that need an external light to make up for the poor lighting at depth.
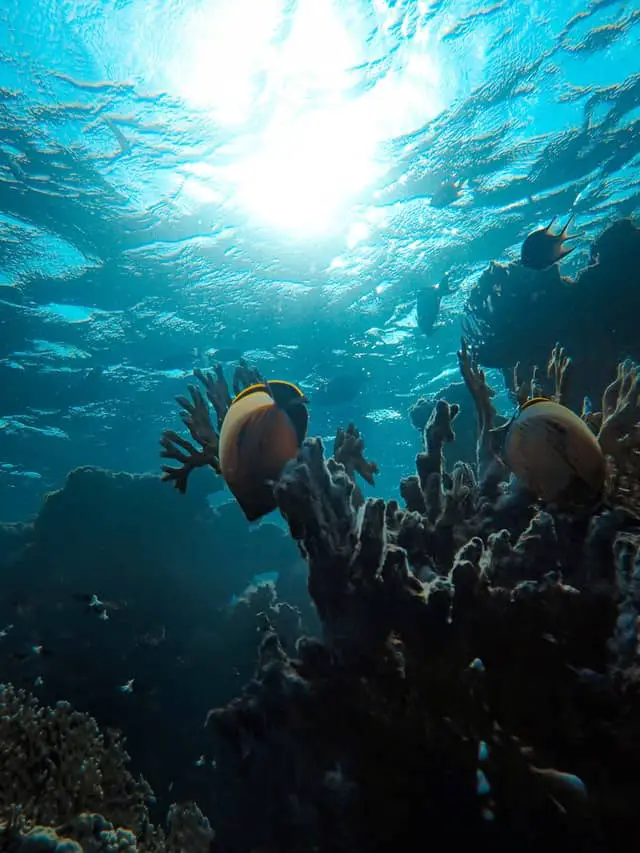
If you’re snorkeling in shallow water on a sunny day, you don’t need a strobe or flash; the natural sunlight will be more than enough. In fact, you are more likely to ruin a shot using a strobe because it creates more backscatter as the light bounces off all of the suspended particles in the water.
The optimal time to be taking photos while snorkeling is at noon when the sun is directly above and shining light evenly. Of course, you can take photos at different times and try to use the sun’s angles to get some interesting compositions. The natural light reflecting off of corals, fish, and even rocks can look very beautiful indeed.
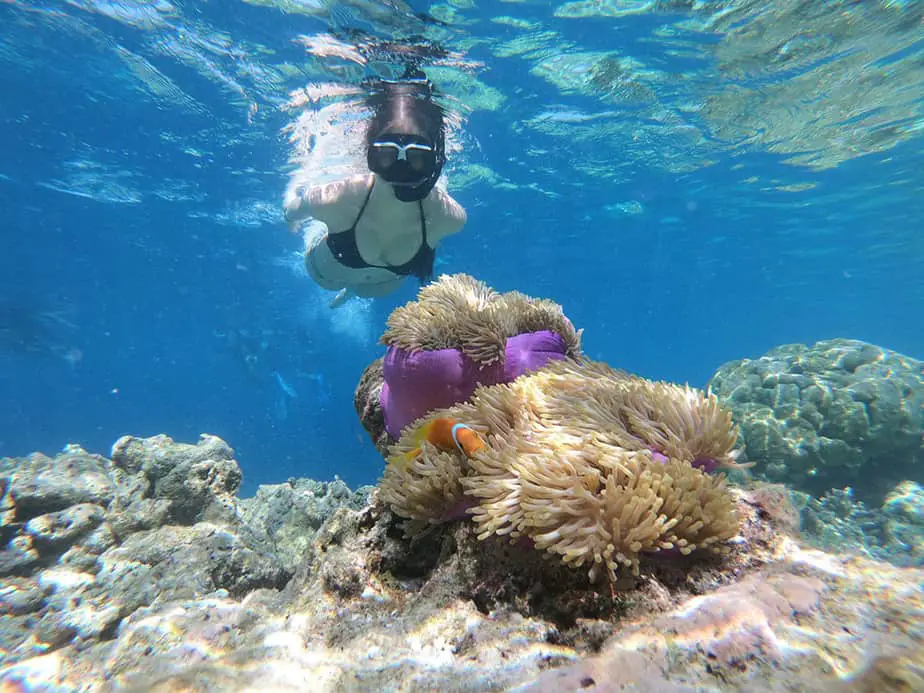
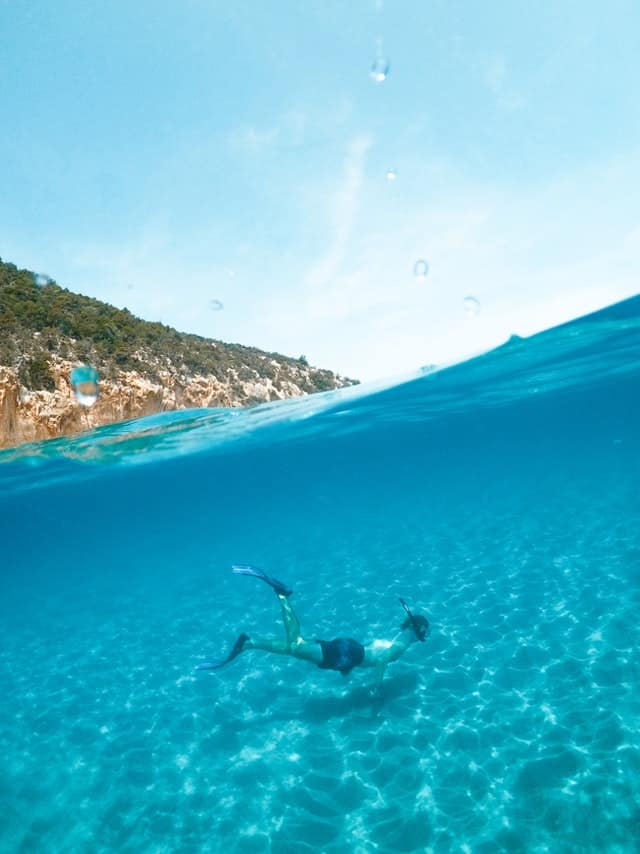
Duck Dive Down
When staying by the surface you can still get some decent photos, however the best photos are taken at the same depth as the marine life you’re photographing. When you’re above them looking down, you’ll find that most marine life tends to camouflage into their surroundings.
Even if your experienced eye can identify everything, to the layman it just looks like there isn’t enough contrast between the background and subject to make it “pop” out. Everything will look like it’s all on the same plane, making it look bland and boring.
Furthermore, taking pictures from above doesn’t do the underwater landscapes and shoals of fish any justice. You are not capturing their full dimension from this angle, nor their shape or beautiful colors. For some subjects, like turtles or rays, it may even be worthwhile to position yourself beneath them so that the surface of the water can become their background.
So your best bet is to take a deep breath and dive down for a better angle. This can be a bit tricky, because in addition to your photography skill, now you are testing your lung capacity and swimming proficiency. In addition, the fish are not exactly willing participants; they won’t stay still and they may even swim away!
Try to take photos of the fish facing the camera if possible. Many sea creatures like to face away if they notice you, but other fish are not so shy, such as the aggressive anemone fish which are easier subjects. You will need to tread carefully and anticipate where marine life might go.
Always look for a new vantage and test for different compositions. With some luck and patience, you will be able to get the shot that you want.
Lastly, wide angle shots of the reef from above tend to look washed out; take the shot at level or even slightly below looking up for the most interesting composition.
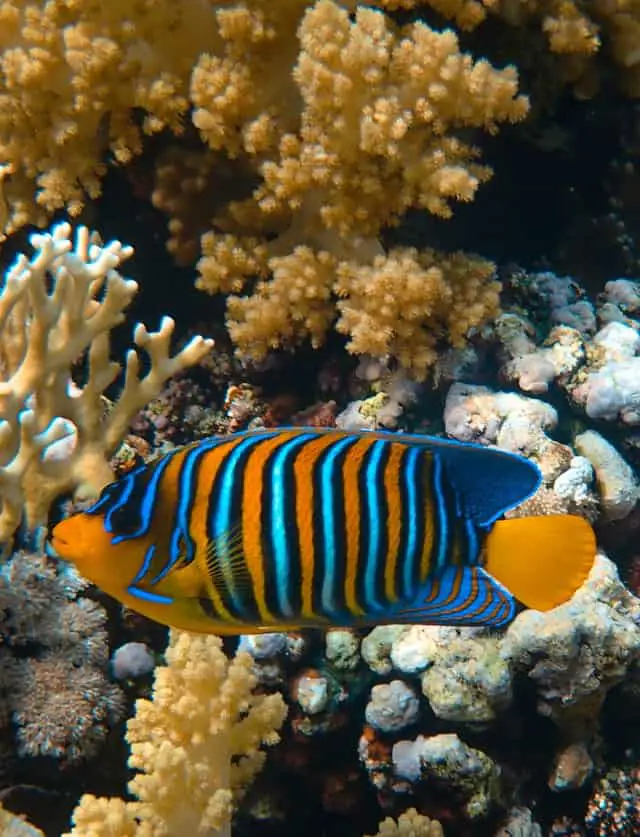
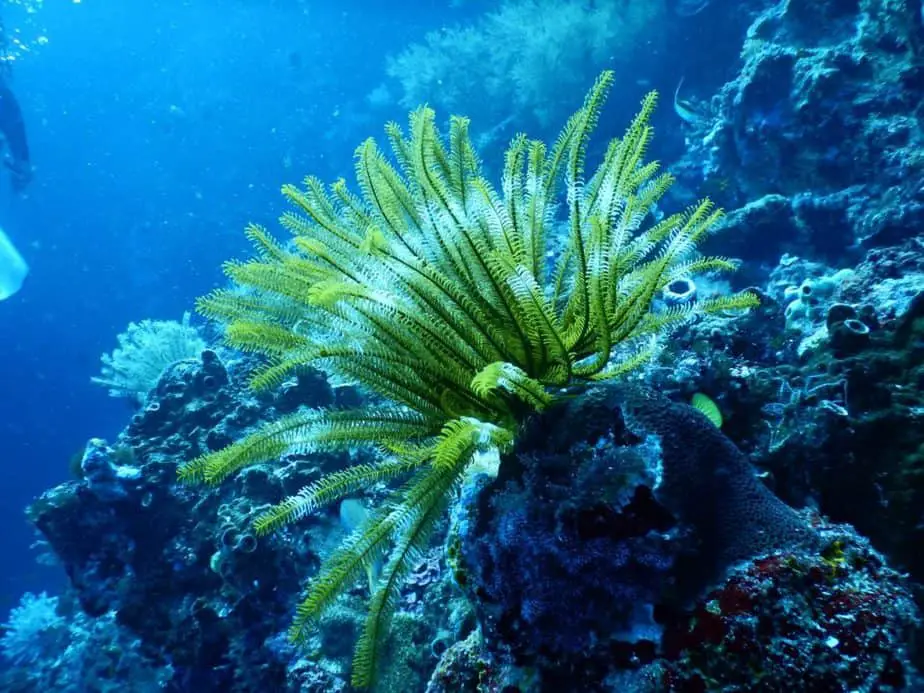
Consider the Background
To expand further on making the subject “pop”, you need to consider the background. In other words, set up the shot so that there is contrast between the background and the subject. For instance, take a photo of an orange gorgonian sea fan with the deep blue sea as the background to really make it stand out.
Lead the viewer’s eyes from the foreground to the background. For instance, you can have coral heading towards the lens or coming towards a barrel sponge to make the image stand out.
Another way to contrast the subject and background is to show size. Take a picture of a fish next to a much larger fish, or snap a picture of a diver next to a large manta ray to help the viewer understand the scale of what’s shown in the photo.
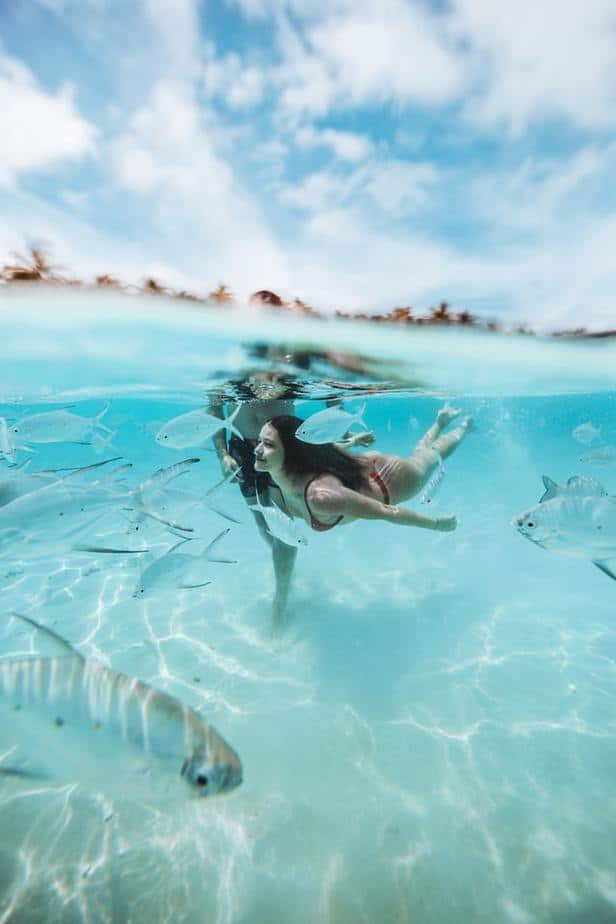
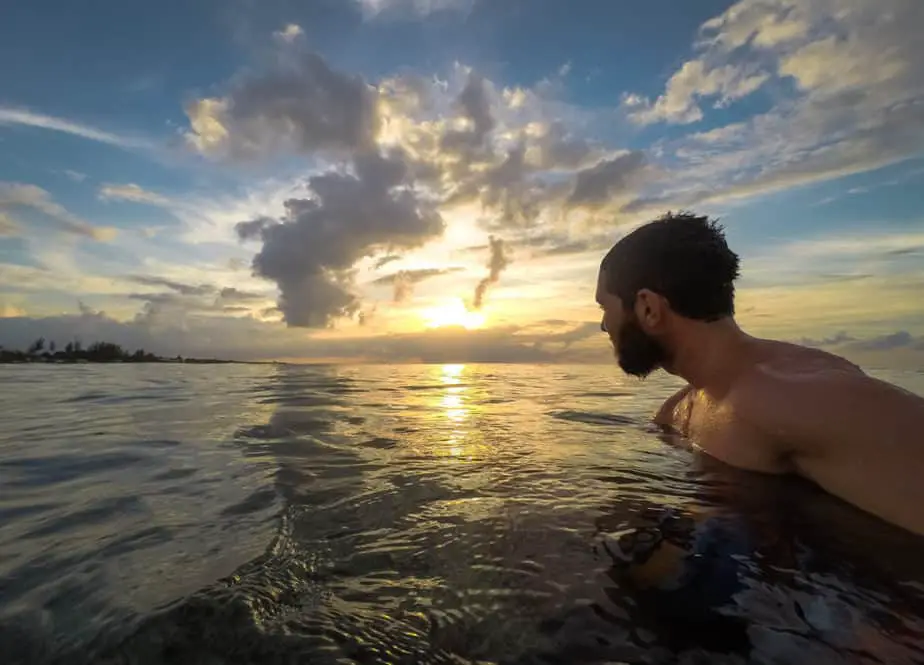
Half and Half
You want a nice and simple way to wow your viewers? Take a photo by the surface in shallow water where half of the frame is below water and the other half is above. It’s one of those things that always looks good, kind of like taking a picture of a sunset.
While a half and half photo is not particularly hard to take, there are still a couple of tips you should keep in mind. First, the water should be very shallow, around two to three feet at most. Second, a large dome port is ideal to give us a large surface area to work with to balance the two worlds.
Third, you should be wearing a life jacket not just for safety reasons, but to help balance your camera and your body. You’ll also find that lifting the camera up is easier when you can also rest it on your life jacket. Lastly, make sure you keep the port clear of water droplets; use a little bit of saliva and smear it around the acrylic or glass lens to clear it up.
Take Lots of Photos
We’ve already talked about how there are a lot of particles and debris in the water that can potentially ruin the shot. Additionally, marine life won’t stay still and you’ll often get lots of blurry photos as they move around.
While practice can make perfect, it’s much safer to just take plenty of pictures and then filter out the good ones later. Seriously, repeat each shot three or four times just to be safe. Make sure your camera has a large memory stick or hard drive to accommodate this. Most of the photos will be rubbish (out of focus, blurry, too much debris, etc.), but you’ll get a handful that look fantastic.
Be as Stable as Possible
This is much easier said than done, but you need to be as stable as possible to successfully take snorkeling photos. This is the most sensitive part of snorkeling photography, and on the surface it’s relatively easy. As you are floating, keep an eye out for water ripples because they are the only thing that will cause you to move.
Hold your camera (or pole) steady and take a picture before a ripple destabilizes you. Surface pictures are typically taken in shallow water (such as the half and half picture) so that you can still see the bottom. Anything deeper than that and you will end up photographing subjects from above which is way less interesting as we explained earlier.
When you dive down to take photos, stability plays an even more important role. Unlike scuba diving where divers utilize dive weights to reduce their buoyancy, snorkelers will find it difficult to control how floaty they are while trying to snap the perfect photo.
As a snorkeler dives downwards, they require powerful movements which can scare the marine life away. A snorkeling photographer may need to dive from a distance and approach their subject slowly, or master the art of gentle submergence so as not to draw attention to themselves. Afterwards, snorkelers must then stabilize the camera underwater to have the best chance of snapping a good photo.
Stability when Filming
When shooting film, stability is once again very important. Have you ever seen one of those GoPro videos of a biker pedaling over uneven terrain (or something similar to that) where the footage is so shaky you can’t tell what’s going on and also feel nauseous? Right, so stabilize that camera. When finning along the surface, hold the camera in front of you and focus on maintaining just one angle of view.
Practice on Static Subjects
If you’re new to taking pictures while snorkeling, instead of focusing on that one timid fish that won’t stop moving, why not start with something static like clams, coral, invertebrates fixed on rocks and sea anemone?
This way, if you find that you’re still taking blurry photos, at least you know it’s due to poor stability. Sometimes curious fish will swim around you, presenting you with the opportunity to snap a few easy photos. In certain locations, you may even get turtles approaching you.
On fast moving subjects, we recommend taking lots of photos. Somewhere in your barrage of shooting is a great photo that you can look for later. You may even end up taking over a dozen just to obtain the perfect photo.
Some fish, such as angelfish and butterflyfish, will swim at an angle when followed. They’ll only reveal their flank when changing direction, so this is a perfect time to utilize the “take lots of photos” strategy and just go all out until you finally get their good angle. Just make sure your camera has enough storage space and battery life to handle it.
Post Processing
You can make your photos look even better in post. If you don’t have any photo editing programs, you can use a free one like Gimp to help you edit your photos to perfection. The three changes you can make to the photo that make a huge impact are the cropping, contrast, and color balance. Maybe the colors look a little off, but by adjusting the color balance you can salvage an otherwise bland looking photo.
For example, the deeper you shoot your photos, the less red there is. In post processing, you can turn it back up to make the reds pop again. If you overdo it though, you’ll get strange results such as the water turning a pink hue.
Adjusting the contrast makes the light and dark shades more prominent, adding definition and making the subject stand out.
Sometimes when a photo has too much going on, you can crop out only the relevant sections to get rid of the distraction and focus only on the subject. When cropping, many beginners tend to put the subject directly in the middle of the photo. Try applying the rule of thirds to make the composition look more interesting.
Which Camera Should I Use?
The seabed provides innumerable opportunities for photographers to take pictures of exciting underwater subjects. However, underwater photography always had a high barrier of entry until recent years. Today, the cameras on the market are much more affordable and accessible, letting more amateur photographers take a shot at creating wonderful memories of their underwater expeditions.
As for the selection of cameras, there are three types, each with varying features and depths at which they can operate effectively. First, waterproof compacts are the smallest in size and highly durable and are best used between 10 to 15m.
Second, watertight housing cases can be used with compacts or DSLR cameras to great effect. They can be used at depths up to 40m but are quite bulky. Third, we have action cameras (“action cams”) which are synonymous with the GoPro style of cameras. With them, you can shoot wide-angle videos in UHD (4k resolution) and they are usable as far down as 60m.
For a freediving snorkeler, the immersion capacity of these cameras is not really a huge factor since the average person does not dive more than a few meters with a single breath. As such, cameras with watertightness up to 10 meters (most commonly found on budget watertight compacts) are more than sufficient.
Snorkelers who only stay at the surface only need a model that is watertight down to three meters.
Compact Cameras
Let’s go over waterproof compact cameras in more detail. First, they have improved significantly over recent years, with most models becoming highly durable. They are shock-resistant and can survive getting dropped at 1.5 to 2 meters. They are also crush-resistant, capable of withstand 100kg of force on them, and cold-resistant down to temperatures of -10 degrees celsius.
Furthermore, most entry-level compact cameras are water-resistant down to 10 meters, and more expensive models can function down to 25 meters. They have limited zoom at only 4x or 5x, but as we explained above you should try to get as physically close to the subject as you can for the best shot anyways.
Additionally, numerous models have a built-in GPS which allows you to instantly generate the geolocation of your photos (very nifty for snorkeling). With that said, this eats up the battery quickly.
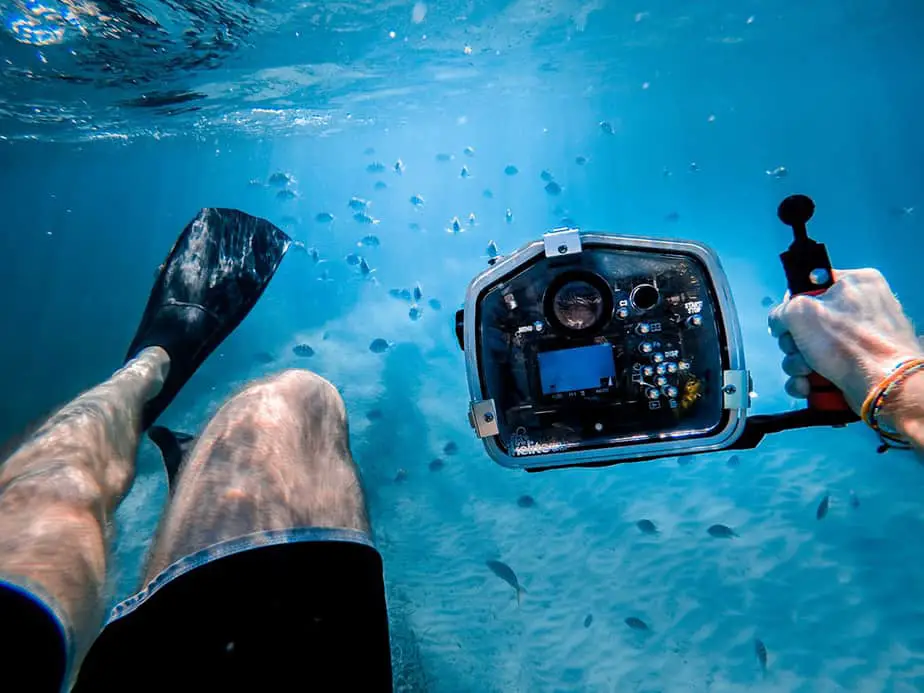
Housing Cases
Next, if you already own a compact camera or would rather use a reflex camera instead of a viewfinder, then you should consider purchasing a housing case for your camera. Most housing cases are constructed using transparent plastic (polycarbonate).
Various features, such as small levers or waterproof push-buttons, are added to leverage the camera’s release mechanism and other buttons.The biggest downside of waterproof cases are how much bulk they add to your camera, making them difficult to wield while snorkeling.
In addition, they require constant maintenance such as applying waterproof oil on the seals to prevent leakage. As with most camera equipment, housing cases are very expensive, and can be as much as a compact camera outright. However, they allow you to use a powerful DSLR camera underwater which produces higher quality photos.
Action Cams
While action cams have limited capabilities for photography, they may still interest you due to their small size and hands-free filming (if you have a head strap) filming capability. The market for small waterproof action cameras has exploded, with GoPro dominating the market.
Since they are designed for use during sports activities, they are highly durable and will survive getting dropped in addition to being resistant to the elements. Action cams allow you to film at an ultra-wide angle (around 170 degrees) at 60 FPS and 4k ultra HD resolution. In other words, you can expect original and high quality footage of your adventures.
What this means for snorkelers is you can even film yourself underwater, and with the help of a pole or head strap, you can get a great angle on the subject you are filming.
Underwater Camera Maintenance Tips
No matter how durable your camera equipment is, constant exposure to salt, sand, and water can eventually wear it down. That is why you should inspect your camera for wear and tear prior to taking it underwater. Look out for harmful debris that can damage your camera, such as dust, hair, grains of sand, drops of water, and so on.
These elements can compromise the camera or housing case’s watertightness. Make sure the camera body or housing case closes and secures tightly. After a snorkeling trip, just as you would for your snorkeling gear, make sure to rinse your camera equipment with fresh water.
If you forget to do that, then the salt water will corrode the fragile parts of the camera such as the screws, seals, glass, and so on. In fact, it is recommended that you submerge your camera equipment in freshwater for at least 20 minutes after each dive to get rid of any lingering ocean debris.
Using These Snorkeling Photography Tips
So there you have it, some snorkeling photography tips to help you learn how to take pictures while snorkeling. Turns out the barrier to entry has been lowered significantly due to advancements to camera technology in recent years.
Even just getting started with a cheap compact camera (“cheap” being relative to other camera gear) and by following the tips above, you can take some pretty darn good photos yourself. However, safety is our number one concern, so unless you’re a strong swimmer and an experienced snorkeler, don’t even think about taking pictures until you can snorkel at a high level. Also resist the urge to feed the fish to attract them; this behavior is extremely harmful to the fish and ecosystem.
We recommend you start off with taking photos in shallow water so that staying afloat isn’t an issue. You can take some nice half and half shots. If you’re feeling slightly adventurous, then dive 2-3 meters down, but save the extreme diving to scuba divers or advanced snorkelers.
Now you can impress all of your family and friends with your awesome underwater photos each time you go snorkeling.
You might also be interested in our guide about how to carry a camera while snorkeling.