The purpose of weighting yourself for freediving is to make it easier to descend to depth by counteracting against the positive buoyancy of your freediving equipment and the oxygen in your body.
It can be difficult to judge exactly how much weight you need to have in your weight belt or neck weight. Too much and you’ll constantly be sinking, which is dangerous when you’re trying to resurface. Too little and you’ll still have too much resistance when diving.
Furthermore, if you have any problems with weights while underwater, your diving buddy must be able to keep up with you and rescue you. Getting it just right requires some guidance, which we will be providing in this article, but expect to go through some trial and error due to the fickle nature of weighting yourself for freediving.
Weighting Yourself For Freediving Considerations
There are numerous ways a freediver can add attach weights to themselves depending, and the exact weighting method used depends on personal preference or their freediving discipline. For instance, one can freedive without any weights, with neck weights, a weight belt, or both.
The most common weighting method involves wearing a rubber weight belt with the exact amount of weight on it necessary to reach zero buoyancy. And that’s where we get to the point of this article: how to properly weight yourself so that you can reach neutral buoyancy for freediving.
The top factors that will affect how much weight you need are as follows:
- Your body weight, composition, and gender.
- Wetsuit thickness.
- Dive depth.
- Salt or freshwater.
Perhaps you’ve already freedived before and put on the same amount of dive weight only to find that this time you are no longer neutrally buoyant. What gives? Well, the first two factors probably haven’t changed, however you may be wearing a thicker wetsuit this time around, or you’re diving in freshwater instead of salt water. Let’s go over how this could affect your buoyancy.
Body Composition
It’s not about how much you weigh, it’s about what that weight is composed of. Here’s an example. Suppose there are two men both weighing 180 pounds (82 kilograms). One man could have an extremely low body fat percentage, meaning most of his weight comes from lean muscle mass. The other man could have 35% body fat and he would be absolutely, positively buoyant compared to the muscleman.
Here is why body composition is important. Muscle and bone is negatively buoyant, whereas fat is positively buoyant. The other tissues in the human body have a similar density to that of water. Thus, people who are naturally skinny or are lean fitness models will not float as much compared to people who have more fat on their body.
Similarly, women naturally have a higher body fat percentage compared to men. Men are typically denser than women and may not need dive weights at all. As such, women shouldn’t feel self-conscious if they need dive weights in order to reach zero buoyancy.
Wetsuit Thickness
Wetsuits are made from neoprene material and they come in various thicknesses. The air bubbles trapped in the neoprene cause wetsuits to be positively buoyant. The thicker the wetsuit is, the more air bubbles that are trapped inside and the more buoyant the diver will be.
As such, freedivers who plan on diving in cold water will probably insulate themselves by wearing thicker wetsuits, and thus will require more diving weights to achieve neutral buoyancy.
Salt or Freshwater
Someone who has calibrated their dive weights to be neutrally buoyant in saltwater may find themselves sinking in freshwater or vice versa, which has perplexed many a freediver. If their body weight hasn’t changed and they are wearing the same wetsuit, and they are diving to similar depths, why aren’t they naturally buoyant?
People often forget that objects in saltwater are naturally more buoyant than in freshwater. Each cubic foot of saltwater can displace 64.1 pounds of weight. On the other hand, freshwater will only displace 62.4 pounds of weight. There is a 2.5% difference in the amount of weight displaced, and that difference can make the difference between floating or sinking instead of staying in place.
Calculating How Much Weight You Need for Freediving
Knowing how much weight you need to wear while diving is so important that many have got it down almost to an exact science. There are even freediving weight calculators to help you figure it out if you enter your body stats. However, each of these methods should only act as guidelines because you need to do your own testing regardless.
Here’s roughly the formula used by freediving weight calculators when they spit out a number for you.
The Math
For each millimeter of thickness of your wetsuit, multiply that number by 1 kg (2.2 lbs) and then add another 2 kg (4.4 lbs) if you’re lean, or 2.5kg (5.5 lbs) if you’re larger. So if your wetsuit is 3mm thick, the math is: (3 * 1kg) + 2kg. You would add approximately 5kg (11 lbs) of weights to your weighting system.
ABT: Always Be Testing
Just because you used 5kg of weights that one time to reach zero buoyancy doesn’t mean you will always only need 5kg. You need to do regular testing to ensure that you have the correct amount of weights. You must always test your buoyancy prior to each training or freediving session for safety reasons.
As painful as it is to admit it, our bodies are constantly changing, especially as we get older. It’s possible that you’ve gained some weight over the holidays, or that you’ve lost some muscle mass. Even a difference of a few pounds will affect your buoyancy.
Thus, due to the ever changing nature of our body, as well as other factors that may not be so obvious, one should always endeavor to test their setup to stay safe. Use smaller weights to help make fine adjustments. They are less stressful on the body and are easier to evenly distribute their weight around your weighting system.
Weighting Tips
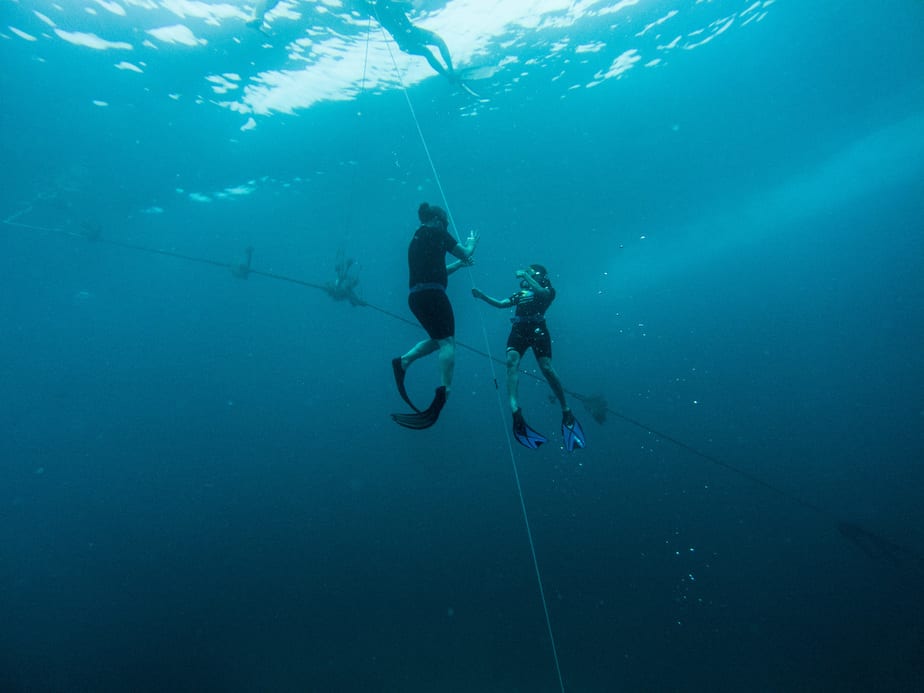
There are two common ways to test for buoyancy that beginner freedivers should start with. First is to test the buoyancy by the surface. The second is testing for neutral buoyancy at a depth of 10m or 33ft. Both methods work well, but just to be safe you should always have at least one other person around to watch your back.
What is the Significance of Being Neutrally Buoyant at 10m or 33ft?
First, being naturally buoyant means you are neither sinking or floating, you’re just floating in place. It’s hard to judge if you are precisely neutrally buoyant without a dive computer. You’ll also need to set up a line that has a marking at 10m to better keep track of your depth.
Second, the reason why it is ideal to be neutrally buoyant at this depth is because that is when the atmospheric pressure doubles compared to the surface. In other words, suddenly the positive buoyancy provided by the air in your wetsuit and your lungs is halved so that you are less buoyant.
However, the dive weights remain the same weight. The consequence is that if you’ve weighted yourself to be neutrally buoyant by the surface, you are now negatively buoyant at a depth of 10m and below, so when you want to resurface you will need to swim against the weight on your weight belt until you pass 10m and the atmospheric pressure returns to normal.
Depending on how far you are diving, that is extra weight you have to fight against for a long distance. Being weighed down is not ideal, so it’s better to weigh yourself to be neutrally buoyant at 10m (33 ft.) and to be somewhat positively buoyant by the surface.
Another reason why you’d want to be neutrally buoyant at 10m or below is due to the risk of shallow water blackouts. If you were to suddenly blackout near the surface, due to your positive buoyancy you would slowly float upwards and increase your chances of survival if someone saves you quickly enough.
Surface Buoyancy Test
Naturally, if you are a complete beginner we do not expect you to immediately dive down to 10m/33ft. to test if you are neutrally buoyant. Instead, there is a safer strategy you can employ at the surface. Here’s how it works.
Float by the surface in an upright position. Keep your hands by your sides and let your fins point downwards. You should be able to float without treading water. Now fully exhale (this causes you to lose buoyancy so you should sink a bit). The water level should rise up to be between your lower lip and your chin.
If the water level is below that, then you are still too positively buoyant and need to add more weights. If it is below that level, then you have too many weights and need to remove some.
The surface buoyancy test is a method for beginners to adjust their dive weights in a relatively safe environment without the need for fancy equipment like a dive computer. Although not nearly as accurate as testing for neutral buoyancy at a depth of 10m/33ft, it’s the optimal choice for people getting started with freediving.
Advanced freedivers would follow a different approach. They would measure their neutrally buoyant point at approximately one third of the depth of their maximum dive that day.
Consequences of Incorrect Weighting
You should try your best to weight yourself as precisely as possible. Even the difference between a few pounds of weight can be disastrous in an emergency. We’ve already covered the dangers of a shallow water blackout, and improperly weighting yourself can increase the chances of that occurring.
Insufficient Weight
With too little weight, you will limit how far you can dive. Since you are positively buoyant, you are constantly fighting against that buoyancy the entire time, making your descent harder than it needs to be. It will cause you to spend more oxygen and energy than you should, exhausting you and forcing a fast return.
It should be noted that while having some positive buoyancy is not ideal if you are trying to reach new depths, at least your chances of survival are greater in an emergency such as if you need to reach the surface faster or experience a sudden blackout.
Excessive Weight
Having too much weight on you will cause you to be negatively buoyant, meaning you’ll constantly be sinking. This is a very dangerous situation to be in. Sure, it’ll feel great as you’re diving down. However, once you’ve reached your desired depth and start your ascent, you will realize that you have to fight against this extra weight all the way back up.
This is basically the opposite situation of having too little weight. However, the difference is that you are far from the surface, probably running out of breath and panicking. Swimming upwards with extra weight will cause you to burn through your oxygen and energy much faster and can result in a blackout while underwater.
If you haven’t managed to release the weights and you suddenly blackout, then you will sink to the bottom and it will be too late to rescue you.
Freediving Weighting Systems
There are various weighting systems you can use for freediving. When selecting one, you must check that it has a quick-release mechanism that allows you to detach the weighting system along with all of the attached weights. The quick-release must be easy to use and able to be triggered with just one hand.
This way, you or your freediving partner can get rid of the excess weight provided by the weighting system and safely return to the surface in case of an emergency. The most common weighting system is the weight belt, but one may also use neck weights.
Freediving Weight Belt
Most freedivers prefer to wear a rubber freediving weight belt. The weight belt should be worn around the hips so as not to obstruct the diaphragm, allowing the freediver to inhale more oxygen during their breath-ups.
Small freediving weights can be evenly distributed around the weight belt to let you achieve equilibrium underwater.
The material of the freediving weight belt is important. Rubber weight belts are the preferred choice because they are comfortable and can stretch so as not to obstruct your breathing or movements. Even as the water pressure changes, rubber weight belts will expand or contract and provide a snug fit without issue.
On the other hand, nylon weight belts should be avoided because of how stiff they are. They will constrict your diaphragm and movement, making it impossible to perform at your best. Furthermore, their rigidity is uncomfortable and can cause irritation if worn for too long.
There’s also the issue of keeping the weights in place. Rubber weight belts tend to have more friction and will keep the weights in place without any help. Nylon weight belts require weight stops to stop the weights from shifting around as you’re freediving.
Overall, rubber freediving weight belts provide so many more advantages over nylon, the most important of which is how stretchy it is. By allowing you to breathe normally and move as if you were unencumbered, while providing the necessary resistance to make you neutrally buoyant, it is clear why they are the top choice for most freedivers.
Freediving Neck Weights
Depending on their freediving discipline, sometimes freedivers will wear a neck weight in conjunction with a freediving weight belt for better weight distribution. It can be difficult to remain both neutrally buoyant and completely parallel to the bottom of the pool while training, especially with no fins.
As for depth, neck weights are more efficient and streamlined freefalls. Some divers even prefer to use neck weights exclusively and forgoing a weight belt altogether. There are various types of neck weights: DIY, lobster, Chabaud, and Apneautic.
Whichever one you pick, they all share the same disadvantage: they require you to have strong neck muscles to support your head on the surface. If you don’t like how cumbersome they are on the surface, then neck weights may not be for you.
Weighting for Other Freediving Disciplines
Depending on which freediving discipline you are planning to partake in, the recommended weighting system may differ.
Static Apnea (STA)
You are not allowed to use any weights and your body should effortlessly float at the surface.
Dynamic Apnea with Fins (DYN)
The preferred weighting system for this discipline depends on where on your body you have the most buoyancy. Women tend to have more buoyancy in the lower half of their body, so they would benefit more from wearing a weight belt. Men are generally more positively buoyant by their head so neck weights are often a better option.
The goal of weighting yourself for DYN is to achieve a balance where you can fin and glide underwater without sinking to the bottom or floating to the surface. Achieving this may take a lot of trial and error. Further adjustments may need to be made if your body composition changes too drastically or you replace equipment.
Dynamic Apnea without Fins (DNF)
Similar to dynamic apnea with fins, weighting yourself for dynamic apnea without fins requires even more scrutiny because you are not able to rely on your fin/s to make micro-adjustments to your position in the water. You will not have the same propulsion and control so even the slightest miscalculation in your dive weights can cause you to float or sink.
If you find that your weighting set up changes each time you dive, just know that it happens to even experienced dynamic divers and is probably the most frustrating part of this discipline to deal with.
Constant Weight freediving with Fins (CWT)
When performing any dive deeper than 15m, in order to be safe you should aim to be neutrally buoyant at a depth of 10m. Shallow water blackouts are a serious risk that you want to be prepared for by being positively buoyant around this depth.
Competitive freedivers can, at their own discretion, aim to be neutrally buoyant at deeper depths so that by the time they reach the 10m mark, they don’t even have to fin anymore to float to the surface.
When beginners first learn to freedive, they are tempted to add so much weight that they become negatively buoyant to help with their dive down. However, one should not compensate for bad duck diving technique by over-weighting. This raises another issue of how will a beginner safely return to the surface with their poor technique while carrying all of that extra weight?
Furthermore, effort should be made to perfect one’s duck diving technique so that they can use the correct amount of weight to be neutrally buoyant at a safe depth.
Constant Weight freediving without Fins (CNF)
Those participating in constant weight freediving without fins should adhere to the same principles above. However, the urge to add additional weight is even greater for this discipline, since descending without fins is such a challenge. However, one must not underestimate the strain of the return trip.
From a psychological point of view, it is better to not be over encumbered so that ascending will feel easier. It is also much safer, since you will no doubt be low on oxygen and energy, and your muscles will be burning from the lactic acid build up.
Free Immersion Freediving
Just like constant weight freediving, aim to be neutrally buoyant around 10m deep. Unless you’re relying on free immersion techniques to practice equalization to shallow depths, you might feel more comfortable adding more weight so that you aren’t fighting to keep yourself at 3 meters.
Furthermore, you can also use ankle weights to assist with streamlining when practicing equalization feet first. This frees your attention to learning equalization instead of fighting against your positively buoyant legs.
Variable Weight Freediving
Here, no physical strength is required to bring you to depth and thus can utilize a lower point of neutral buoyancy to help with surfacing. Thus, no weight is needed except for a weight belt used only to help seal your suit and not to add weight. Typically, a thicker wetsuit is used for insulation and providing positive buoyancy at depth.
No Limits Freediving
Just like variable weight freediving, a weighted sled will take you to the desired depth so one does not need additional weight. Furthermore, a buoyancy device such as a lift bag will take you back to the surface. Thus, the main consideration is a thick wetsuit that provides insulation at depth, and some positive buoyancy in case the sled fails.
Recreational Freediving
The general weighting advice doesn’t apply to freedivers who are recreationally diving in shallow reefs. After all, what’s the point of being neutrally buoyant at 10m if the sea floor at your location is only 4m deep?
You would be positively buoyant the entire time and thus you should adjust your weights to be weighed down more than normal while still remaining slightly positively buoyant by the surface. Instead, aim to be neutrally buoyant somewhere close to the bottom so that you won’t crash straight into the sea floor and hurt yourself.
How to Weight Yourself for Freediving: Parting Words
To wrap up this article, we leave you with our final safety tips so that you can safely freedive with weights.
First, when deciding what depth you want to set your neutral buoyancy, also consider the limits of your diving buddy. After all, it is this individual that must be able to keep up with you and rescue you should anything go awry.
Second, since there are so many factors that can alter your weighting, you should keep a detailed freediving log book of how much weight you used under what conditions as well as all of the equipment you used. The log book can serve as an excellent reference for future dives.
Furthermore, it is a good idea to have some extra gear such as additional neck weights to help make micro-adjustments, as well as an extra half kilo weight for the weight belt.
And above all, you should always err on the side of caution and choose a conservative weighting setup that prioritizes safety and allows you and your buddy to watch each other’s backs without hassle.