What to Eat Before Snorkeling – Best and Worst Options

Before engaging in any physical activity, fueling your body by eating the right foods beforehand can make a big difference on your energy levels and performance. Snorkeling is no exception.

This article delves into the optimal foods to eat as well as when to eat them to best fuel your body for an exciting snorkeling adventure, ensuring you make the most of every underwater moment.

Why is it important to eat before snorkeling?

high protein diet chicken breast

Eating before snorkeling is crucial for a few reasons:

  1. Energy: Snorkeling, though enjoyable, can be physically demanding, especially if you’re swimming against currents. Having a meal ensures you have sufficient energy to enjoy the activity without feeling fatigued.
  2. Blood Sugar Levels: Going too long without food can cause a drop in blood sugar levels, which may lead to dizziness, fatigue, or even fainting. This is particularly concerning when you’re in the water.
  3. Maintaining Body Temperature: The body uses more energy to maintain its temperature in water than on land, even in tropical waters. Consuming food can help maintain body warmth by boosting metabolism.

What types of foods are best to eat before snorkeling?

Before snorkeling, you should focus on foods that are easily digestible and provide sustained energy. Ideal foods include:

  1. Complex Carbohydrates: These provide slow-releasing energy. Examples include whole grains, oats, and fruits like bananas.
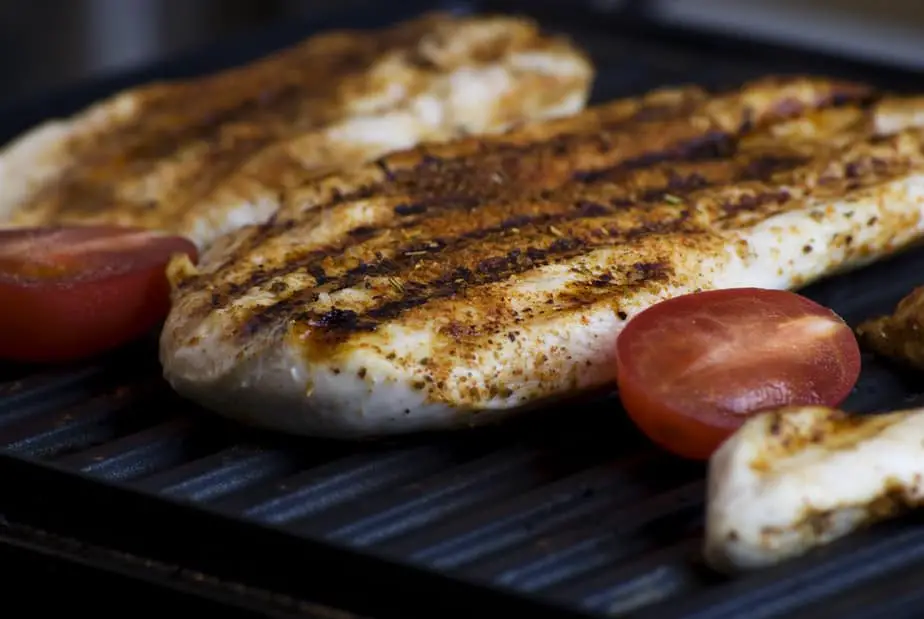
  2. Lean Proteins: Proteins like chicken, turkey, tofu, or legumes help repair and build muscle.
  3. Healthy Fats: Avocado, nuts, and seeds can give you sustained energy without causing a spike in blood sugar.
  4. Hydration: Drink water, herbal teas, or hydrating fruits like watermelon.

How long should I wait after eating before I start snorkeling?

It’s recommended to wait at least 30 minutes to an hour after eating a light snack before snorkeling. If you’ve had a larger meal, it’s best to wait about 3-4 hours. This waiting period allows the food to digest properly, reducing the risk of cramps or discomfort while swimming.

Can I eat heavy meals before snorkeling?

It’s not advisable to eat heavy meals right before snorkeling. Consuming large amounts of food can make you feel sluggish or bloated, which is uncomfortable when you’re trying to swim. Heavy meals can also increase the risk of stomach cramps while swimming. If you do eat a heavier meal, it’s important to give your body more time (2-3 hours) to digest before heading into the water.

Are there certain foods I should avoid before snorkeling?

Yes, there are foods that might not be ideal to consume right before snorkeling:

  1. Spicy Foods: These can cause indigestion or heartburn, which can be uncomfortable when swimming.
  2. Dairy Products: For some people, dairy can cause stomach upset or phlegm production, which may affect breathing.
  3. Fried or Greasy Foods: These can be harder to digest and may lead to discomfort or sluggishness.
  4. High-Sugar Snacks: These can cause a quick energy spike followed by a crash, which isn’t ideal for sustained activities like snorkeling.
  5. Gas-Producing Foods: Beans, certain vegetables, and carbonated drinks can lead to bloating or gas, causing discomfort underwater.

Can I drink alcohol before snorkeling?

Drinking alcohol before snorkeling is not recommended. Alcohol can impair judgment, coordination, and reaction time, which are crucial for safe snorkeling. Furthermore, alcohol can dehydrate the body, increasing the risk of cramps. It can also lower the body’s ability to regulate temperature, which is essential when you’re in the water for extended periods. It’s best to save any alcoholic beverages for after your snorkeling session.

How does food impact my energy levels while snorkeling?

Food is the primary source of energy for the body. When snorkeling:

  1. Carbohydrates are broken down into glucose, the main source of energy for our muscles. Without adequate carbohydrate intake, one might feel fatigued more quickly.
  2. Proteins help in muscle repair and recovery, which is essential after any physical activity. While they’re not the primary energy source, they can help in prolonged endurance activities.
  3. Fats are a dense source of energy and are used by the body especially in prolonged, low to moderate intensity activities, such as leisurely snorkeling.
  4. Hydration is key. Water plays a role in energy production, and dehydration can lead to fatigue, muscle cramps, and dizziness.

Eating a balanced meal or snack ensures your body has the necessary nutrients to function effectively, maintain stamina, and recover quickly post-activity.

Are energy bars or protein bars good options before snorkeling?

Yes, energy bars and protein bars can be good options before snorkeling, especially if you’re looking for a quick and convenient source of energy.

  1. Energy Bars: These typically contain carbohydrates, which provide a quick energy boost. Look for ones with whole ingredients and avoid those with excessive sugar.
  2. Protein Bars: While primarily used for muscle recovery, they can also offer sustained energy for prolonged activities. Again, choose bars with natural ingredients and minimal additives.

Always read the label to ensure you’re getting quality nutrients and not just empty calories. Pairing a bar with a piece of fruit or some water can round out your pre-snorkeling snack.

Does caffeine have any impact on snorkeling?

Caffeine can have both positive and negative impacts on snorkeling:

  1. Positive: It can increase alertness and reduce the perception of effort, potentially enhancing your snorkeling experience.
  2. Negative: Caffeine is a diuretic, which can lead to dehydration. Dehydration increases the risk of cramps and fatigue. Caffeine might also cause jitters or anxiety in some individuals, especially in high doses.

If you regularly consume caffeine and know how your body reacts to it, a moderate amount might not be an issue. However, always balance caffeine intake with adequate water to prevent dehydration.

Does the type of snorkeling activity influence what I should eat beforehand?

The fundamental nutritional needs remain consistent, but the intensity and duration of the snorkeling might change your approach:

  1. Shallow Water Snorkeling: This is generally less physically demanding, so a light snack or meal with a balance of carbohydrates, protein, and some fats should suffice.
  2. Deep Water or Free Diving: This is more intense and might require more energy. Prioritize easily digestible carbohydrates for quick energy and ensure you’re well-hydrated.

Regardless of depth, always ensure you give your body time to digest before starting.

What should I do if I feel bloated after eating, but I still want to snorkel?

If you feel bloated or uncomfortable:

  1. Wait: Give your body more time to digest. This might mean delaying your snorkeling by another hour or so.
  2. Walk or Stretch: Gentle movements can sometimes help with digestion and relieve discomfort.
  3. Hydrate: Drink some water, but not too much to avoid further bloating.
  4. Assess Severity: If the discomfort is intense, it might be best to postpone snorkeling to another time. Listen to your body.

Can eating certain foods help with underwater pressure equalization?

While the act of equalization is more about the technique (like pinching your nose and gently blowing) than nutrition, certain foods and habits can help maintain clear Eustachian tubes, which aid in equalization:

  1. Stay Hydrated: Dehydration can make mucus thicker, potentially blocking the Eustachian tubes.
  2. Avoid Dairy and Excessive Salt: Some believe they can increase mucus production, though the evidence is not definitive.
  3. Anti-inflammatory Foods: Foods like pineapples, turmeric, and ginger might help reduce inflammation, potentially aiding in clearer passages.

Remember, while nutrition can play a supporting role, proper equalization techniques and practices are most crucial for comfortable and safe descents and ascents in the water.

Sources:

Is It Dangerous to Snorkel in Jamaica?

Snorkeling is a popular activity for many travelers who visit Jamaica, a Caribbean island with stunning beaches and coral reefs. But snorkeling is not without risks, and some of them may surprise you. 

In this article, we will explore some of the dangers of snorkeling in Jamaica, from marine life, weather, to environmental factors. You will learn how to avoid these hazards and enjoy your snorkeling adventure safely. Keep reading to find out more.

Is it safe to snorkel in Jamaica?

dangers of snorkeling in jamaica

Yes, it’s generally safe to snorkel in Jamaica. The island is a popular destination for water sports, including snorkeling, thanks to its crystal-clear waters, vibrant coral reefs, and diverse marine life. 

However, like with any water activity in a foreign place, there are precautions that visitors should take. It’s always a good idea to snorkel with a group or a guided tour, especially if you’re unfamiliar with the area. Paying attention to local advisories and guidelines can give you a heads up on potential dangers.

What marine animals should I be cautious of while snorkeling in Jamaica?

While the waters around Jamaica are home to a variety of beautiful marine life, there are some creatures that snorkelers should be cautious of:

  1. Stingrays: While they’re usually calm, it’s best to avoid touching or stepping on them. If you maintain a safe distance and refrain from making sudden movements, they are generally harmless.
  2. Sea Urchins: Their sharp spines can pierce the skin, causing pain and potential infections. Always be careful where you step or place your hands.
  3. Jellyfish: Some species can deliver a painful sting upon contact.
  4. Lionfish: An invasive species in the Caribbean, the lionfish’s spines are venomous and can deliver a painful sting.
  5. Barracudas: While attacks are rare, they’re known to be attracted to shiny objects, so avoid wearing jewelry while snorkeling.

Always observe marine life without touching and maintain a safe distance. Do not feed any wild animals either.

Is there a risk of encountering sharks while snorkeling in Jamaica?

The risk of encountering sharks while snorkeling in Jamaica is minimal. While the waters around Jamaica are home to various species of sharks, they typically do not frequent the shallow areas where most snorkeling activities occur. 

Furthermore, shark attacks are exceedingly rare. However, as with any marine activity, always be cautious and aware of your surroundings. If you do spot a shark, remain calm, maintain a vertical position, and slowly back away.

How common are snorkeling-related accidents in Jamaica?

Snorkeling-related accidents in Jamaica are not common. Most incidents are due to lack of experience, unfamiliarity with the area, or ignoring safety guidelines. For these reasons, you should do your due diligence and research the area you’ll be snorkeling at. 

Be cautious, don’t venture too far from shore, be aware of currents, and ideally, always snorkel with a buddy or group.

Do the local tour operators provide safety guidelines for snorkeling?

Yes, reputable local tour operators in Jamaica provide safety guidelines for snorkeling. These guidelines usually include information about the local marine environment, potential hazards, safe practices, and emergency procedures. 

Before booking with a tour operator, ask about their safety protocols and ensure they provide proper equipment and instructions. Always prioritize your safety and choose operators with positive reviews and a history of following best safety practices.

Are there any health concerns related to snorkeling in Jamaica?

In general, Jamaica’s popular snorkeling spots are clean and safe. However, like many coastal regions worldwide, occasional water pollution incidents can occur. As such, look at weather reports to stay up to date on the water quality, especially after heavy rainfall, as rain can wash contaminants from land into the sea.

Regarding infectious diseases, while it’s not common to contract diseases while snorkeling, there’s always a risk when engaging in water activities in any location, not just in Jamaica. Always ensure any open cuts or wounds are well-covered before entering the water and thoroughly clean them afterward.

Are there any environmental concerns that could impact my snorkeling experience in Jamaica?

Jamaica, like many Caribbean islands, faces environmental challenges that could potentially impact the snorkeling experience. Overfishing, coral bleaching, and the invasion of non-native species, like the lionfish, can affect marine biodiversity. Moreover, coastal development and tourism can contribute to pollution and damage to coral reefs.

While Jamaica has marine protected areas to conserve its marine ecosystems, it’s essential for snorkelers to be responsible: avoid touching or standing on corals, refrain from feeding or harassing marine animals, and ensure they do not leave trash behind.

Can you snorkel without a guide or local expert in Jamaica?

For those unfamiliar with the local marine environment and potential hazards, it’s recommended to snorkel with a guide or local expert in Jamaica. 

Guides not only provide insights into the marine life and ecosystems but can also advise on currents, tides, and potential dangers in specific areas. While experienced snorkelers might feel comfortable venturing on their own, having local knowledge always enhances safety and the overall experience.

What’s the best time of year to snorkel in Jamaica in terms of safety and visibility?

The best time to snorkel in Jamaica for optimal visibility and safety is during the dry season, which typically runs from November to mid-April. During this period, the waters are calmer, clearer, and the weather is generally sunny and pleasant. 

The months outside of this window can experience heavier rainfall, which can reduce visibility underwater and bring about stronger currents.

How can I identify safe snorkeling spots when traveling around Jamaica?

To identify safe snorkeling spots in Jamaica:

  1. Consult with locals: Local knowledge is invaluable. Talk to hotel staff, tour operators, or residents about the best and safest snorkeling spots.
  2. Observe warning signs: Always be observant of warning signs or flags at beaches which indicate current water conditions.
  3. Check for designated snorkeling areas: Some beaches have specific zones for snorkelers, away from boat traffic and potential hazards.
  4. Research online: There are many travel forums, blogs, and websites dedicated to snorkeling in Jamaica where travelers share their experiences.
  5. Ask reputable tour operators: If you decide to take a guided snorkeling tour, choose operators known for their safety standards.

Are there emergency services or marine rescue teams available at popular snorkeling spots in Jamaica?

Yes, many popular snorkeling spots in Jamaica, especially those close to major tourist areas, have access to emergency services or marine rescue teams. 

Beaches frequented by tourists often have lifeguards on duty, and local tour operators usually have safety protocols in place, which may include first aid and rescue services. Nonetheless, always inquire about the availability of such services when choosing a snorkeling location or when booking with a tour operator.

Sources:

What Happens to Poop in the Ocean? What You Should Know

If you are a surfer or an avid beach goer, you may have wondered what happens to poop in the ocean. Whether it’s your own or someone else’s, poop is not something you want to encounter while riding the waves or swimming in the water. 

How does poop affect the ocean and its inhabitants? How does the ocean deal with fecal matter? How can you tell if your local beach is contaminated with fecal matter?

In this article, you will learn how poop decomposes, how it impacts the water quality and the marine life, and how you can protect yourself from exposure to fecal matter in the ocean. Keep reading to find out more.

The decomposition process of poop in the ocean

what happens to poop in the ocean

When fecal matter, whether from humans or animals, enters the ocean, it begins a process of decomposition and dilution. The ocean, vast and ever-moving, dilutes the fecal matter over time. However, the immediate area where the fecal matter enters can experience higher concentrations. 

Marine bacteria play a critical role in breaking down this waste. As they consume the organic matter in the feces, they convert it to other forms, such as carbon dioxide, water, and biomass. The presence of sunlight, salinity, and other factors also affect the decomposition process. 

Over time, the majority of the fecal material is rendered harmless, but if there’s a significant influx, like from untreated sewage, the local environment can suffer, potentially leading to oxygen-depleted zones or algal blooms.

Do surfers need to worry about poop in the water?

Surfers, as frequent ocean-goers, do need to be aware of the water quality in their chosen surf spots. While the vastness of the ocean often dilutes many contaminants, certain conditions can increase the risks. 

For instance, after heavy rainfall, urban runoff can carry a cocktail of pollutants—including fecal matter—from streets, storm drains, and overflowing sewage systems into the ocean. This runoff can cause local concentrations of contaminants, which may pose a health risk. 

Monitoring local water quality reports and being informed about recent rainfall can help surfers make safe decisions.

How can fecal contamination affect surfers?

Coming into contact with or ingesting water contaminated with fecal matter can have several health repercussions. The primary concerns stem from pathogenic organisms often found in feces. These can include bacteria like E. coli, viruses, and protozoa. When surfers swallow contaminated water or have open wounds exposed to it, they can contract illnesses like:

  • Gastroenteritis: This involves symptoms like stomach cramps, diarrhea, vomiting, and nausea. It’s often caused by bacteria or viruses found in fecal-contaminated water.
  • Skin Rashes: Skin can become irritated or infected after prolonged exposure to contaminated water. Conditions like “swimmer’s itch” are possible, which is a rash caused by an allergic reaction to tiny parasites.
  • Eye, Ear, and Throat Infections: Pathogens in the water can lead to infections in exposed areas, such as the eyes or ears.
  • Hepatitis: Some types of this liver disease can be contracted from water contaminated with fecal matter.

To be safe, rinse off with fresh water after a surf session, and if any symptoms manifest after exposure to ocean water, seek medical care.

How do I know if my local surf spot is contaminated with fecal matter?

Monitoring water quality is crucial for ensuring safe recreational activities in the ocean. Many coastal areas have water testing programs conducted by local health or environmental departments. These tests typically measure levels of indicator bacteria (like Enterococcus or E. coli) that suggest the presence of fecal contamination.

  • Websites & Apps: Often, water quality data is available on government or local municipality websites. Some regions even have dedicated apps or websites tailored to surfers, providing up-to-date water quality information for popular surf spots.
  • Beach Postings: If fecal bacteria levels exceed safe limits, authorities may post warning signs at the affected beaches. Always look out for these signs before entering the water.
  • Local News: Local media sometimes reports on water quality issues, especially after significant rain events known to impact water conditions.

How long should I wait to surf after it rains?

Rain can substantially affect coastal water quality. As rainwater flows over streets, rooftops, and through storm drains, it collects a myriad of pollutants, including motor oil, pesticides, trash, and yes, fecal matter. This cocktail then flows untreated into the ocean.

As a rule of thumb, many experts and health departments recommend waiting 48-72 hours after heavy rain before engaging in water activities like surfing. This waiting period allows time for the pollutants to disperse and dilute, reducing health risks. 

However, the exact time can vary based on local conditions, sewage infrastructure, and the volume of the rainfall. It’s always best to consult local advisories and rely on up-to-date water testing data.

Can marine animals get sick from human poop in the water?

Marine animals have evolved in their respective environments, so they’re generally more resilient to naturally occurring pathogens in the ocean. However, a significant influx of fecal matter, especially from untreated human sewage, can disrupt marine ecosystems.

For one, the bacteria breaking down the fecal matter can multiply rapidly, consuming a lot of oxygen in the process. This can create oxygen-depleted or “hypoxic” zones where most marine life struggles to survive. 

Secondly, the nutrients from the sewage can spur algal blooms. Some of these blooms produce toxins harmful to marine life, leading to large fish kills or poisoning marine mammals and other animals that feed on contaminated organisms.

Moreover, certain pathogens that are not naturally found in the ocean—those that come specifically from humans—can potentially affect marine life, though such instances are not as commonly documented as the direct impacts on humans.

In essence, while marine animals have some resilience, excessive pollution can gravely affect marine ecosystems, and, by extension, the animals that inhabit them.

Is it true that sewage sometimes gets dumped into the ocean?

Yes, it is unfortunately true that in various parts of the world, untreated or partially treated sewage is directly discharged into the ocean. This practice can have several reasons:

  • Insufficient Infrastructure: In some areas, especially in developing countries, there may be a lack of adequate sewage treatment facilities.
  • Sewage System Overflows: Even in developed nations with proper sewage treatment, heavy rainfall or infrastructure failures can lead to system overflows. This can result in untreated or partially treated sewage entering waterways and eventually reaching the ocean.
  • Illegal Dumping: Sometimes, ships or industries might illegally discharge waste into the ocean to save on the cost of proper disposal.

Releasing untreated sewage into the ocean poses severe risks to marine ecosystems and human health. It introduces harmful pathogens and nutrients that can disrupt the delicate balance of marine environments.

Does seawater naturally “clean” or “sanitize” fecal matter?

While seawater does have a diluting effect on contaminants, including fecal matter, it doesn’t necessarily sanitize or neutralize all the harmful components. Salinity and various marine microorganisms can aid in breaking down fecal matter over time. 

However, the pathogens, like bacteria and viruses present in feces, can survive for varying durations in the marine environment. Seawater’s natural cleaning ability largely depends on several factors:

  • Sunlight: Ultraviolet (UV) radiation from sunlight can kill or deactivate many pathogens. However, this process is not instantaneous and can vary based on the pathogen and water clarity.
  • Temperature: Warmer waters can sometimes promote faster microbial decay, but they can also boost the growth of harmful algal blooms when combined with excessive nutrients from sewage.
  • Marine Bacteria: The ocean’s native bacteria compete with pathogens for nutrients, sometimes inhibiting their growth or directly consuming them.

While the ocean has a remarkable capacity to heal itself and handle natural waste inputs, excessive or concentrated pollution overwhelms these natural processes, leading to environmental and health issues.

What are the health risks if I accidentally swallow seawater?

While swallowing a small amount of seawater is usually harmless, if the water is contaminated with high levels of fecal bacteria or other pollutants, there are potential health risks:

  • Digestive Issues: Bacteria, viruses, and parasites in contaminated water can cause symptoms like diarrhea, stomach cramps, and vomiting.
  • Respiratory Infections: Some pathogens or toxins in the water might lead to respiratory problems if ingested.
  • Neurological Effects: Harmful algal blooms, sometimes spurred by nutrient pollution, can produce toxins that, if ingested, might lead to neurological issues.

To reduce risks, always rinse your mouth with fresh water after a surf session, especially if you’ve swallowed seawater. If you feel unwell after exposure, consult a healthcare professional.

What are the signs to look out for which indicate the presence of fecal matter in the water?

While direct observation can give some hints, definitive knowledge about fecal contamination usually requires water testing. However, some general signs might suggest compromised water quality:

  • Murky Water: While many factors can cause water cloudiness, a sudden change in clarity after a rain event could indicate runoff pollution.
  • Strong Odors: Unusual or foul smells, especially those that are sewage-like, might be indicative of contamination.
  • Floating Debris: The presence of visible waste or debris, particularly after rainfall, can be a sign of polluted runoff.
  • Algal Blooms: An unusually high concentration of algae, often green or red, can indicate nutrient pollution, which may accompany fecal contamination.

Despite these signs, it’s crucial to rely on official water testing results to ensure the water’s safety, as many contamination events might be invisible to the naked eye.

Sources:

How to Go to the Beach Alone – 19 Crucial Tips

Whether you’re going to a local beach or spending your vacation on the shores of a tropical paradise thousands of miles from home, you should take steps to ensure that your beachgoing experience is smooth and safe, especially if you’re alone. Keep reading on to learn how exactly you can do just that.

19 Crucial Tips for Beach Safety and Leisure

is it weird to go to the beach alone as a girl

  1. Choose a Popular Spot: Picking a well-frequented beach ensures that there are lifeguards on duty and other people around. This can provide a safer environment both in and out of the water.
  2. Arrive Early or Late: If you want a quieter experience, consider going early in the morning or later in the evening. This allows you to find a good spot, and the cooler temperatures can also be more comfortable.
  3. Notify Someone: Before you head out, let a friend or family member know where you’re going and what time you expect to return. Check-in with them once you’ve safely left the beach.
  4. Dress Appropriately: Wear easily removable shoes like flip-flops, and consider dressing in layers. This makes it easier to switch from sunbathing to taking a dip or heading into a nearby shop or eatery.
  5. Bring Entertainment: Pack a good book, journal, or download music/podcasts. It’s a chance to have some “me-time” and truly relax.
  6. Plan for Shade: If you’re staying for a prolonged period, having a source of shade like a beach umbrella or a pop-up tent can be beneficial. It offers relief from the sun and a recognizable landmark if you go for a swim or walk.
  7. Stay Connected: Ensure your phone is fully charged and consider bringing a portable charger. This isn’t just for entertainment – it’s crucial for safety.
  8. Selfie Caution: If you’re taking selfies, be cautious about the surroundings. Make sure you’re not near the water’s edge with your back to the waves, as unexpected large waves can pose dangers.
  9. Know Local Wildlife: Before you head to the beach, research common local marine life and animals. Knowing which creatures to avoid or watch for can prevent unwanted encounters.
  10. Limit Valuables: Only bring essentials. If possible, leave expensive items like jewelry or fancy electronics at home. The less you bring, the less you have to worry about.
  11. Invest in a Waterproof Pouch or Bag: For items that you must bring (like your phone, keys, or money), consider investing in a waterproof pouch or a bag with a lock. Some pouches can even be worn around your neck or waist, keeping them close to you at all times.
  12. Set Up Near Lifeguards or Families: Positioning yourself closer to the lifeguard station or near families can offer a feeling of security. It’s less likely for thieves to target areas with many watchful eyes.
  13. Stay Aware of Your Surroundings: Even if you’re engrossed in a book or relaxing, try to stay semi-aware of what’s happening around you. Periodically scan your surroundings and check on your belongings.
  14. Water Safety: If you’re planning to swim, always respect the ocean’s power. Stay within designated swimming areas, be wary of rip currents, and if in doubt, don’t go out. When swimming alone, it’s even more critical to stay closer to the shore and to wear a buoyancy aid.
  15. Use Sun Protection: Since there’s no one to help remind you or reach tricky spots, make sure to apply a water-resistant sunscreen with an SPF 15 rating or higher liberally before arriving and reapply regularly. Consider using UV protective clothing or an umbrella for added protection.
  16. Stay Hydrated & Snack Smart: Bring plenty of water to keep yourself hydrated. If you’re packing snacks, choose items that won’t melt or attract unwanted attention from wildlife.
  17. Clean Up & Pack Light: Bring a trash bag to pack out what you pack in. Not only is it respectful to the environment and other beach-goers, but it also means you won’t have many things to keep track of. Packing light makes it easier to move spots if you feel uncomfortable or if the tides change.
  18. Plan Transportation: If you’re driving, make sure you’re aware of parking rules and any fees. If using public transport, know the schedules to avoid getting stranded.
  19. Trust Your Instincts: If something feels off or you feel uncomfortable for any reason, don’t hesitate to pack up and leave or move to a different spot. Your safety and comfort should always come first.

Frequently Asked Questions

Is it safe to go to the beach by myself?

Yes, it is generally safe to go to the beach by yourself, but it does come with precautions. The level of safety can vary based on the beach’s location, its popularity, and the time of day you choose to go.

To start, pick a well-frequented beach where there are lifeguards on duty, which adds an element of security both in and out of the water. Additionally, letting someone know where you’re heading and when you expect to be back is a good practice. Always stay alert and aware of your surroundings, and trust your instincts; if something feels off, it’s okay to leave.

How do I handle unwanted attention or interactions when I’m alone?

Handling unwanted attention or interactions requires a balance of assertiveness and safety awareness:

  1. Stay Aware: Regularly scan your surroundings. Being aware can deter potential unwanted interactions.
  2. Choose Your Location Wisely: Set up closer to families or groups, as it tends to be safer and can discourage unwanted attention.
  3. Be Confident: If approached, use a firm and confident voice. Confidence can sometimes dissuade unwanted interactions.
  4. Avoid Providing Personal Information: If someone asks, there’s no need to disclose that you’re alone or give details about your plans.
  5. Use Technology: Have your phone accessible and consider using earphones with no music playing; this allows you to hear your surroundings while giving the impression you’re occupied.
  6. Plan an Exit Strategy: Know your routes out of the beach and have a plan if you feel the need to leave quickly.
  7. Trust Your Instincts: If someone or something makes you uncomfortable, don’t hesitate to pack up and move to a different spot or leave entirely.

What essential items should I bring for a solo beach trip?

For a solo beach trip, consider packing the following essentials:

  1. Sun Protection: Sunscreen, sunglasses, a wide-brimmed hat, and UV-protective clothing.
  2. Hydration & Snacks: A refillable water bottle and non-perishable snacks.
  3. Entertainment: A good book, music or podcasts with earphones, or a journal.
  4. Identification & Money: A copy of your ID, some cash, and a debit or credit card.
  5. Communication: A fully charged phone and possibly a portable charger.
  6. Security: A waterproof pouch or bag with a lock for valuables.
  7. Comfort: A comfortable blanket or beach chair, and an umbrella or tent for shade.
  8. Water Safety: If you plan to swim, consider floatation devices or wearing a bright-colored swim cap to be easily spotted.
  9. Clean-up: Trash bags to ensure you leave no trace.
  10. Footwear: Appropriate beach footwear like flip-flops or water shoes.

Is it advisable to swim in the ocean when visiting the beach by myself?

While swimming is one of the primary attractions of the beach, caution is crucial when doing so alone. If you choose to swim:

  1. Stay Close to Shore: This ensures you’re easily visible to lifeguards and others on the beach.
  2. Know the Beach: Be aware of the beach’s specific risks, such as rip currents, tides, and local marine life.
  3. Swim in Designated Areas: Always swim in areas watched over by lifeguards.
  4. Avoid Risky Behavior: Don’t dive into unknown waters or swim too far out.
  5. Be Visible: Use a bright swim cap or floatation device to increase your visibility.
  6. Know Your Limits: Even if you’re an experienced swimmer, factors like water temperature, currents, and fatigue can affect your abilities.

What are the benefits of going to the beach alone?

Going to the beach alone offers numerous benefits:

  1. Solitude/Socializing: It provides a break from social interactions, offering peace and tranquility. Conversely, you can also use this opportunity to meet new friends, but please respect the fact that some people are there to be left alone.
  2. Flexibility: You can choose when to go, where to set up, and how to spend your time without compromising for others.
  3. Self-reflection: The calming nature of the beach is conducive to introspection and meditation.
  4. Empowerment: Doing activities alone, like going to the beach, can boost your confidence and independence.
  5. Connection with Nature: Without distractions, you can fully immerse yourself in the natural surroundings, observing the waves, wildlife, and the vastness of the ocean.
  6. Uninterrupted Relaxation: Read, nap, or sunbathe without interruptions.
  7. Freedom: Listen to the music you like, read at your pace, or even try out beach activities you might feel shy doing in a group.

Sources:

21 Things to Do Before Snorkeling: A Beginner’s Guide

Thinking about taking up snorkeling as your new hobby? There are some crucial things you should know about it. Even though it looks like you’re just floating along the water’s surface without seemingly a care in the world, there is actually a lot of safety tips that you need to keep in mind to ensure your snorkeling experience goes safely and smoothly.

Below, we go over the essential tips you should do both before and during your first snorkeling session.

21 Essential Tips for First-Time Snorkelers

things to do before snorkelingThis is not an exhaustive list of all the things you should do before and during snorkeling, but it covers the essentials, starting with:

  1. Learn Basic Snorkeling Skills: Knowing how to swim does not mean you know how to snorkel. Consider taking a basic snorkeling course. They can teach you useful skills, like how to clear your snorkel or equalize pressure in your mask and ears. If you don’t know how to swim, take a swimming course first, as being competent at swimming is highly recommended for snorkeling.
  2. Research Your Destination: For beginners, calm and clear waters with a lot of marine life close to the surface are ideal. Research or ask locals about local marine life, currents, and recommended snorkeling spots. Some areas might have dangerous marine life or strong currents that can be harmful to inexperienced snorkelers.
  3. Use Quality Equipment: Ensure that you have high-quality and well-fitted snorkeling equipment, including a mask, snorkel, and fins. There are plenty of buying guides that outline what to look for. It’s a safe bet to buy or rent from reputable stores. Before getting in the water, give your equipment a quick check. Ensure the snorkel is securely attached to the mask and that there are no cracks or breaks.
  4. Get a Mask that Fits Snug: The mask should fit snugly without being too tight. Breathe in through your nose while placing the mask on your face without using the strap; it should stay on without any support if it’s a good fit.
  5. Get Comfortable with Mask Defogging: Use a defogger solution or baby shampoo on the inside of your mask to prevent it from fogging up. Rinse it out before using. Spit is also a very good mask defogger in a pinch.
  6. Practice in Shallow Waters: Before going into deep waters, practice snorkeling in a shallow area or swimming pool. Get accustomed to breathing through the snorkel and clearing water from it. Practice deep, calm breaths as this helps in staying relaxed and conserving energy.
  7. Stay Hydrated: Drink plenty of water before snorkeling to avoid cramps and dehydration. But avoid heavy meals, as it might make you feel sluggish.
  8. Apply Sunscreen: The sun can be particularly strong when reflected off the water. Use a reef-safe, water-resistant sunscreen to protect your skin and the marine environment.
  9. Never Snorkel Alone: Always snorkel with a buddy. It’s safer and more fun to have someone with you, especially if you run into any difficulties.
  10. Learn Basic Safety Signals: Understand and communicate with the basic hand signals. For example, a hand on the head means “I am okay,” while a waving hand means “I need assistance.” Make sure your buddy knows these hand signals too.
  11. Check Weather Conditions: Ensure the weather is suitable for snorkeling. Avoid going out during stormy conditions or when the sea is too rough. Be aware of the tides and currents, as they can change rapidly. If you’re caught in a current, don’t panic. Swim perpendicular to the current to get out of it.
  12. Observe, Don’t Touch Marine Life: Avoid touching or standing on coral reefs. They are delicate and can be easily damaged. Observe marine life from a distance without disturbing them.
  13. Stay Relaxed: If you feel tired or anxious, take a break. You waste a lot of energy and increase the risk of danger if you panic. Floating on your back can help you relax and catch your breath. It also helps if you have a flotation device so you can just rely on it to keep you afloat instead of struggling in the water.
  14. Enter Water Correctly: If entering from a boat, use the ladder or follow any procedures outlined by the crew. If entering from shore, it’s recommended that you wear your fins in the water. Also, be cautious of waves and rocky terrain.
  15. Stay Near the Surface: As a beginner, you’ll see plenty without diving deep. Plus, it’s safer and easier to breathe when close to the surface. Don’t dive underwater until you get more snorkeling experience.
  16. Use a Buoyancy Aid: For added buoyancy and safety, consider using a snorkeling vest or even a life vest, especially if you’re not a strong swimmer.
  17. Avoid Alcohol and Drugs: They can impair judgment, coordination, and your body’s ability to regulate temperature.
  18. Pay Attention to Boat Traffic: In areas with boat traffic, use a snorkeling buoy or flag to indicate your position to nearby boats.
  19. Protect Yourself Against Jellyfish: In areas known for jellyfish, consider wearing a full-body rash guard or thin wetsuit. Jellyfish stings cannot penetrate through them, so having as much coverage as possible is useful.
  20. Know Your Limitations: Don’t push yourself too hard or go too far from the shore or boat. Know your physical limits and stay within them.
  21. Plan Your Exit: Before venturing out, always have a clear plan of where and how you’ll get out of the water, whether it’s a particular part of the beach or returning to a boat.

Frequently Asked Questions

What equipment do I need for snorkeling?

For a basic snorkeling experience, you’ll require the following equipment:

  1. Snorkel Mask: This allows you to clearly see underwater. Ensure it fits snugly without being too tight.
  2. Snorkel: Attached to the mask, this tube lets you breathe while floating on the surface. There are different types like the classic, semi-dry, and dry snorkel.
  3. Fins: Fins help you navigate underwater with less effort. They come in full-foot and open-heel varieties.
  4. Wetsuit or Rash Guard: Depending on the water temperature, you might need a wetsuit. In warmer climates, a rash guard might suffice to protect against the sun and minor abrasions.
  5. Mesh Bag: Useful for carrying and rinsing your gear.
  6. Defogger or Baby Shampoo: Helps in preventing the mask from fogging up.

Additional equipment such as underwater cameras, flotation devices, and dive flags might also be useful, depending on your needs and the snorkeling location.

What kind of clothing or swimwear is best for snorkeling?

The ideal clothing for snorkeling would depend on the water temperature and personal preferences. Generally:

  1. Wetsuits: Recommended for colder waters, they provide thermal protection. They come in various thicknesses, typically from 0.5mm to 7mm.
  2. Rash Guards: In warmer waters, a rash guard can protect you from sunburn and minor abrasions. They are lightweight and quick-drying.
  3. Swimwear: A comfortable swimsuit under a wetsuit or rash guard is essential. Ensure it’s not too tight or loose.
  4. UV Protective Clothing: If you’re snorkeling in intense sunlight, wear clothing that offers UV protection.
  5. Booties: If using open-heel fins, neoprene booties help in comfort and protection against rough surfaces.

How do I equalize pressure in my ears while snorkeling?

When snorkeling, you usually stay close to the surface, so equalizing might not often be necessary. However, if you decide to dive deeper:

  1. Start equalizing early and do it often as you descend.
  2. Pinch your nose and gently blow against it while keeping your mouth closed (known as the Valsalva maneuver).
  3. Swallowing and wiggling your jaw can also help.

Never force equalization, and if you feel pain, ascend slightly to relieve the pressure and try again.

Is it better to snorkel during high or low tide?

Both high and low tides offer unique snorkeling experiences:

  1. High Tide: Provides clearer visibility as there’s less sand stirred up. Deeper water might allow for easier swimming and covering more ground.
  2. Low Tide: Reveals more marine life in shallow areas, including tide pools. However, care is needed to avoid harming marine life or getting injured on exposed corals.

Always check local tide charts, be aware of currents, and ensure safety first.

Can I feed the marine animals while snorkeling?

It’s generally discouraged to feed marine animals while snorkeling. Feeding can:

  1. Alter their natural behavior.
  2. Lead to dependency on human-provided food.
  3. Cause harm if the food isn’t suitable.
  4. Disrupt the ecological balance.

Always observe marine life without interference.

How can I ensure that I don’t damage the coral or disturb marine life?

Follow these guidelines:

  1. Maintain Buoyancy: Avoid standing or resting on corals.
  2. Mind Your Fins: Keep your fins away from the bottom to avoid stirring up sediment or accidentally kicking corals.
  3. Stay on the Path: If there’s a designated snorkeling route, stick to it.
  4. Avoid Touching: Never touch, chase, or harass marine life.
  5. Control Your Equipment: Ensure snorkels, cameras, or other gear don’t drag or hit the reef.

What should I do if I feel panic or anxiety while snorkeling?

If you start feeling panicked:

  1. Signal your snorkeling buddy or guide immediately.
  2. Inflate your flotation device if you have one.
  3. Float on your back, breathe slowly and deeply. Focus on your breath.
  4. Avoid making sudden movements.
  5. Once calm, slowly make your way to the shore or boat.

Before snorkeling, familiarize yourself with hand signals and always have a buddy with you.

How do I clean and maintain my snorkeling equipment?

Regular maintenance ensures your equipment lasts longer:

  1. Rinse with Fresh Water: After every use, rinse all equipment with fresh water to remove salt, sand, and other debris.
  2. Defogger Solution: Clean the inside of your mask with defogger or baby shampoo and rinse.
  3. Dry Properly: Let your gear air dry in a shaded area. Direct sunlight can degrade some materials.
  4. Store Properly: Keep in a cool, dry place. Avoid placing heavy objects on top of masks or fins.
  5. Regularly Check: Inspect for any wear and tear, especially the straps and buckles.

Remember, well-maintained equipment not only lasts longer but also ensures your safety while snorkeling.

Sources:

What to Do With Your Valuables While Snorkeling

It’s really hard to enjoy snorkeling if you’re constantly worried about whether your valuables are safe. You want to have peace of mind so that you can focus all of your attention on observing the wonderful sights that the underwater world has to offer, and in order to do that, you need some reliable ways to safeguard your personal belongings.

Keep reading on to learn the best ways to keep your valuables safe while snorkeling, such as renting a locker, using waterproof pouches or bags, and using a dry box.

Top Tips to Keep Your Valuables Safe While Snorkeling

What to Do With Your Valuables While Snorkeling

Rent a Locker

Many snorkeling destinations and beach resorts provide locker facilities to visitors. These lockers serve as a safe and secure place to store your belongings while you’re out enjoying the water.

You should rent one if available, as it offers an added layer of protection against potential theft or loss. Before leaving your valuables in the locker, ensure it’s in working condition, and always keep the key with you—preferably attached to a wristband or worn around your neck for easy accessibility and to prevent misplacement.

Use Waterproof Pouches or Bags

When you’re planning to engage in water-based activities like snorkeling, investing in a high-quality waterproof pouch or bag is one of the smartest moves you can make.

These specially designed pouches can protect items from water intrusion. Many of them can be comfortably worn around the neck or waist, ensuring that your valuables such as money, credit cards, and small electronics remain dry and secure.

Before buying, look for pouches with good reviews, double-seal mechanisms, and durable materials. It’s also wise to test the pouch at home by placing a piece of paper inside and submerging it in water. If the paper remains dry, it’s a good indication that the pouch is effective.

Travel Light

The best way to avoid the stress of losing valuables while snorkeling is to minimize what you bring in the first place.

When prepping for your snorkeling trip, critically assess what you truly need. Items like jewelry, unnecessary electronics, or excess cash are best left at your accommodation or home.

By reducing the number of valuable items you carry, you not only decrease the risk of potential loss but also allow yourself to immerse more fully in the experience without constant worry. If you’re staying at a hotel, consider using their safe or safety deposit box for added security.

Buddy System

Engaging in water activities with a trusted friend or partner offers many benefits, one of which is the added security of your belongings.

The buddy system involves taking turns while snorkeling. While one person explores underwater wonders, the other stays on the shore or boat, keeping an eye on personal items.

This method ensures that there’s always someone present to guard against potential thieves or to address any unexpected situation that may arise.

Use a Dry Box

If you’re bringing along sensitive items like cameras, phones, or important documents, a dry box is essential. Unlike regular containers, dry boxes are explicitly designed to be watertight and robust, ensuring that your items remain dry even when submerged.

Many of these boxes also come with attachment mechanisms, allowing you to securely fasten them to buoyancy aids or wear them on your wrist. Before venturing out, always double-check the seal of your dry box and, like the waterproof pouches, consider testing it at home first to ensure its effectiveness.

Burying Technique

Discreetly burying your valuables in the sand while at the beach is an old trick known to many beachgoers. While it’s not the most foolproof method, it can serve as a deterrent to opportunistic thieves, especially in less crowded areas. Here’s how to do it:

  1. Select an Appropriate Spot: Choose a spot close to where you’ll be in the water, so you can keep an occasional eye on it.
  2. Use a Waterproof Bag: Before burying anything, ensure that all items are placed inside a waterproof bag. This protects them not just from potential thieves but also from moisture and sand.
  3. Dig a Hole: Using your hands or a small tool, dig a hole deep enough to store your belongings.
  4. Bury and Mark: Place your bag in the hole and cover it with sand. Lay your towel or beach mat over the spot, or mark it with an inconspicuous object to remember its location.

Always remember where you’ve buried your items and be discreet in the process to avoid drawing attention.

Stay Close to Shore

If your snorkeling adventure is taking place close to the shoreline, it’s advisable to remain near the area where you’ve left your belongings. By doing so, you maintain visual contact and can monitor any suspicious activities.

It not only allows for quick interventions in case someone approaches your stuff, but it also gives you peace of mind, knowing you’re not too far from your belongings. If you’re with a group, communicate your general location or set up a designated spot so that others are aware and can help keep an eye out.

Invest in a Waterproof Camera

Instead of worrying about protecting a regular camera or phone, consider investing in a waterproof camera designed for underwater activities. These cameras are built to withstand submersion and often deliver high-quality photos and videos of marine life. When shopping for one:

  1. Check Depth Ratings: Ensure the camera can handle the depth at which you’ll be snorkeling.
  2. Look for Durability: A rugged build that can withstand drops and bumps is a plus.
  3. Consider Battery Life: Ensure it has sufficient battery life for your snorkeling sessions.
  4. Review Image Quality: Research reviews and sample photos to ensure you’ll get the shots you desire.

With a waterproof camera, you can capture memories without the constant worry of water damage.

Be Cautious with New Acquaintances

While traveling and snorkeling, you’ll often encounter friendly faces and make new acquaintances. While this is one of the joys of travel, it’s essential to exercise caution.

Avoid revealing too much information about where and how you’ve stored your valuables. Being overly trusting can unfortunately make you an easy target for those with ill intentions. Always prioritize your safety and the safety of your belongings by practicing discretion.

Consider Insurance

Travel insurance can be a valuable asset, especially if you frequently travel with valuable items. Such policies can offer coverage for theft, loss, or damage to personal belongings. Before your trip:

  1. Review the Policy Details: Understand what’s covered, the limits of coverage, and any exclusions.
  2. Document Valuables: Take photos of valuable items and keep purchase receipts. This documentation can be invaluable in case of a claim.
  3. Stay Updated: Ensure your policy is active and up-to-date before setting out.

Having insurance doesn’t mean letting your guard down, but it can provide a safety net in the unfortunate event something goes wrong.

Frequently Asked Questions

Are the lockers at snorkeling sites safe for storing valuables?

Lockers provided at snorkeling sites or nearby facilities are generally designed to offer a secure place for visitors to store their belongings. They are commonly used and recognized as a more secure option than leaving items unattended on the beach. However, the safety of these lockers can vary based on a few factors:

  1. Location and Management: Lockers at well-established snorkeling sites or reputable resorts are typically more secure and better maintained than those in less-developed areas.
  2. Lock Mechanism: Some lockers come with built-in locks, while others require you to bring your own. If you’re using your own lock, ensure it’s durable and difficult to tamper with.
  3. Visibility and Surveillance: Lockers located in high-traffic areas with regular surveillance or near staffed stations tend to be safer than those in isolated spots.

Always check the condition of the locker, ensure it properly locks, and keep the key in a safe and accessible place on your person. While lockers generally provide a good level of protection, you should still do your due diligence.

What should I avoid bringing when going snorkeling?

When snorkeling, it’s best to adopt a minimalist approach for both safety and convenience. Here’s what you might consider leaving behind:

  1. Unnecessary Jewelry: Rings, necklaces, and bracelets can easily get lost in the water.
  2. Excessive Cash: Bring only what you’ll need for the day’s expenses.
  3. Important Documents: Avoid bringing passports, birth certificates, or other critical documents unless absolutely necessary.
  4. Non-Waterproof Electronics: Devices that aren’t waterproof or water-resistant are at risk of damage.
  5. Bulky Items: Large items can be cumbersome and make you an easy target for theft.

Remember, the fewer valuables you bring, the less you have to worry about and the more you can focus on enjoying your snorkeling experience.

Is it safe to leave my belongings on the beach while I’m in the water?

Leaving belongings unattended on the beach comes with inherent risks, as they might become an easy target for opportunistic thieves. If you must leave items on the beach:

  1. Stay Close: Choose a snorkeling spot near your belongings so you can keep an eye on them.
  2. Visibility: Don’t leave items in plain sight. Tuck them under a towel or inside a bag.
  3. Use the Buddy System: If snorkeling with others, take turns so someone is always watching over the group’s belongings.

Ideally, use lockers or leave valuables at your accommodation to minimize the risk.

How effective is the burying technique for hiding valuables on the beach?

Burying valuables in the sand can deter opportunistic thieves, but it’s not foolproof. Its effectiveness relies on:

  1. Discretion: The burying process must be discreet to prevent onlookers from noticing.
  2. Marking the Spot: It’s essential to remember where you’ve buried your items. Use a towel, beach mat, or an inconspicuous marker.
  3. Waterproof Protection: Ensure valuables are in a waterproof bag to protect them from moisture and sand.

While this method can provide a level of protection, it’s still riskier than lockers or personal supervision. It’s best suited for less-crowded beaches where there’s less chance of theft.

Can I take my regular camera or smartphone snorkeling?

Taking a regular camera or smartphone snorkeling without proper protection is not advisable, as they can easily get damaged by water. However, if you wish to capture underwater memories:

  1. Waterproof Cases: Invest in a high-quality waterproof case specifically designed for your device. Ensure it has positive reviews and can withstand the depth you plan to snorkel at.
  2. Waterproof Cameras: Consider investing in a camera made for underwater use. They’re designed to handle submersion and often capture high-quality photos.
  3. Test Before Using: Before snorkeling, test the waterproof case or camera in a controlled environment to ensure there are no leaks.

Always be cautious and regularly check your equipment for any signs of water intrusion while snorkeling.

Should I invest in travel insurance for my snorkeling trips?

It’s generally a good idea to invest in travel insurance to provide a safety net in case of unforeseen incidents, such as injury, illness, or loss of valuables. However, you must read the fine print to see what exactly is covered.

Most travel insurance protects against loss or theft of valuables if it’s something out of your control, such as the airline losing your luggage or a thief stealing your valuables. However, if your personal belongings are damaged because you brought them into the water, it’s highly unlikely that the insurance company will reimburse you.

What if I lose my valuables while snorkeling – what steps should I take immediately?

Losing valuables while snorkeling can be distressing. If it happens, take the following steps:

  1. Search the Area: Start by thoroughly checking the immediate vicinity. Sometimes items get misplaced rather than stolen.
  2. Alert Authorities: If at a managed snorkeling site or resort, inform the local staff or security. They might have a lost and found or can assist in the search.
  3. File a Report: If you believe your items were stolen, file a report with local law enforcement.
  4. Inform your Insurance: If you have travel insurance, notify them of the loss. They’ll guide you on the next steps and what documentation they require.
  5. Secure Personal Information: If you lost phones or documents, take steps to protect your personal information. This might involve changing passwords or notifying your bank.

Staying calm and acting swiftly can mitigate the impact of such an unfortunate event.

Can I trust local guides or tour operators with my belongings?

While many local guides and tour operators are trustworthy and have a vested interest in maintaining a good reputation, you must do your due diligence. Consider the following:

  1. Reputation: Before booking, research the reputation of the guide or operator. Reviews from other travelers can provide insights.
  2. Professionalism: Established operators usually have protocols in place for safeguarding clients’ belongings.
  3. Personal Judgment: Use your intuition. If something feels off, it’s okay to be cautious.
  4. Limit Exposure: Even with trustworthy operators, minimize the valuables you bring on excursions.

Trust should be based on a combination of research, reputation, and personal judgment.

Is it safe to attach valuables to my body while snorkeling?

Attaching valuables to your body can be a practical solution to keep them close and safe. However, there are considerations:

  1. Waterproofing: Ensure that anything attached is either inherently waterproof or placed in a reliable waterproof container.
  2. Secure Attachment: Use sturdy straps or cords. Items should be snug against your body to prevent them from getting caught on something.
  3. Comfort: Consider comfort, especially for prolonged snorkeling. Avoid any setup that causes discomfort or restricts movement.
  4. Visibility: If hiding valuables, ensure they’re not easily visible to avoid attracting attention.

While attaching valuables to your body can be safer than leaving them unattended, always prioritize comfort and safety during your snorkeling adventure.

Sources: