Lung Packing For Freediving: Are the Risks Worth It?

Lung packing is a technique that some freedivers use to inhale more air than their lungs can normally hold. The purpose of lung packing is to literally pack more air into your lungs in the hopes that your body will benefit from the additional oxygen when diving.

The general idea behind lung packing is to first take a full natural breath, then start a secondary inhalation period where you suck more air with your mouth. With a special technique, you can  force the extra air into the lungs with a movement similar to swallowing. This results in your lungs being overinflated past their natural total capacity.

Lung packing is an old-school freediving technique that was created and utilized during a time when freedivers thought that more air in the lungs is always better. Packing has since become quite controversial among freedivers due to the risks involved as well as questionable efficacy.

There is also a question of whether lung packing is even needed, since many freedivers do not use it and they can still manage to reach depths of 100m or stay underwater for over eight minutes during static apnea.

In this guide, we will do a in-depth look at what lung packing is, how to do it, the supposed benefits it provides, and the arguments against lung packing regarding how potentially dangerous it can be.

What Is Lung Packing?

Lung packing can also be referred to as air packing, frog breathing, carpa, buccal pumping, or glossopharyngeal inhalation.

Outside of freediving, lung packing is sometimes used by individuals who have low lung volume and weakened breathing muscles. It can also be used by those affected by muscular dystrophy, spinal injuries, and polio.

Glossopharyngeal inhalation can let people who have lung problems breathe in the event that their breathing apparatus somehow fails unexpectedly. This breathing technique has saved the lives of many people by forcing oxygen into their lungs. Through the use of their tongue, cheeks, and pressure differences, it is possible to swallow air into one’s lungs without inhaling.

Lung Packing for Freediving

Freedivers train their lungs to hold more oxygen, and lung packing is a sort of “hack” that forces their lungs to hold oxygen over its capacity. The theory is that the more oxygen in the lungs, the longer and deeper the dives.

When the average person breathes, their lungs will fill up with around four to six liters (1.05 to 1.58 gallons) of air. With lung packing, one can go over that capacity by 10 to 50%, depending on how good you are with the technique.

Without lung packing, the only other ways to increase oxygen levels is to train with an Air Restriction Device which helps train lung volume, or to use a low-volume dive mask to conserve oxygen when equalizing pressure.

Getting a significant increase in oxygen levels is a very attractive option for most freedivers, so it’s no surprise that many have tried to learn how to do it.

How to Lung Pack

Note: We are not doctors and lung packing has its share of risks (discussed further below). If you plan on doing any lung packing, you do so at your own risk and we strongly recommend you see a doctor first. 

Furthermore, if you use a weight belt, make sure that it is not made out of nylon or a similar inelastic material. Nylon will restrict your diaphragm, preventing you from fully inhaling and limiting your breathe-up. You should look into getting a rubber weight belt that will stretch as you inhale and move your body.

Without further ado, here is how to lung pack.

Step 1: Calm your breathing and heart rate.

Take 3-5 deep, slow breaths, then resume breathing at your normal rate. Next, imagine a pleasant scene that puts you at ease, such as the relaxing sound of rain outside as you drink hot coffee at your favorite café, or the splashing of waves against the side of the boat on a beautiful sunny day. Or you could just close your eyes and focus on your breathing, much like meditation.

Step 2: Fully inhale

Next, you will fill your lung to its natural capacity by breathing in deeply and slowly. Start by filling your stomach, then after a brief pause, continue inhaling into your chest until it expands to its limit.

Step 3: Close your throat

There are two things you need to do in order to seal your throat. First is to close your glottis (the opening between your vocal cords). Second is to seal the back roof of your mouth. This is an important step, so you may want to practice this before moving on.

Step 4: Create a vacuum in your mouth

You can create negative pressure in your mouth by opening your mouth slightly while your throat is still sealed. Lower your jaw and press your tongue to the back of your mouth to create the vacuum effect.

Step 5: Gulp air into your lungs

Now close your lips and swallow the trapped air into your lungs. If you’ve never lung packed before, start small. Try to manage 3-5 gulps if you can, or listen to how your body feels and if you think you can fit more then do it.

Step 6: Exhale

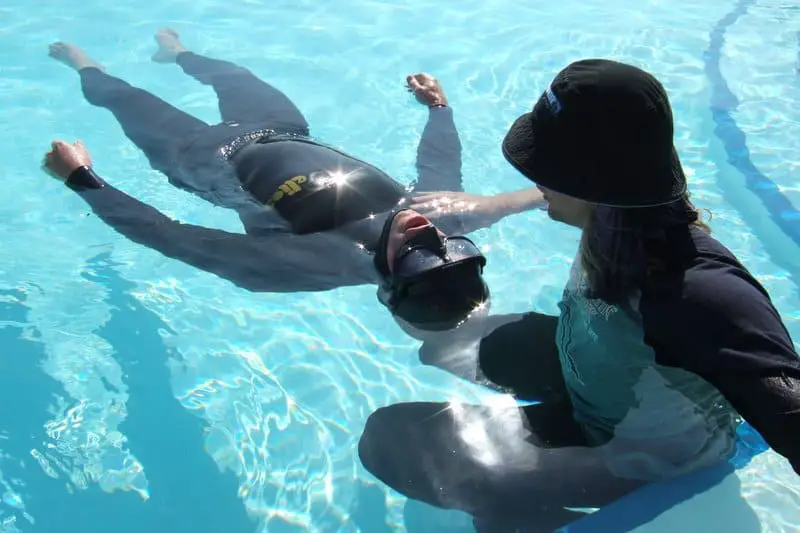
Finally, let all of the air out of your lungs. We recommend you practice lung packing on land just in case anything goes wrong. If you are in the water, you will need an instructor or safety diver to look over you in case you lose consciousness from holding your breath.

Hire an instructor

As with any technique, it can be tough starting out without the proper guidance. You could be doing it completely wrong and not even know. Admittedly, following written instructions isn’t the greatest way to learn either. So we recommend you hire a mentor to give you personal, one-on-one guidance.

Another option is to watch an instructional video. Here is a great video that teaches beginner freedivers how to lung pack. We recommend you watch the entire video because of how informative it is.

Lung Packing Breathing Techniques

The way lung packing is done is nearly identical across all freedivers. After all, the idea is to stuff more air into your lungs beyond what it can normally hold by utilizing negative pressure differences. As you can imagine by that description, stretching your lungs beyond capacity will feel uncomfortable and it comes with risks which we will discuss further below.

There may be some slight differences between lung packing breathing methods, however the differences are so minor as to be nearly negligible. For instance, one guide may recommend using your cheeks to create negative pressure instead of your tongue. One is not necessarily better than the other as long as you can create the negative pressure.

In the end, you should do the lung packing approach that you feel is most reliable for you to do. If you want to try out the different variations of lung packing, we recommend you hire an instructor or join a freediving group that is willing to educate a beginner.

Who Should Lung Pack?

Lung packing is a technique that should be used only by advanced freedivers. As a beginner, you can learn about the general principles and decide later on if you want to pursue it some more. However, your primary focus should be on being a better breather in general instead of focusing on lung packing.

If you don’t know the basics, then lung packing may do more harm than good. You should first be proficient in your breath-hold training, as well as learning how to calm yourself down and entering the Flow state.

Lastly, getting some practical freediving experience by heading into the water a few times a week will teach you more about the practical aspects of freediving more than any video or article can teach you. Learning about theory is good, but it must be combined with a hands-on approach.

After you have become proficient at breath-hold training, learning how to stay calm and keeping your heart rate low, you can then move on to lung packing. As a matter of fact, any beginner and even intermediate freedivers can potentially damage their lungs if they are not careful, and even AIDA doesn’t recommend lung packing.

Potential Benefits of Lung Packing

If you have more air in your lungs due to lung packing, then doesn’t that mean you can dive for longer? That’s what some freedivers would say it does. Besides this, lung packing may also:

  • Increase lung capacity which makes it easier to equalize pressure at depth.
  • Relaxes your airway.
  • Increase overall performance by giving you more oxygen to work with.

How Effective is Lung Packing?

Many of the supposed benefits of lung packing come from personal anecdotes and may not be scientifically sound. For instance, there is a study that came to the conclusion that lung packing can potentially reduce freediving performance.

Ironically, by forcing more oxygen into your lungs, you can end up lowering your stroke volume and decreasing cardiac output. To address this problem, the body releases adrenaline which increases your heart rate and keeps you from fainting. However, an increased heart rate will use up your oxygen stores faster, which defeats the purpose of lung packing since you may end up decreasing your overall dive time.

Furthermore, lung packing takes time to do. The time you spend by the surface holding your breath as you try to gulp more air is time you could have spent diving deeper underwater. Additionally, lung packing is uncomfortable and increases your heart rate which means you will not be as calm as you ought to be.

Lastly, an increased amount of oxygen means you are more positively buoyant for the initial portion of your dive. You will need to exert more force to break through this point, which uses up more oxygen than normal.

Potential Injuries from Improper Lung Packing

In addition to its questionable efficacy, lung packing can also lead to serious injuries if done properly. Below is a list of some potential issues, some more severe than others, when one over-packs their lungs during long breath-hold dives.

There are many more potential injuries one can sustain, however these are the most common ones. The last few bullet points are incredibly dangerous and can lead to death. As such, lung packing is not something to take lightly; if done wrong, you can die.

Gas Embolisms from Lung Packing

What are gas embolisms? They are a potential side effect of forcing too much air into your lungs.

When you pack too much air into your lungs, the air pressure within gets elevated to such intense levels that your lungs cannot withstand the volume held in them. The air will try to move to any area that has more space available.

Unlike balloons which simply explode when they’ve been overinflated, our lungs are thankfully more resilient. However, the air pressure can cause air bubbles to escape by squeezing through the linings of your lungs.

The air bubble can then enter straight into your bloodstream. This gas embolism will travel through your body and block blood vessels and arteries, which is incredibly life-threatening. It can result in strokes, loss of consciousness, convulsions, and death.

Blackouts from Lung Packing

Shallow water blackout and above-the-water blackouts are some of the dangerous risks associated with going too far with lung packing. Results from this study have found that it increases intrathoracic pressure which can lead to dizziness or even blacking out just prior to the dive attempt.

The reason this happens is because the intrathoracic pressure causes your heart’s cardiac output to decrease, lowering overall blood pressure. Once your blood pressure drops to a certain point, the brain becomes starved for oxygen and shuts down to conserve oxygen, causing a blackout.

Once you blackout, your body will start inhaling while you are unconscious to try to get oxygen into your system. On dry land this is not an issue, as this natural reaction could save your life. However, if you blackout while underwater, the inhalation which would normally fill your lungs with air will instead fill them with water, and you will drown.

Freedivers already have a chance of blacking out without lung packing, and if you end up over-packing your lungs you can further increase the chances of a blackout both under or above the water.

Lung Packing While on Dry Land

While blacking out isn’t as dangerous on dry land, that’s not to say that there isn’t any risk involved. If you are practicing lung packing, make sure you are in a space environment, such as on your bed or on a padded mat. This is to protect your head in case you do blackout.

If your head hits something with enough force, the impact could be lethal. To minimize the damage, try practicing lung packing while seated or lying on the floor. That way, suddenly fainting won’t hurt your head, and your brain will automatically force your body to breathe again.

With that said, lung packing on dry land can still be lethal, since forcing too much air into your lungs is dangerous. You can still suffer all of the same injuries as someone lung packing in the water, such as lung squeeze, pneumothorax, gas embolisms, and so on. That is why you should go at your own pace and not to rush things.

Is Lung Packing Necessary for Deep Dives?

No, there are numerous top freedivers that set world records without lung packing. In fact, most freediving world records were done without lung packing. As such, don’t feel compelled to learn lung packing because clearly it isn’t an absolute must to know.

Some beginner freedivers hear that some advanced freedivers used it to great success, or want to copy what they see in a YouTube video, but these same freedivers are in danger of imitating the wrong technique.

After all, lung packing is an advanced technique, and beginners may be trying to learn something beyond their current understanding of breathing techniques and jeopardizing their safety in doing so.

One should be patient and take the time to properly learn the basics. Do not be eager to advance too quickly, but instead, get a strong grasp of the fundamentals and refine these techniques over time. Staying safe should be a freediver’s top priority.

However, freediving is an inherently dangerous sport that attracts risk takers, so perhaps you have already weighed the risks of lung packing and deemed it a risk worth taking. Personally, we feel that for every supposed benefit lung packing provides, it has a disadvantage that negates it.

Yet if you must learn lung packing at all costs, try to find a professional freediver in real life (not online, not from a YouTube video) and have this person do a one-on-one training session with you. If the instructor is any good, he should start off slow but ramp up the difficulty over time. Impatience will only increase the chances of accidents.

Reverse Lung Packing

You’ve heard a lot about lung packing, but there is another breathing technique known as reverse lung packing which you may be interested in.

Reverse lung packing is a training technique performed on dry land which mimics the strain that the underwater pressure places on one’s body and lungs. It can help train your lungs to be more resistant to injuries that can be sustained when subjected to intense pressure underwater.

Furthermore, reverse packing can increase diaphragm flexibility similar to an air restriction device. This can allow you to equalize more effectively and dive deeper. Unlike lung packing, most freedivers agree that reverse lung packing is safe and is recommended for a freediver who wants to reach their full potential.

How Reverse Lung Packing Works

Reverse lung packing works by decreasing the residual volume in your lungs. The residual volume is the reserve of air left in your lungs after you fully exhale, and it is the reason why you don’t immediately pass out afterwards.

Since you normally can’t exhale the residual volume, reverse lung packing is needed. Similar to lung packing, reverse lung packing utilizes negative air pressure to funnel out the residual volume out of your lungs. Doing this will cause the lung tissue as well as other tissues in the chest cavity to stretch, which can help improve your lung volume.

How to Perform Reverse Lung Packing

Step 1: Lie or sit down somewhere

As with any breathing exercise, there is always a risk of blacking out. As such, you should practice your breathing techniques in a safe, padded environment preferably while sitting or lying down. That way, in the event that you blackout, you will not hit your head hard. Do not practice reverse lung packing while standing.

Step 2: Steady your breathing

Start by breathing normally so that your heart rate is low and your mind is calm. At this point, don’t bother counting breaths, or trying to breath in perfect intervals, or hyperventilating. Just breathe calmly.

Step 3: Take a deep breath

Once you feel ready, take a long, deep breath through your mouth until both your lungs and stomach fills up completely.

Step 4: Fully exhale

Now, slowly exhale all of the air starting from your chest, then your stomach. Once you feel like you are out of breath (you actually aren’t), start tensing the muscles above your stomach to squeeze even more air out.

To get even more air out, tilt your head back slightly and keep squeezing your diaphragm muscles to get some more air out.

Step 5: Create negative pressure

Untense all of the muscles that you are currently using to exhale. Seal your nose and lips tightly. If you were wearing a nose clip this whole time, then just focus on sealing your lips. With both nose and lips sealed but throat open, lower your jaw and tongue. This should siphon the remaining air from your lungs into your mouth.

Step 6: Exhale remaining air

Seal your glottis. Move your jaw and tongue back to their original position. Push the air out of your mouth by applying tension to your cheek muscles.

Step 7: Perform reverse gulps

Keep repeating the step above, pumping the air out of your lungs like pistons. This is like the opposite of lung packing, where you are trying to gulp in more air. Here, you are trying to remove as much air from your lungs as possible, hence “reverse gulp”.

Once enough air has been expelled, you will reach a point where there is only the residual air volume remaining. You will know that you’ve reached this point once you feel lightheaded, your collar bones are visibly prominent, and your diaphragm is squeezed so tightly that you look very thin.

Step 8: Inhale

Relax all of your muscles and breathe in slowly. Reset your heart rate and give your body time to rest by spending a few minutes breathing in and out slowly.

Congratulations, you’ve just read about how to do reverse lung packing. This technique is hard to describe in words, so we recommend you check out this video to supplement your learning.

Benefits of Reverse Lung Packing

  • Strengthens muscles around the ribcage and improves diaphragm flexibility.
  • Conditions your lungs to dive deeper for longer.
  • Strengthens your lungs to become resistant against injuries at deep depths.
  • Helps with equalization at deep depths.
  • Acclimates your lungs to intense pressure by simulating its effects but on dry land.

Who Should Do Reverse Lung Packing?

Any freediver can benefit from practicing reverse lung packing. It is something you can do on dry land and is a great tool to help you get used to deep diving. However, learning how to do reverse lung packing correctly is difficult without an instructor, so beginners would benefit the most from getting some help from an experienced freediver first. Doing something wrong can ingrain bad habits, but when it comes to breathing techniques, special attention must be given.

Is Reverse Lung Packing Safe?

We’ve already mentioned how normal lung packing has its fair share of risks, and should only be attempted by the most experienced of divers. Thankfully, reverse lung packing is less dangerous, but obviously care must still be taken when interfering with your breathing.

The main reason why reverse lung packing is safer is because you are expelling the air from your lungs which is not as strenuous on your body as over-inhaling is. With that said, there are still a few potential risks you should be wary of, such as:

Blackouts

All freediving breathing techniques have a risk of causing you to blackout from lack of oxygen. If you blackout on dry land while standing, you can easily land head first and cause serious injury to yourself. Set up a padded environment by placing pillows around you or lying down on a soft mat so that in the event you do blackout, you will land on a soft surface.

If you decide to practice reverse lung packing in the water, then blacking out becomes significantly more dangerous. As we explained earlier, your brain will tell your body to start breathing again while unconscious, which means you will inhale water instead of air and drown.

Lung Squeeze

Once again, if you practice reverse lung packing while underwater, then the negative pressure difference could cause a lung squeeze. Though this is not likely to occur and the injury is not considered to be serious, it’s still something to keep in mind. If a breathing technique can be practiced on dry land, such as this one, then we recommend it just to be safe.

Should You Lung Pack: The Verdict

Due to the potential risks associated with lung packing, and in addition to the fact that AIDA do not recommend it, we also cannot in good conscience recommend this breathing technique even if it has been successfully used by some freedivers. Another fact is that many of the current top freedivers do not use this technique, so clearly it’s not something that is a necessity to employ in competition.

On the other hand, reverse lung packing is something that can be done relatively safely and its benefits are desirable. At the end of the day, it’s up to you to weigh the risks and if you feel like lung packing is absolutely crucial for you to know in order to reach your goals, then nobody is stopping you. Just take things slowly and ease your way to new limits.

Alternative Breathe-Ups instead Lung Packing

So if lung packing isn’t recommended, then what should you do instead? The answer is that there is no right or wrong way for breathing up before a dive. The ideal breathe-up is literally just normally breathing and relaxing yourself so that your heart rate is low and your mind is calm.

Doing this slow, almost meditative breathing is way more straightforward than memorizing some inane instruction like “breathe in for exactly X seconds, then exhale for Y seconds.” Advice like this can paralyze beginners who follow the instructions to the letter, but then get stressed out when they slightly mess it up. Stressing out defeats the entire purpose of the breathe-up!

That is why we recommend keeping things simple, and slowly breathing in and out is sufficient to ready your mind and decrease your heart rate before a big dive. Once you can do this basic thing, then you can consider moving on to more advanced breathing techniques like lung packing.

How to Freedive Without Ears Hurting

When you’re freediving, you may feel your ears hurting as it expands and cracks under the water pressure until the pain is almost unbearable. Many inexperienced divers panic when they feel this and abandon their dive prematurely. There’s a lot of pressure inside your ears, and if it is not properly dealt with, it can lead to barotrauma.

Experienced freedivers know how to handle this better than anyone because it’s one of the first things they have to overcome if they plan on diving to deep depths. This guide will help you protect your ears from hurting while freediving so that you can enjoy this exciting sport to its fullest without suffering any ear injuries.

Why Do My Ears Hurt When Freediving?

Before we discuss ways to prevent ear pain, it is important that you first understand why this happens in the first place. On dry land (assuming you’re not living on a mountain or something) our bodies experience 14.5 pounds of pressure. You could say this is our “normal”, and we don’t feel any discomfort because the fluids in our body are exerting the same force outwards.

While underwater, the pressure is different, and the deeper you go the more intense the pressure gets. You might be wondering then, how do animals like whales survive at deep depths? The answer is that our bodies are vastly different.

We humans have a stiff and rigid body. On the other hand, aquatic animals have very flexible bodies that have more give. Going back to whales, they have cartilage throughout their entire body that allows them to contract without causing damage to their internal organs.

Humans have numerous air pockets throughout our body, particularly in our head. For instance, our ear canals, eye sockets, and nasal cavities all have some air within them that are necessary to regulate the pressure exerted at the surface.

However, once the pressure in those air pockets changes, such as when you’re up in an airplane or on top of a mountain, you will feel a similar painful sensation in your ears and sinuses as you would underwater. You can equalize this pressure by pinching your nose and then forcefully exhaling.

How do Professional Freedivers Prevent Their Ears from Hurting?

What separates an amateur from a professional freediver, besides experience, is their skill at equalizing pressure while underwater. This is a crucial technique that one must learn if they want to make any headway in freediving. Otherwise, one’s maximum depth will be limited by their ear’s pain threshold.

Furthermore, there is no right or wrong way to do this. Freedivers from various backgrounds with a wide range of experiences fine tune their equalization techniques to suit themselves. Additionally, everyone’s body has different limits and perhaps one technique will work better than others depending on the individual.

Professional freedivers have experimented with various methods, including how to equalize the pressure in their head just before diving. Pros may use a combination of methods or one particular method which they have perfected. Below, we will go over the most common equalization methods to help you get started.

How to Equalize Your Ears to Keep them from Hurting

Don’t worry if you aren’t doing the same secret techniques that the pros are using. In this section, we’ll cover the three most common maneuvers that will help you dive deeper than ever before without any ear pain.

Frenzel Maneuver

This maneuver was created during World War II and  is named after its creator, Herman Frenzel. This method is effective even up to 85m (278ft) deep, which is more than enough for the average freediver. A simple way to describe this method is like you are sealing up your vocal cords as you are carrying a heavy weight. Here’s how to do it:

  • Squeeze your nose shut with your fingers.
  • Allow some air to enter your mouth.
  • Close your epiglottis (the flap at the back of your mouth at the base of your tongue).
  • Ensure that the soft palate of your mouth (the soft area in the upper area of the back of your throat) is not moving around.
  • With your tongue acting like a piston, try to snap the air to the back of your throat.

Don’t worry if you don’t get it right the first time. These maneuvers are difficult and require much practice to perfect. You can even practice the maneuver on land, and then test it out underwater when you’re feeling ready.

freediving by a boat

The Valsalva Maneuver

The Valsalva Maneuver is one that you probably already know, as it is commonly used by people all over the world whenever they are on an airplane or high elevations. It is named after Antonio Valsava, who was one of the pioneers of the study of pressurization in the middle ear as early as the 1700s.

This maneuver is popular because of how easy it is to do; however, the downside is that it is only effective down to 30 feet, so you can think of it as a beginner technique.

In order to perform the Valsalva technique, you must:

  • Squeeze your nose cavity closed using your thumb and index finger.
  • Exhale forcefully through your nose while keeping it pinched.
  • The trapped air will build up pressure until you hear a “pop” sound inside your ear canal.
  • Perform this underwater each time you feel the pressure is too much.

Mask Equalization Maneuver

When wearing a dive mask, the pocket of air in the mask will add pressure to your eye sockets the further you dive down. You will need to equalize the pressure in the mask as well as your ears, otherwise you risk suffering damage to your eyes and ears. Using the mask equalization maneuver, you can relieve the pressure and prevent damage to your face.

In order to perform the Mask Equalization Maneuver, you must:

  • Ensure that the dive mask has a soft nose pocket that can be easily pinched with just one hand (so that you can still equalize the pressure on your ears).
  • Exhale slightly through your nose until the pressure has subsided.

The mask equalization technique is such a straightforward technique, however you need to keep a few things in mind. First, exhaling too much obviously uses up precious oxygen that you need to stay underwater longer.

Second, when you exhale, you are introducing moisture and heat into the mask that can condense on the lens and fog it up. That is why it is recommended you search for low volume dive masks because they require less air to equalize and also gives you a better view with fewer obstructions.

Ear Pressure Equalizing Tips

Stay Hydrated

Staying hydrated is crucial when performing any physical activity, and this one is no exception. Make sure you are drinking lots of fluid throughout the diving session.

Medication

Before taking any medication, especially if you are already on medications, consult your doctor to see if there are any contraindications or warnings you should heed.

With that said, Mucinex is a great expectorant for getting rid of mucus in your nose, ears, and sinuses. While Afrin and Sudafed can also clear your ears, they are accelerants which will increase your heart rate which is like kryptonite for freedivers.

With your airways fully clear, you do not have to worry about restricted air flow that can limit your diving potential. You can get these benefits by taking Mucinex two days prior to your dive attempts. You do not need medication to be a successful freediver, but it may be helpful.

Tuck Your Chin

If you are struggling to equalize your ears, try tucking your chin in so that you are not looking at the bottom, and then try one of the equalization techniques. If you’re craning your neck and looking straight down while diving, it may make equalizing more difficult.

Equalize Before It’s Needed

Don’t wait until you are at your pain threshold before deciding to equalize your ears. You should be relieving the pressure well before any significant discomfort or pain occurs. If in doubt, just keep your hand on your nose the whole time so that you are always ready to equalize.

Freediving Ear Care

One simple way to drastically reduce the chances of contracting an ear infection is to make a homemade solution of half vinegar and half rubbing alcohol. The alcohol will quickly evaporate any lingering water after a dive. Next, the acidity of the vinegar will prevent any bacteria growth. After a dive, apply two drops into each ear to unclog your ears and prevent ear infections in the future.

Additional Safety Tips

The golden rules of freediving are that you must always have a spotter with you on a dive, and you must equalize your ears before you experience any pain.

It should be pretty obvious why you shouldn’t dive alone. If you were to lose consciousness due to a shallow water blackout, your life is as good as over. Additionally, if the weather conditions are bad enough, you can get lost or experience an accident underwater or topside. If your eardrums suddenly rupture, you’ll be glad you’ve got somebody to watch your back.

However, if you follow the second rule of equalizing before the pressure becomes too unbearable, then you shouldn’t have to worry about a perforated eardrum. Yes, using any of the pressure equalizing maneuvers above will use up pressure energy and oxygen. However, suffering a pressure related injury to your skull is not worth the risk just to get a few extra meters of depth.

Pay attention to your body because it is constantly giving you feedback regarding its condition. Always err on the side of caution.

The sport of freediving has been around for hundreds of years, as humans continue to push their limits underwater. It may seem daunting at first; you might think professional freedivers are half-fish with their ability to stay underwater for several minutes and dive over 100m on a single breath.

However, these pros were once like you when they were starting out, and it was through constant training and experience that they achieved this level of competency. By learning the basics of how to free dive without ears hurting, you can dive further than when your limiting factor was pain in your ears.

Causes of Freediving Deaths and How to Prevent Them

Imagine an environment that is so deadly to humans that being in it for a few minutes can kill you. Where every second saps your strength and inches you closer to death. Where visibility is limited and invisible currents can sweep you away, and your body might not be found. If you tried to call for help, barely any noise would come out, and there is no guarantee that somebody will save you in time.

In case you’re wondering what all of this applies to, we’re talking about the adversities a human might encounter while doing a breath-hold dive. Breath-hold dives are commonly done by freedivers and spear fishermen, two groups of people who are brave enough to find enjoyment in performing such a risky activity. With all of the risks involved, you might be wondering about the number and frequency of freediving deaths are.

It’s true that freediving can be extremely dangerous, particularly if one lacks the proper equipment and training. After all, you literally only have one breath to work with, and a single mistake at a deep enough depth will lead to a watery grave. With that in mind, the death rate for recreational freedivers is 1 in 500 dives. In competitive freediving, the death rate is 1 in 50,000 thanks to its stricter regulations. By understanding what the most common causes of freediving deaths are, we can work to prevent them from happening as often to recreational freedivers.

Recreational Freediving Death Rate

In order to see the beauty of the underwater world, many people try their hand at recreational freediving. For example, many snorkelers will notice something in the distance and attempt to dive down for a better look.

Some people even bring their underwater cameras to take selfies and capture the beautiful sights for family and friends to see. Other recreational freedivers head down in order to go spearfishing. Some do it because they find the peace and tranquility of the underwater world to be quite calming.

Casual freedivers tend to stay within depths of 5-10 meters. This is mainly because a significant portion of marine life and coral can be seen around this depth. Furthermore, inexperienced divers simply lack the confidence, equipment, and breath-hold capacity to risk going further.

Despite this, recreational freediving has a significantly higher death rate compared to competitive freediving. There is one death for every 500 dives, and there are many reasons why this may occur.

Lack of Proper Equipment

In order to stay safe while freediving, one should have the proper equipment. For instance, freediving fins will significantly improve the amount of thrust you can generate per kick while keeping energy expenditure low thanks to their long fin blades.

Furthermore, freediving wetsuits provide positive buoyancy which will help you stay afloat more easily and conserve energy. Of course, this works against you if you are trying to dive down further, however it is better to be safe than sorry. Additionally, wetsuits provide good insulation when diving in cooler waters.

Additionally, one should never freedive without setting up a freediving buoy and line. A freediving buoy provides a place for you to rest and recover fully between dives. It also lets boaters know your general location so they can stay away and prevent a collision. You can store items in a dive buoy, such as a first aid kit, dive torch, or your small valuables like jewelry. It’s benefits don’t end here.

You can also attach a dive line to the buoy, which acts as a guide for you to see where you’re headed while underwater. The deeper you dive, the harder it is to orient yourself, and having a line to follow makes the dive so much safer.

No Regulations

Recreational freediving is something that cannot be regulated by any authority or government body because it is simply impossible. Anybody who finds a large enough body of water and decides to dive down as far as they can go can do it. This means plenty of unsupervised diving, lack of medical check-ups, complete disregard for recommended safety guidelines, and so on.

Inexperience

Even the term recreational freediving implies casualness, and many freedivers dive without much practice or care. After all, they aren’t in a competition, they are just trying to have fun. Compared to professionals who spend several hours every week training, for months and years on end, amateurs don’t train as seriously and this can result in their deaths if they encounter a situation they aren’t prepared for.

Similarly, they may not do as much research on their dive location. Lots of freediving attempts are done by tourists on vacation who are eager to have a memorable experience. As such, casual freedivers may not be aware of dangerous environmental factors such as currents or riptides.

Diving Alone

freediving deaths

Not everybody has a freediving buddy they can rely on to watch their backs. As such, some freedivers go it alone, and this puts them at extreme risk. First off, there is always a possibility that they can suffer a shallow water blackout (loss of consciousness as they approach the surface) which means certain death if no one is around to rescue you.

Furthermore, if a freediver suffers a medical emergency from an existing condition, they may lack the strength to resurface or may lose consciousness while struggling. Whatever the reason, if they are diving alone when an emergency happens, chances are high that they will drown.

The reasons described above are why it is so common for deaths to occur during recreational freediving. All of this can be avoided if one dives with an experienced partner (hire an instructor or join a group if needed) who can educate them on safety guidelines which can save so many lives each year.

Competitive Freediving Death Rate

When you think of competitive freediving, a sport where world class freedivers are pushing the limits of the human body by diving several hundred feet underwater and resurfacing all in one breath, you’d think that there would be fatalities at every event.

These people are risking their lives just so they can reach an extra meter deeper than their competitor, all the while enduring immense water pressure acting on their internal organs while depriving their body of much-needed oxygen.

If you think that there would be more deaths in competitive freediving compared to recreational freediving, well, the numbers are unbelievably low (thankfully). In all of the competitive freediving competitions worldwide, there has only been one death to occur so far (and we hope it stays that way).

In the more than 50,000 dives and counting that have been performed in competitions, suffering only one fatality is actually a statistical miracle. So how is it that competitors in one of the most extreme sports on earth are able to accomplish these amazing feats so reliably?

It’s thanks to the extreme skill that world class freedivers possess, as well as compliance with the strict regulations of AIDA (or similar freediving authority), that makes this dangerous sport as safe as possible.

If the rules are not followed, then the competition and any of the dives performed may be deemed illegitimate and no diving records can be set. To give you an example of how strict they are, here are some official rules:

  • There must be a minimum of one medical doctor present at any competitive AIDA world record attempt. Furthermore, a trained safety diver (spotter) or paramedic must be on standby.
  • The medical doctors at each event must have access to specialised gear, such as oxygen masks or a pulse oximeter in case they are needed.
  • The medical doctor reserves the right to disqualify an athlete from diving that appears to be unwell or who refuses testing.
  • Safety divers must pass a safety course provided by the event organizer to ensure they know what’s expected of them and test if they are capable of life-saving procedures.
  • All accidents and incidents are registered and reported.

.. and there are many more rules. As numerous and strict as these rules are, you can’t deny their efficacy. After all, the competitive freediving death rates are so low that tens of thousands of extreme dives can be performed with no loss of life.

Another possible reason that the death rates are so low in competitive freediving are the type of people this sport attracts. These are not the same happy-go-lucky, lackadaisical recreational freedivers that we discussed in the other section.

To be able to perform such superhuman feats of endurance, one would likely have:

  • Years of deliberate training where their goal is maximum performance.
  • Advanced tracking gear, such as dive computers that track surface intervals and depth with amazing accuracy to help them stay safe.
  • A strict fitness and diet regimen to prepare their body for the rigors of their sport.
  • Expensive and efficient freediving gear that helps them conserve oxygen and energy while helping them jet through the water like a torpedo: bi-fins or monofins, open-cell wetsuits, low-volume freediving masks, etc.
  • AIDA 2-star qualification training (or equivalent, depending on the categories) and higher.
  • A reliable network of spectators, training partners and safety divers that are closely monitoring them and will jump in whenever things go awry.

To sum it up, the reason competitive freediving death rates are so low is because the people involved are highly professional and on top of their game. Furthermore, the competitions themselves are well-managed and under intense scrutiny so that they adhere and enforce the strict safety guidelines.

Even sports like cycling, running, or SCUBA diving have a much higher death rate than competitive freediving. Therefore, as much as we want to say that freediving is “safe”, due to the many freediving attempts performed by amateurs that has led to many deaths, freediving will always be a risky sport.

Freediving Death Rates

wet static apnea training
Photo Credit: jayhem CC BY 2.0

Based on the incident reports provided by the Divers Alert Network (DAN), which covers the freediving deaths sustained between 2006 and 2011, there are approximately 61 deaths a year.

Out of 447 cases of freediving accidents, 308 or nearly 70% of cases are fatal. In other words, you should do everything you can to prevent an accident in the water, because you have a less than ⅓ chance of surviving one.

With that said, there may be some bias in these numbers, since these statistics are based self-reported by onlookers through the DAN website. For instance, there could be many more accidents that have occurred, but people didn’t know there was a website to report it.

Furthermore, if for example a friend or family member had an accident and survived, you may not be as likely to report it. On the other hand, someone who is grieving a loss and wants others to not go through the same thing will be more likely to do so, which might skew the data towards more fatalities.

The data also shows that the demographic of people who are most likely to lose their life while freediving are males between the age of 20 to 29 years old. Within this age range, 90% of the deaths are males and only 10% are females. Furthermore, 90% of all reported freediving deaths occurred in the ocean.

Notable Freediving Deaths

Amateur freediver deaths comprise the vast majority of all freediving deaths, however occasionally even professional freedivers can lose their life due to unforeseen circumstances.

Over the years, some notable figures in the freediving community have passed away while training, recreationally with friends, and very rarely in competitions.

Each freediver listed below has a long list of accomplishments which we briefly go over, and each one lost their life due to equipment malfunctions, errors in judgment, mysterious circumstances, or just plain bad luck.

Nicholas Mevoli

Nicholas Mevoli was an American freediver who was the first athlete to lose his life in an international freediving competition. Remember the 1 in 50,000 statistic we mentioned earlier? Unfortunately, Mevoli was that one person.

He had an obvious talent for freediving, having only freedived for about a year before he began to freedive competitively, winning two titles in the Deja Blue competition and placing third in the Caribbean Cup. While participating in the Caribbean Cup, he set an American record by reaching a 3-digit depth of 100 meters in CWT, being the first male to do so.

Mevoli set his sights on achieving a 72m (236ft) CNF dive on a single breath at Dean’s Blue Hole in the Bahamas, at an event hosted by Vertical Blue. This dive location has a depth of 202m (663ft), making it the world’s deepest blue hole in seawater.

After reaching 68m (223ft), he decided to turn back but then made the curious decision to resume diving, evidently believing that he could have gone even further. Mevoli eventually resurfaced after spending 3 minutes and 38 seconds underwater. He appeared fine, signaled that he was “okay” and even had his photo taken, but then suddenly lost consciousness and fell backwards into the water.

Despite being rescued by safety divers and being attended to by the event doctor, who tried to resuscitate him for over 90 minutes, his pulse could not be restored. He was eventually taken to the hospital where he was pronounced dead due to a pulmonary edema (fluid in the lungs).

Mevoli’s death was tragic because it seemed like he was fine when he resurfaced. Furthermore, people were confused as to why he decided to dive downwards again. According to competition rules, once a diver starts swimming up to the surface they must continue all the way to the top.

Perhaps when he first decided he needed to resurface was when he felt that something was wrong. If he had just headed back up instead of diving back down, would he be alive this day?

Audrey Mestre

Born into a family of SCUBA diving and snorkeling enthusiasts, it’s no surprise that Mestre would take to the waters. As a baby she already began swimming, and at only two years of age she came first place in a 25-meter swimming competition.

Even as a young girl, Audrey Mestre continued to excel in water-based environments and quickly made a name for herself by winning numerous swimming awards. When she was only 13, she was already proficient at SCUBA diving but due to French law, couldn’t get a full certification until she was sixteen years of age.

She eventually decided to try her hand in professional freediving after meeting a personal hero of hers, legendary freediver Francisco “Pipin” Ferreras. Mestre and Ferreras quickly entered into a relationship. Mestre moved to Florida to be with Ferreras and he became her freediving instructor. It would not be long before she started setting world records in no-limits freediving.

No-limits freediving is an official AIDA sanctioned discipline where the diver descends and ascends using whatever equipment they prefer. A common setup is to descend downwards using a dive sled that follows a fixed line, allowing one to reach great depths in one breath that normally would not be possible with self-propelled means.

To resurface, divers rely on inflatable lift bags to rapidly carry them back to the surface before they run out of breath. As you would expect, no-limits freediving is extremely dangerous, pushing the boundaries of what the human body is capable of withstanding at these extreme depths.

In October 2002, having set her eyes on breaking rival Tanya Streeter’s 160m (525ft) no-limits world record, Mestre attempted a no-limits dive to 171m (561ft). The dive started out smoothly, and she successfully reached her target depth. Then Mestre came to the horrifying realization that there was no air in the cylinder that was supposed to inflate her lift bag.

A rescue diver attempted to inflate the lift bag using whatever air he had in his tank, but it failed to inflate the bag fast enough. With no other choice, Mestre desperately tried to resurface on her own. If everything had gone according to plan, the entire dive should have only taken Mestre three minutes. However, she remained underwater for over eight minutes.

It was clear that the dive did not meet the normal freediving safety standards. There was a lack of safety divers, insufficient rescue equipment, no doctor at sea or shore, and the most damning mistake, no air in the lift bag air tank. Ferreras himself was supposedly in charge of filling the tank and making sure it had been charged.

When Mestre had finally been recovered to the surface after nine long minutes which seemed like an eternity to everyone involved in the dive, she still had a pulse. However, there were no doctors on the boat, and all resuscitation attempts failed. She was pronounced dead at a hospital by the shore.

Mestre’s death was mired with controversy, with much of the blame put on her husband, Francisco “Pipin” Ferreras. Many accusations were made, one of which was that Ferreras had pressured Mestre into doing this dive, and that his negligence and influence on her led to her death.

Stephen Keenan

Steephen Keenan was the Chief of Security for many Vertical Blue freediving competitions and also an AIDA, EFR, and PADI instructor who was well-known in the freediving community. Keenan’s work as a safety diver was so prolific that he would almost always be seen in photographs next to freedivers who were celebrating their new record-breaking dive.

Keenan himself was also an accomplished freediver, at one point holding three Irish national freediving records in depth: 52m (170ft) CNF, 74m (243ft) FIM, and 81m (266ft) CWT. Only someone of his calibre could be relied upon to perform daring rescue attempts at over 50m (164ft) underwater.

Freediving competitions would not be possible without a team of at least four to five safety divers. Diving to depth is rarely the issue, in fact past 20m (65ft) divers will begin to freefall which helps them reach depth while conserving oxygen. Problems are more likely to arise when divers make their ascent against the negative buoyancy as their oxygen levels start to run low and their risk of blackout increases.

Thus, multiple safety divers are needed at various depths to monitor the freediver’s well-being and provide assistance if needed. This is what Keenan was known for, and he always pulled through, making him an icon in the freediving community.

On one fateful Saturday, Keenan was working as a safety diver for Alessia Zecchini, a world record holder with an impressive dive of 104m (341ft) at the prestigious Vertical Blue competition. This time, she was attempting to traverse the arch at Dahab’s Blue Hole off the coast of Egypt. Conditions weren’t great; the winds were high, visibility was low, and the currents could send any freediver off-course.

Despite this, Zecchini pushed onward trying to reach the Arch and back without fins, relying only on a custom breaststroke and Keenan’s watchful eye. Unfortunately, she became disoriented when she reached depth and her ascent was slow. Keenan took action around 50m (164ft.) and began to provide assistance.

Details are not clear regarding what happened from the time Keenan started his rescue attempt and when Zecchini reached the surface. The facts are, when Zecchini surfaced she was alone and Keenan was nowhere to be seen. A search party was immediately dispatched and Keenan was soon found floating face down and unresponsive.

It is believed that Keenan suffered a shallow water blackout (which typically occurs around a depth 10m/33ft) and drifted away from Zecchini as she was trying to resurface.

Since the two divers did not surface together, precious time had to be spent just trying to locate him. By the time life-saving measures were performed on Keenan, too much time had passed and he could not be resuscitated.

Even in the dive that claimed his life, Keenan was able to successfully rescue the distressed athlete he was monitoring. No matter who was in his charge, he was known to watch them intently and stay underwater for long periods of time, to the point that even his own breath would nearly run out. His tenacity and selflessness was put on full display in his last dive, and he was hailed as a hero.

Keenan’s unfortunate passing devastated many in the freediving community. It marked the first ever recorded death of a safety diver while performing his duty in a freediving attempt. It also put the spotlight on the safety and well-being of safety divers, since almost all of the attention is on the athlete.

People often forget that safety divers must freedive to impressive depths as well, and they are also just as likely to suffer a shallow water blackout like the athletes in the competition. Keenan’s passing was a grim reminder that no matter how accomplished a diver is, even in the role as a safety diver, no one can avoid the risk of a shallow water blackout.

Natalie Molchanova

natalia molchanova

Unlike Audrey Mestre who took to the waters at a young age, Natalie Molchanova did not start her freediving career until she was 40 years old. She only began in order to get her mind off of a recent divorce, after learning about the sport in a freediving magazine. With a background in competitive swimming during her college years and a love for open water swimming, she tried her hand at freediving and was soon breaking records.

Within a year she had set her first Russian record in the pool discipline. She achieved a 9:02 breath-hold in static apnea (holding one’s breath for as long as possible without moving). Another feat Molchanova could accomplish was staying underwater for three and a half minutes while continuously swimming. With such an impressive breath-hold capacity, she felt that a freediver should move from the pool and freedive in open water.

Over the next 13 years, she would set record after record, eventually claiming 41 world records, making her one of the most accomplished female freedivers. People began to give her monikers like “The Queen” or “The Machine” in recognition of her dominance in the sport as well as superhuman endurance. Molchanova liked to break world records on her birthday in defiance of the idea that her old age is preventing her from being the top athlete.

One unsuspecting day, two miles west of La Savina port on Formentera, Molchanova was giving a private freediving lesson. She attempted a planned dive to 35m (115ft), which is quite a deep dive especially without fins, however her personal best in this discipline is 70m (232ft). Furthermore, the conditions that day allowed for over 65 feet of visibility, so theoretically a safety diver could have kept watch from a distance.

However, being the only experienced diver in the group and the one who would be attempting the dive, nobody was watching her back. Molchanova would dive down and never resurface again. Soon the local coast guard as well as the Guardia Civil were alerted by Molchanova’s friends and a large scale search was conducted.

Unfortunately, it is believed that Molchanova had 6kg (13lbs) of dive weights on her, so if she had lost consciousness she most likely would have remained underwater due to the negative buoyancy. The possibility that Molchanova would be floating by the surface was ruled out. Thus, an extensive underwater search was conducted, however the area where Molchanova disappeared reached depths of 80m (262ft) which complicated matters.

Search efforts yielded nothing and eventually was suspended. Molchanova’s body was never recovered, and she is presumed dead. The disappearance of Molchanova shocked the freediving community.

How could such an accomplished diver who was attempting a dive that was, by her standards, quite easy to do, fail to resurface? It is believed that Molchanova was swept away by an underwater current that sent her hundreds of meters away from her original location, which could explain why the search party could not find her.

Loïc Leferme

loic leferme

Loïc Leferme was one of three people who founded l’Association Internationale pour le Développement de l’Apnée (a.k.a. AIDA International). In addition to that, he was a world record competitive freediver who once held the world record in the No-Limits discipline for his 171m (531ft) dive until Herbert Nitsch took the record with a 183m (600ft) dive.

On April 11th, 2007, Leferme was training to take back the No-Limits record from NItch outside Nice bay of Villefranche-sur-Mer. He attempted a training dive to 171m (531ft), which was the same depth as his old world record.

After two and a half minutes underwater, Leferme reached depth and started up the anti-ballast which eventually suffered a malfunction 80m (262ft) from the surface. The surface team eventually realized something was wrong but could not pull him to the surface, and it appears no back-up system was utilized.

After Leferme had been submerged underwater for approximately six and a half minutes until the SCUBA team found him floating at about 20m (65ft) and brought him to the surface. He was suffering from a cardiac arrest and all attempts to resuscitate him failed.

Furthermore, the cause of the equipment malfunction could not be determined because all of the equipment was cut and dropped. Could the anti-ballast have failed due to an entanglement, perhaps the bearings failed? Unfortunately, only speculations can be made.

Four years prior, French freediver Audrey Mestre passed away under eerily similar circumstances. She was attempting a 171m (531ft) dive when her sled also failed to rise and she could not be rescued in time.

Leferme was 36 years old and is survived by his wife and two children. He was planning to break Nistch’s record in July 2007.

How Dangerous is Freediving Exactly?

We’ve been throwing around a lot of statistics and any activity comes with its share of risks, so the question you might be wondering is “is freediving safe?” After all, even accomplished freedivers have lost their lives to this sport that they love.

The answer of course is not a simple “yes” or “no”. There are many factors such as whether you have an existing medical condition or not, know the safety guidelines, have the right gear and know how to use them, have a diving buddy, and so on.

If you know you are missing something crucial to the dive you are willingly putting yourself at risk, then you are basically gambling your life away. If the weather conditions aren’t optimal or you are diving alone, an accident will almost certainly be fatal.

It’s up to you to do the proper research or hire an instructor to teach you, because the ocean doesn’t care whether you’re a pro or a first-timer. One slip-up can easily send you to a watery grave.

Hopefully in the future, as freediving becomes more well-known, there will be more advanced freediving equipment injury prevention methods to keep loss of life to a minimum.

Until then, always err on the side of caution. Use the right equipment, train with a safety diver, train diligently, and don’t let pride be your downfall when trying to set new personal records.

Photo Credits:

How to Increase Breath Hold for Freediving

Every freediver strives to improve their breath-hold time, and doing so requires diligent training as well as an understanding of what saps your oxygen the quickest. Unfortunately, rationing your oxygen isn’t as intuitive as rationing something tangible like food, where you can easily see how and feel much you have left.

It’s common sense that performing any movement consumes oxygen. However, even without intentionally moving any muscle, your internal organs will always be functioning and consuming oxygen, particularly your heart and brain. If you can’t keep your heart rate as low as possible, then you will use up your oxygen supply faster and limit your breath-hold duration.

Furthermore, if you start panicking or stressing out while underwater then your heart rate will dramatically increase even if your external movements haven’t changed. Being in a panicked state can also cause you to not think clearly, to move erratically and waste energy, all of which will result in decreased breath-hold time and increased risk of a blackout.

As such, there are many questions we hope to answer in this article. We’re going to cover how to increase breath hold for freediving, top factors that can drain your oxygen, ways to stay calm, our recommended training style, the dangers of hyperventilation, and what happens to your body as you hold your breath for too long.

Basic Safety Rules for Freediving

Before we get into the nitty-gritty of how to increase your breath-hold for freediving, we need to go over some basics because even while training things can go wrong.

Any sport where you restrict your breathing, such as freediving and spearfishing, is inherently risky due to the risk of blacking out and drowning. Each time you dive underwater, you will be subjected to mother nature’s whims and be at her mercy.

By erring on the side of caution, you can overcome many of these obstacles and reduce your chances of blacking out. The most important safety rule of freediving and spearfishing is to be prepared for emergency situations. Here’s how you can do that.

Keep a Dive Log

Even though you are trying to improve and push past your limits, first you need to have a good understanding of what your current limits are. It is important that you keep a dive log of each attempt so that you have a baseline for approximately how deep you can dive and resurface without issues. Then from that baseline, you can begin to push your limits.

Be very thorough and record everything you can about the dive. Log the location, what kind of equipment you were wearing, if you were diving in freshwater or saltwater, how many dives you attempted, how long you rested in-between each dive, the duration of each dive, the depth of each dive, and any other information you think is pertinent.

Without a step-by-step and thorough process like this, a beginner may misjudge what they are actually capable of and find themselves gasping for air while still dozens of feet underwater. Have the patience and work ethic to make gradual progress in your freediving attempts, and soon you will have enough experience to blow past your limits.

Never Dive Alone

constant weight freediving with spotters
Sylvain7171 / CC BY-SA

Always bring at least one other person with you whenever you head out into the water. During apnea, there is a possibility that you can blackout. Without a partner to monitor your progress, if this happens you will almost certainly drown.

Hyperventilating (and why you shouldn’t do it)

When our body accumulates too much carbon dioxide, it will send out a signal to warn you that you need to breathe. Being aware of these warning signs is crucial so that you know when you’re about to black out.

Many freedivers use a breathing technique known as hyperventilating where they deeply inhale and exhale rapidly to fill their body with more oxygen than normal before beginning their dive. This can trick your body into not sending a signal to your brain to remind you that you need to breathe soon.

In effect, hyperventilating makes it so you will not be able to tell when you are on the verge of a blackout which puts you most at risk of a sudden blackout. We do not recommend the practice of hyperventilating for freediving or spearfishing.

(Skip to the section on the Risks of Hyperventilating by clicking here).

Quit Smoking

Easier said than done, right? However, even temporarily putting a hold on smoking leading up to a freediving event may help you recover enough lung function to make significant progress. If you are a smoker and a freediver and want to increase your breath-hold times, it’s quite obvious what the solution is.

Dry Static Apnea Training

Training in the water poses the same risks as if you were competitively freediving. At any point you could lose consciousness, choke on water, suffer a medical emergency, or any number of unexpected things.

That is why you should consider dry training. By taking the proper precautions, you can increase your breath hold for freediving with dry training in a safe and more convenient environment.

Dry Training vs. Wet Training

Dry training is exactly what it sounds like: training your breath-hold on land, whereas wet training is done in the water. Pretty intuitive. Of course, nothing can be a perfect substitute for wet training when it comes to providing the most realistic conditions for freediving and spearfishing.

With that said, dry training has its benefits, namely that many professionals use it to increase their lung capacity and to enter the ideal headspace for their dives, all within the comfort and safety of dry land. Its popularity is due in no small part to the fact that it can be done without a training partner since there is no risk of drowning.

How Dry Static Apnea Will Improve Your Freediving Breath-Hold

We need to come clean here. Dry static apnea training won’t help your body adapt to freediving deeply. Only plenty of experience actually freediving can do that. Additionally, dry static apnea does NOT strengthen your lungs, only sprints, lung stretches, or an Air Restriction Device can do that. So why are we even talking about this?

Dry breath-hold training is effective for training your mind and body to withstand the obstacles that freediving breath-holds will bring up. By focusing on apnea training, you can improve your diaphragm contractions, overcome the urge to breathe by boosting CO2 tolerance, handle low oxygen levels, and steel your mind to remain calm no matter the situation.

It’s probably the best way to train your breath-hold without the risks associated with freediving.

How to Do Dry Static Apnea Training

(Disclaimer: While relatively safe, dry static apnea training involves holding your breath which can result in blackouts and injuries sustained due to blacking out. The advice we are providing is, to the best of our knowledge and experience, correct and reasonably safe to do. However, you follow this advice at your own risk. Always perform static apnea training on a flat, soft surface such as a bed or padded floor.)

Step 1: Lay flat on a bed or the floor. If you are on the floor, we recommend setting up a yoga mat or putting some kind of padding to make the experience more comfortable.

yoga mat for dry static apnea training

Step 2: Listen to some relaxing music; you want to calm yourself down and also have something to focus on so that you can be distracted from the discomfort of your body’s urging you to breathe. Don’t play upbeat or loud music as this can cause your heart rate to increase.

Step 3: Get a timer and set it to the times listed in the CO2 table. Don’t try to do the counting yourself; while it would make a good distraction, humans are notoriously bad at counting time accurately, especially when they are slowly suffocating.

Step 4: Perform your pre-dive breathe-up. The standard method is to perform two-minutes of slow breathing, where you exhale for twice as long as you inhale. So if you inhale for five seconds, make sure to exhale for ten until two minutes have elapsed.

Step 5: With the breathe-up complete, it’s time for the final breathing preparations. Fully exhale all of the air in your lungs. Then do one long inhale until your lungs are nearly full (say, 95%). Going all the way to 100% is considered bad practice because of how uncomfortable it feels and it is likely to impair your concentration.

Step 6: Hit play on your music device and also make sure the timer is ticking, you’re on the clock now.

Step 7: The entire time during apnea, you are trying to limit your heart rate by remaining as calm as possible. If you’re not sure how to do that, here’s a good starting point. First, you need to associate the underwater environment with something positive.

Picture yourself in a picturesque lake, or in the tropical ocean of Hawaii. Next, imagine yourself diving to the bottom to explore. Feel the water against your skin, fish swimming within reach around you, underwater flora all around you. Are you feeling relaxed yet?

Step 8: No matter how good you are at distracting yourself, as you approach your limit the natural contractions urging you to breathe will no doubt get more violent. At this point, tuck your chin down to your chest.

This not only feels comfortable, but it can protect your face when diving deep. Also, no doubt the contractions are causing you to panic a bit and increasing your heart rate.

To maintain a low heart rate, understand that the convulsions aren’t actually hurting you and that they will happen naturally (assuming you haven’t hyperventilated). Once you’ve made peace with this fact it will give you peace of mind and prevent further panicking in the future.

Step 9: As you near the end of your breath-hold, picture yourself successfully returning to the surface.

Step 10: The imagination part of the exercise is mostly over. Open your eyes, and follow up with 5 hook breaths. If you want, you can keep on imagining yourself in the water because this breathing technique is exactly the thing you will be doing during the real thing.

Hook breaths are a special way to breath that you should do after resurfacing from each dive (not before). It rapidly supplies your bloodstream with oxygen faster than regular breathing, which can help prevent surface water blackouts.

To perform a hook breath, you inhale air like normal, but then keep the air in your lungs while exerting a downward force using your abdominal muscles and diaphragm. This raises the air pressure in your lungs and forces oxygen into your brain faster.

Try following a cadence of: inhaling for 1-2 seconds, then holding your breath and pushing down with your diaphragm and abdominals for 1-2 seconds, exhale, and repeat 3-5 times.

Congratulations, you’ve successfully completed a dry static breath-holding training session. Using this visualization technique and with the help of music, you should be able to train your mind to stay calm and keep your heart rate low. This should result in your breath-hold lasting significantly longer.

Soon, you will be able to last for a two-minute or longer dry static breath-hold right off the bat. Once you’ve reached a breath-hold spanning more than three minutes (which is doable after some practice), then your ability to stay underwater while freediving will have increased significantly as well.

CO2 Tables for Dry Static Breath-Hold Training

Without a structure to your breath-hold training, you won’t be as effective in achieving milestones. A CO2 table (carbon dioxide table) can give you an idea of a recommended breath-hold time to shoot for as well as how long to rest between each attempt.

The general structure of a CO2 table is laid out like this. There will be a column listing the apnea time to aim for. There will also be a column with the recommended breathing time as you prepare for the next set.

(The table below is structured around someone with a breath-hold of 3 minutes. A rule of thumb is the breath hold should be around 50% of your maximum limit and the training should only last for 8 cycles or sets).

ventilate – 2:30 min apnea – 1:30 min
ventilate – 2:15 min apnea – 1:30 min
ventilate – 2:00 min apnea – 1:30 min
ventilate – 1:45 min apnea – 1:30 min
ventilate – 1:30 min apnea – 1:30 min
ventilate – 1:15 min apnea – 1:30 min
ventilate – 1:00 min apnea – 1:30 min

As the breath-hold training session progresses, each subsequent set will have a shorter breathing period, while the apnea time remains the same. In other words, the sets will get progressively more difficult because you’ll have less time to get rid of the CO2 in your system and fully recover between sets.

This forces your body to get accustomed to apnea with some CO2 in your body. You will adapt and build a tolerance for CO2 so that you can get accustomed to the discomfort of being out of breath while underwater. CO2 tables will help you resist your urge to breathe by desensitizing your body to diaphragm contractions.

All of this will result in a more relaxed dive and superior breath-hold times.

Why Dry Static Apnea Training Instead of Other Methods?

Dry static breath-holds are the ideal training method for a couple of reasons:

Convenience. You don’t need any specialized equipment, supervision, or a pool. You can do it basically anytime you want, anywhere, and there’s no risk of drowning since you’re not even in the water. Furthermore, you don’t need to ask anybody to help you out which is a plus.

Safety. As the name suggests, this is a type of dry training which means you are not in the water at any time. Even if you push yourself too far with your breath-hold and lose consciousness, your body will start breathing again on its own and you’ll live. With that said, you should do the training laying down on a soft surface so that you don’t hurt yourself if you faint.

Disadvantages of Dry Static Apnea Training

Despite their advantages, dry static breath holds are not without their downsides. Since you’re not actually training in the water, even if you have an impressive breath-hold time on land, it doesn’t necessarily mean you’ll last as long underwater.

The purpose of dry static breath-holding is to help you get used to the uncomfortable effects that apnea causes your body. However, if you never get a chance to head into the water to freedive and measure your progress in the proper environment, then your body will not be as accustomed to underwater apnea as it could.

Furthermore, being underwater will trigger our Mammalian Dive Reflex which provides us with useful breath-holding benefits such as a naturally reduced heart rate and priority blood flow to our major organs. These factors make it hard to compare your apnea times on land compared to underwater.

Dry Static Apnea Training Frequency

Aim to do dry static breath-hold training 3-4 times a week. After a couple of weeks of successful training, you can expect an increase in your breath-hold times while underwater.

Training Your Lungs for Freediving

hiit training for freediving

Mentioned above, dry static apnea training increases your CO2 tolerance and also serves as a relaxation technique to keep heart rate low, thereby decreasing oxygen consumption. It does not actually improve the strength of your lungs to inhale more air.

To do that, you need to perform sufficiently stimulating cardiovascular exercises, such as High Intensity Interval Training (HIIT), an example of which is sprinting at top speed for a few seconds, resting, then sprinting again, etc. You can also do lung stretching exercises like yoga.

Another way you can train your lung strength to inhale air more efficiently is with the use of an Air Restriction Device such as the Powerlung. Practice twice daily for five minutes each session and you can get stronger lungs in just a few days.

How to Equalize for Longer Dives

In order to be an effective spearo or freediver, you need to know how to deal with underwater pressure as you head further underwater. If you’ve ever been on an airplane, then you’ve probably experienced an increase in pressure on your sinuses or ears, almost to the point of pain.

Freedivers will need to work on their equalization techniques simultaneously with their static apnea training because both will benefit longer dives immensely. Before getting in the water, the first thing you should do is pre-equalize. After all, spending precious oxygen to equalize in the water is something you should limit doing.

The best way to equalize underwater efficiently and quickly is a method known as the Vasalva Method. You’ve probably already done this many times without knowing what it’s called.

To perform the Vasalva method, simply pinch your nose and try to exhale through it. This will pressurize your sinuses by forcing air through them so that you can continue diving without discomfort. By pre-equalizing before a dive, you save some energy by not having to do it in the earlier depths which can help you dive longer.

Rest Time Between Dives

Some divers have complicated formulas that they use to calculate the perfect surface interval between dives. We want to keep things simple, so here’s the only rule. You should rest at least three times longer on the surface compared to what you spend underwater. So if you spent 60 seconds underwater in your most recent dive, consider resting for at least 3 minutes before diving again.

This might sound excessive, however, the benefits are massive. Many experienced freedivers and Spearos will tell you that they swear by this rule, and that they have not experienced a single blackout over their years of diving. You can take the risk of resting less if you’re impatient, but it’s your life that you’re gambling.

Even with this knowledge in mind, it can be difficult to accurately estimate your surface interval. That is why you should consider investing in a dive watch. It’s a hefty sum of money but it’s worth it. Many beginner’s estimates are so dangerously off-base; they are at serious risk of blacking out.

What may seem like 3-4 minutes on the surface may, in fact, only be about 90 seconds. So either have a buddy track the time with a watch by the boat or invest in a dive watch. You can also use it to track dive time and depth, of course, however we urge you to pay the most attention to surface interval.

With sufficient practice, your depth and breath-hold time will surely increase, but it’s by being generous with your surface intervals that you can achieve this progress.

Wet Static Apnea Training

wet static apnea training
Photo Credit: jayhem CC BY 2.0

Another common training technique for freediving breath-hold training is wet static apnea. Apnea is described as a “temporary cessation of breathing.” Static means to lack movement. Put these terms together, and you can get a pretty good idea of what static apnea means: holding your breath while not moving.

Freedivers practice static apnea since it is a close approximation of being submerged in the water. You can practice the static apnea technique both in the water, and even on dry land.

For wet training, a freediver will float along the water’s surface on their backs. What should naturally happen if the body is fully relaxed is eventually one will roll over and submerge their face underwater. The whole time, the freediver is concentrating on staying calm in a zen-like state, as if they were meditating while holding their breath.

A training partner will nudge the diver at set intervals, and the diver will perform a quick hand maneuver while keeping their body as still as possible. Once the diver is out of breath, they will record the breath-hold duration and go over what the partner can do to improve their times.

Static apnea training can be done dry as well. The differences are minor; the diver will lie on their belly on a flat surface and relax their body. Next, the diver will hold their breath and a partner will tap the diver periodically to ensure they are still breathing.

Whether it’s wet or dry training, both require a clear mind. Your brain will send warning signals to remind you to breathe long before your body runs out of oxygen. Only with experience can you know what your limits are and how far you can push yourself without blacking out. Relaxing the body is crucial for static apnea training since even slight movements will consume precious oxygen and limit how long you can dive.

What Happens When You Hold Your Breath for Too Long

For inexperienced freedivers, the thought of holding your breath for several minutes underwater seems unbelievable. The average person will reflexively want to breathe after just 20-30 seconds underwater. In this section, we’ll go over the whole process of what it’s like for a pro to hold their breath for so long, as well as the risks that this poses.

I’m sure you know that when you inhale, you take in oxygen and when you exhale, you release carbon dioxide. While freediving, you are not able to inhale any oxygen during a breath-hold. This results in a buildup of CO2 that should be exhaled, but instead accumulates in the bloodstream and lungs.

When sufficient CO2 has accumulated, your body will transmit a signal to the brain which triggers an urge to breathe. With enough training, you can inhibit these natural convulsions that your body is generating. This is dangerous because you are ignoring the warning signs that your oxygen levels are running low.

Some freedivers take it even further by allowing their body to go through a natural process known as spleen venting. First discovered by observing whales and seals in the wild, a spleen vent is when the body injects a reserve of oxygen into the bloodstream. In humans, this is not a commonly occurring event, typically only occurring when one is in shock or about to suffocate.

Researchers sometimes refer to the spleen as a biological scuba tank that may be the result of an evolutionary trait that mammals have. It stores up to 15% of the oxygen-rich blood in your system and acts as a natural reserve for emergency low-oxygen situations.

As cool as this sounds, this isn’t something you should rely on, nor is it some bountiful supply of fresh oxygen. By continuing to hold your breath and using up this reserve, your body will experience the next phase of suffocation.

Your brain consumes significant resources in order to function, and 20% of the body’s oxygen is used up to keep your brain running smoothly. When you lose too much oxygen, as a self-preservation mechanism, your brain will shut itself off to conserve oxygen.

The shutting down of the brain is known as a blackout, and blacking out underwater basically means certain death unless someone is around to rescue you. To avoid experiencing this, you must improve your lung capacity. Educate yourself and practice the techniques in this guide so that you can hold your breath for longer.

Risks of Hyperventilating

We all want to extend our bottom time  in order to become the best freediver so we are all learning ways to increase our breath-hold. But at what cost? Obviously long breath-holds increase our risk of death; as one’s bottom time improves, the chances of a shallow water blackout increases in equal measure.

Hyperventilating is a breathing technique that many freedivers and spear fishermen practice to instantly increase their breath-hold time. By breathing in excess of the need that our body has for oxygen while exhaling as much CO2, you are hyperventilating.

This is most commonly done by performing rapid shallow breathing (similar to what you might see in a show or movie where a panicking character needs to find a brown paper bag to breathe into in order to calm down).

The benefit of this is an instant improvement in breath-hold time. The downside is it tricks your body into not sending out signals urging you to breathe. You could be mere moments away from a blackout and not feel any urgency to breathe. As such, hyperventilating is one of the most common ways divers experience a shallow water blackout.

The Importance of Relaxing Underwater

Don’t expect to be able to hold your breath underwater for several minutes at a time without months and years of training (or the help of a snorkel). Building up your breath-hold takes time and lots of practice. Furthermore, progress should be made slowly, since one misstep and you run the risk of drowning. But in essence, the key to how to relax underwater can be boiled down into staying calm and limiting your movement.

Whether you’re spearfishing or freediving, movements should be kept to a bare minimum. If you’re a Spearo, movement will reveal your presence to fish. Furthermore, moving your muscles requires oxygen, so the more you move the faster you have to resurface. As a freediver, each movement must take you closer to depth or to the surface. Panicking will cause you to move more frantically and make mistakes, which wastes precious oxygen as well.

Tips to Increase Breath-Hold For Freediving

We’ve gone over a lot of theory about how you can hold your breath for longer, but in this section we will go over some practical tips.

Reduce Your Heart Rate

Each time your heart beats, it consumes oxygen. It follows that a higher heart rate will use up oxygen faster. Before a dive, you need to decrease your heart rate, ideally, to below 45 BPM. Find a way for you to decrease your heart rate using whatever method works best for you, whether it is through meditation or doing slow and controlled breathing.

Meditating is quite simple; you don’t need to be some mountain guru or Buddhist monk in order to effectively meditate. Try this at home or in a quiet environment. Simply close your eyes and focus on performing slow, controlled breathing. See if you can enter a state where you are nearly semi-conscious, yet still aware of your surroundings, almost like an out-of-body experience.

Even if you don’t reach those levels of meditation, at the very least the controlled breathing should reduce your heart rate. Once you feel like you’ve calmed down, then you can begin to dive.

Pre-Equalize

Prior to a dive, pinch your nose and exhale to clear your sinuses. This will keep you pressurized for the initial stretch of the dive to conserve as much energy and oxygen early on (every little bit helps).

Controlled Movements

Remember your static apnea training. Every action you did was intentional, as was any inaction. Don’t deviate from what you practiced and try new techniques in the middle of a dive.

Your movements should be calm and performed perfectly. Keep in mind that your legs are the largest muscle group in your body and consumes a lot of oxygen. Each kick with the monofin must be as efficient as possible to generate thrust while keeping energy expenditure to a minimum. All of this is only possible if your movements are well-rehearsed and controlled.

When you reach the point of freefall, it will be easy to coast downwards while conserving plenty of energy. On the ascent, maintain a hydrodynamic body posture and continue kicking efficiently. Once you’re 15-20 ft. from the surface, you can begin to relax as your natural positive buoyancy takes you to the surface.

Stay Flat

Undulate your body only as much as you need to in order to generate thrust, but otherwise stay as flat as possible. Bending too much can shift or compress your internal organs in such a way that is not conducive to holding your breath for as long as possible. In other words, staying flat will help you to avoid certain variables that could potentially limit your freediving potential.

Wear Properly Fitting Gear

If your weight belt or wetsuit is too tight, for instance, it can constrict your body too much and make it difficult for you to get a full breath of air by the surface. You need gear that is flexible, such as a rubber weight belt, so that you do not restrict your diaphragm to allow you to store as much oxygen as possible.

Know Your Limits

We’ve mentioned this several times in this article, but it is so crucial to know how far you can push yourself. You cannot truly know your limits without lots of practice and keeping a log of each dive attempt. Without a baseline for you to reference, each dive attempt will depend on too much guesswork.

By knowing approximately how deep you can dive on average as well as your personal bests, you can get a feel for whether a dive was successful or not. You can also decide whether you are feeling up to setting a new record that day, or if you should resurface and rest up.

By having a good understanding of your limits, you’ll know when to push yourself and when to ease up on the training. This makes making progress on your breath-hold training while staying safe so much easier.

Beginner’s Guide to Constant Weight Freediving (CWT)

Freediving is a fun activity to do recreationally, but one can also freedive competitively to reach new depths with just a single breath. One such competitive freediving discipline is constant weight freediving, and in this article we will discuss how to do it safely, the inherent risks involved, and well as the recommended equipment for it.

What is Constant Weight Freediving?

Constant weight freediving, otherwise known as constant weight apnea, is a sport where a diver must descend to depth and ascend to the surface with the assistance of only bi-fins or a monofin. The diver will swim next to a dive line the entire time, however they are not allowed to grab the line for assistance except once at the bottom to help them begin their ascent.

The “constant weight” aspect of this discipline means the diver cannot do anything to change their weight. In other words, they are not allowed to wear a weight belt, neck weight, or use a weighted sled.

They must fight against their positive buoyancy until they reach a depth where they start to freefall. On the way up, divers must contend with their negative buoyancy. As with all freediving disciplines, the diver must accomplish this all in one breath.

Comparing Constant Weight Freediving to Other Disciplines

Constant weight freediving is a specialized way of freediving that places an emphasis on performance and reaching the lowest depth in a single breath hold. Freedivers that participate in this activity are very goal-driven; their primary objective is to descend straight down as far as they can go and return to the surface safely.

This type of freediving is often performed in competitions so that competitive freedivers can determine who can set the new world record and achieve acclaim.

Other freediving disciplines are not so strict in their rules. Compare constant weight freediving to recreational freediving, for example. Recreation freediving has no rules, so divers can use whatever equipment they feel like to assist them.

Furthermore, when done recreationally, divers can enjoy their time underwater by taking in the scenery and exploring during their breath holds. Essentially, it prioritizes enjoyment over performance, which is why casual freedivers tend to prefer it over constant weight freediving. Not everyone wants to set new records and break boundaries; many simply wish to relax and enjoy their time in the water.

How to Constant Weight Freedive

Now that you have an idea of how constant weight freediving works, in this section we focus on how you can perform a constant weight freedive.

Get in a Boat

freediving by a boat

Since constant weight freediving is all about going as deep as you can underwater, you can’t exactly perform it in your neighborhood pool or in shallow reefs. You need to head out into deep water by boat so that water depth is no longer your limitation, but rather how long you can hold your breath.

Set Up a Dive Buoy and Line

It is extremely important that you have a dive buoy and line set up to guide you as you dive deeper into the water. The deeper you go, the harder it gets to orient yourself and the dive line will ensure that you continue to head in the right direction as you descend.

To further ensure they are headed in the right direction, some freedivers even attach themselves to the line using a lanyard. A secondary benefit of the dive line is that the markings on it can help you track your depth.

Put On Your Fins

Typically, constant weight freedivers will use monofins for maximum performance, however you are free to use bi-fins if that’s what you’re comfortable with. The downside of bi-fins is that it gets outperformed by monofins in terms of power. Monofins, on the other hand, generates significantly more thrust as you undulate your body.

There’s a reason why the monofin design is inspired by dolphin fins; it will help you cut through the water like one. Bi-fins can be used as a beginner to get used to constant weight freediving, however the goal is to one day upgrade to using monofins.

Bi-fins are not sustainable in the long run since they cannot replicate the strong propulsion that monofins can unless you increase your kicking rate which would only serve to drain your energy and oxygen reserves. Since performance is everything in constant weight freediving, one must make their breath last as long as possible while swimming quickly in order to maximize performance. This best way to do this is with monofins.

Dive With Buddies

As with any water activity, one should never dive alone. Shallow water blackouts or other such emergencies can occur at any time, so you should always have at least one other person on lookout just in case.

In a sport like constant weight freediving, the need is even greater since emergencies are most likely to occur on the ascent. Freedivers can misjudge how much breath they have remaining and may need to be rescued out of the water or resuscitated.

Dive

Once all of the preparations have been made, it is finally time to dive. You cannot use any weighting systems to help you, and you must descend along the dive line without touching it. The exception is when you want to turn around and start your ascent.

The entire time, stay calm and perform proper finning technique. At around 25-30m (80-100ft.) you will feel the water pressure decrease the buoyancy in your lungs, causing you to become negatively buoyant and freefall deeper and deeper. This will help you reach your desired depth, but keep in mind you must fight against this negative buoyancy on the way up, so know your limits.

Dangers of Constant Weight Freediving

Every water sport has a risk of drowning, and with an activity like freediving, the risks are even greater. As such, it should not be performed by individuals who are not confident in their swimming skills or finning technique. Furthermore, one should be comfortable with their breath hold technique and to stay as calm as possible in order to conserve oxygen.

There are precautions one can take to reduce the chances of an underwater emergency occurring. However, one cannot completely alleviate these risks, however it can be the difference between life or death.

Overestimating Your Limits

When it comes to constant weight freediving, the object is to dive as deep as possible without altering one’s weight. Oftentimes when inexperienced freedivers dive to a depth where they start to freefall, they get too caught up in the momentum and end up diving too far.

A freediver must never forget that for every bit of distance traveled during the descent, it must be traveled a second time on the ascent. Unfortunately, even if one is aware of this fact, estimating the half-way point of one’s dive can still prove to be difficult.

What we want to avoid is a situation where one reaches their “half-way” point only to realize they are nearly out of oxygen and energy. This will only serve to cause panic which will lead to mistakes, as well as increase one’s heart rate and use up their remaining oxygen even faster. With that said, how does one reach new depths and set new personal bests with these challenges in mind?

Pushing Past Your Limits

constant weight freediving with spotters
Sylvain7171 / CC BY-SA

In order to push yourself safely, you should strive to gradually dive deeper and always with at least one other experienced diver such as an instructor or a trusted spotter. Your dive progression should be well-documented and record setting attempts should be done sparingly.

By keeping a detailed log, you can objectively track your progress and make informed decisions on whether you should keep pushing ahead or take a few steps back to practice until you’re more comfortable.

When you want to increase your dive depth, make achievable goals. For instance, if you set a record of 20m (~65 ft.) on your first constant weight freediving attempt, it is reasonable to aim for a 25m (~82ft.) dive next time. But while everyone has different limits, it would not be reasonable if you tried to dive twice as far for the next attempt, so stay close to your limits.

As you try to set new personal bests, have a spotter follow you halfway down and stay there to monitor your descent. On your way back up, your dive buddy can observe if you are exhibiting any signs of distress.

If it is not immediately obvious, you can signal to your partner that something is, indeed, wrong. Whatever the case, having someone watching your back is crucial in the event that an emergency arises.

Underwater Blackouts

A blackout occurs when one loses consciousness due to lack of oxygen reaching the brain. This can occur as one pushes the limit of their breath-hold and usually happens unsuspectingly to freedivers who hyperventilate and suppress their instinct to breathe.

Since the freediver believes they still have time remaining during their breath-hold, they are blissfully unaware that their brain is not receiving sufficient oxygen and is on the verge of shutting down. Without a spotter to keep track of you, overestimating your limits would almost certainly lead to loss of consciousness and subsequently drowning.

How to Avoid Freediving Blackouts

To reduce the chances of suffering a blackout, one should take frequent breaks of sufficient length between dive attempts. Blackouts are so dangerous because they can occur even if you feel like you have sufficient oxygen in your body, which is why hyperventilating is such a dangerous technique.

That is why even if you don’t feel like you need it, you should intentionally take longer breaks to allow your body to oxygenate fully. Seriously, take a 10-minute, perhaps even a 20-minute long surface break, particularly if you’ve just performed a long dive. It’s not unheard of to rest that long in order to guarantee that the tissues in your body are oxygenated.

This is yet another reason why a spotter should be present in order to be objective when monitoring your behavior, lest you decide to do another lengthy dive without sufficient rest.

Bi-fins or Monofins for Constant Weight Freediving

Photo Credit: Emma Farell CC By 2.0

How Invested Are You?

While monofins are the best choice for constant weight freediving in terms of performance, that doesn’t mean you should go out and buy one right now. It’s necessary to consider one’s goals, both short-term and long-term. Freediving has a certain barrier to entry, in that the average person can’t just go out and freedive just like that.

First, one needs transportation (i.e. a boat or other watercraft) to head out into water that is sufficiently deep enough for your dive attempts. Furthermore, as we keep stressing above, one should NEVER dive alone; always have a spotter to monitor you. And of course, one should be proficient in their breath-hold and duck-dive technique. There are even more reasons than this in regards to why constant weight freediving isn’t a discipline that the average person can do.

Constant weight freediving requires commitment and sacrifice in order to progress as a freediver. As such, unless you know you have the desire to achieve these goals, then and only then should you consider purchasing expensive equipment to get started, or buying new equipment to replace old ones.

Going All In

Once you’ve decided that constant weight freediving is a discipline you want to pursue, it’s time to select the appropriate equipment to help you reach your goals. If you ever aspire to reach the upper echelon of competitive constant weight freediving, at some point you need to invest in a monofin.

Monofins provide the greatest return in terms of thrust generated for your energy expenditure as you undulate your body. The large surface area of the fins displaces the greatest amount of water compared to other fins which results in superior propulsion.

The water displacement is not just important on the way down to your desired depth, but also as you make your ascent to the surface. As we’ve discussed above, around the 25-30m mark is when you start to freefall. The entire time up to this point you’ve been swimming against your positive buoyancy.

On the return trip, you will be swimming against your negative buoyancy until you reach that point again. At different points during your dive you will be swimming against your buoyancy. That is why you need a monofin for sufficient water displacement to allow you to jet through the water. Without one, you run the risk of expending all of your energy and oxygen while struggling against your negative buoyancy on the way back up.

Constant Weight Freediving Recap

To recap, constant weight freediving is a competitive discipline where divers try to dive as deep as they can without changing their weight and using only bi-fins or monofins to assist them. They follow a dive line straight down and up, using it only as a guide to orient themselves, check their depth, and not for pulling themselves upwards or downwards.

In order to achieve the best results in constant weight freediving, one should learn how to use a monofin. This piece of equipment is necessary to power through the positive and negative buoyancy on your descent and ascent respectively. Without them, you may burn through your energy and oxygen reserves faster compared to using other fins, which would stifle your performance.

Furthermore, due to the inherent dangers of constant weight freediving, one should always dive with a buddy just in case. Also, between each dive, it is crucial that one rests for at least 10 to 20 minutes to fully oxygenate their body. Each dive should be logged so that you have an objective measurement of your progress. This can help you plan your dives and set new records at a steady pace.

Photo: Simukas771 / CC BY-SA

Freediving Neck Weight Benefits & How to Make Your Own

A freediving neck weight is an invaluable piece of equipment for freedivers who want to practice constant weight, dynamic, or free immersion training. In pool disciplines where maintaining neutral buoyancy as well as a body position that is parallel to the bottom of the pool floor is nigh impossible, particularly with no-fins, tools that help with weight distribution is crucial.

As for depth training, a neck weight speeds up the freefall, making the process more streamlined and efficient, so much so that they may forgo using a weight belt in favor of neck weights.

There are numerous types of neck weights available and selecting the right one can be difficult. In this guide, we will provide an overview of the most popular types of freediving neck weights to help you choose the right one for you. Furthermore, if you’re feeling crafty, this guide will teach you how to make a DIY freediving neck weight.

Freediving Neck Weight Benefits

Freediving neck weights have become a mandatory part of freediving, whether it is for training or competitions. Without it, freedivers would not have been able to reach the level that is possible in dynamic freediving today.

There are two major benefits for using a neck weight: 1) helps to achieve neutral buoyancy, and 2) contributes to a longer glide.

Without either of these, a freediver would exhaust themselves just trying to stay submerged. Freedivers would not be able to maintain the glide phase for nearly as long in any discipline, from no-fins to dynamic with fins, and thus limit their potential for growth.

Types of Freediving Neck Weights

Lobster

The Lobster is aptly named because of the long “tail” of this neck weight that traces down your upper back. This neck weight is a great companion for dynamic performances because the position of the weight helps to distribute the weight closer to your lungs and back. Since this area is so close to the human body’s center of gravity, it will be easy on the collarbone and neck.

Furthermore, the vertebrae-shaped weights are flexible and adjustable, which solves the issue of the constantly shifting nature of one’s buoyancy. It’s easy to see that the Lobster neck weight was designed with freedivers in mind.

Thanks to its shape, material, and hydrodynamics, freedivers can move underwater with ease so that they can focus all of their efforts on their training. However, the Lobster is costly and is only usable for pool disciplines.

Chabaud

Chabaud provides a large selection of neck weights, all of which are also catered to freedivers. They are masters of their craft and all of their designs take into account hydrodynamics and comfort, both of which can make or break a neck weight.

While they are more affordable than Lobster neck weights, they are still pricier than traditional neck weights. Thankfully, Chabaud have designed neck weights for use in the pool and for depth. Depending on the model, some Chabaud neck weights are adjustable, allowing you to add or subtract weight depending on your needs.

Apneautic

The Apneautic neck weight is a highly adjustable device that wraps around the neck and resembles a neck collar. It features segments of weights each weighing 300g (10.5oz) that can be quickly changed in seconds.

The adjustable nature of this neck weight makes it an ideal choice for both instructors and students, those who train for depth or pool disciplines, or those who train with and without wetsuits.

At first glance, the Apneautic neck weight looks uncomfortably bulky, and it does take a while to get used to. However, its usefulness cannot be denied, which is why instructors keep using them to help train their students. Furthermore, it is considerably more cost efficient than buying individual neck weights at varying sizes for students to use.

Do-It-Yourself (DIY)

When you think of a neck weight, you might think of someone wearing their own homemade neckweight, though nowadays ordering one from an online retailer is also quite common. DIY neck weights are typically constructed by filling a bicycle tire tube with lead, sealed with tabe, and held in place by a snap clip.

This tool is ideal for helping you reach depth, since its closed loop design means it is not likely to slip off. Furthermore, if you are an instructor, having an adjustable strap is recommended for your students to wear.

One downside of the DIY neck weight is that you cannot add or remove weights from it while in the pool; in other words, you cannot make any adjustments on the fly depending on the situation.

Furthermore, your buoyancy changes all of the time, even on a month to month basis, due to your ever-changing body composition, dive locations, as well as equipment. Should you ever replace some of your gear, without being able to adjust your neck weight, you may find that you cannot maintain neutral buoyancy any longer despite having a similar setup.

Adding or removing weight from your weight belt can affect the distribution of your buoyancy during no-fin performances. Lastly, an ill-fitting neck weight can be quite the distraction if it constantly gets in your face during descent.

How to Make Your Own Freediving Neck Weight

Here are the instructions in text form. Making your own basic freediving neck weight is surprisingly simple. Here’s what you need to get started:

  • Cable/zip ties.
  • Inner tube, recommended 2” in circumference (e.g. mountain bike inner tube).
  • Lead weights (lead shot, ball bearings).
  • Small pouches to hold the lead shot in the tube for additional security such as balloons (Optional).
  • Strapping (at least 12”)
  • Quick-release buckle.
  • Duct tape.
  • Superglue.
  • A knife to cut the materials with.

Making the Freediving Neck Weight Step-By-Step Instructions

  1. First, measure the circumference of your neck. Take that number, and add another 20 cm (~8in.) to the measurement, and cut out a piece of inner tube that is this length. You will be filling the inner tube with lead shot and need some extra space so that the tube can expand and still fit comfortably around your neck.
  2. Attach some fabric or a ribbon to the bottom of the quick release buckle, curl it up, and tie a tight knot. Perform this step to both the male and female ends of the buckle.
  3. Slide the knot and buckle into one end of the inner tubing until the buckle is slightly in the inner tube as well.
  4. Secure a cable tie over the knot from outside of the tube. Do this tightly so that it holds firmly in place (otherwise the buckle will simply slide out) but not so much that it damages the tube.
  5. Pull the buckle out of the excess inner tube so that it is fully showing but still held in place by the cable tie.
  6. Next, weigh out how much lead shot you want in your neck weight. You can fill the inner tube with the lead weights directly, however we recommend first separating them into small bags or balloons. This way, you can evenly distribute the weight into these bags, as well as get some extra protection against the lead leaking out of the neck weight. Using a funnel is also a good idea so that you don’t spill the weights everywhere. Here, the thickness of the tube can affect how much lead you put in or how long the neck weight ends up being.
  7. If you think the inner tube of your neck weight is too long, this is your last chance to trim it because we are about to seal the other end. Also, how full your tube is depends on how heavy the neck weight will be. If you need a heavy neck weight, then it is likely that it will be packed tightly with lead shot. Otherwise, the inner tube may not be full and you might even want to trim off any excess tubing.
  8. Repeat steps 3-5 on the other side to attach the other end of the buckle.
  9. You can further reinforce the ends of the neck weight duct tape. This can also improve the appearance by covering up the cable ties and also smooth it out so nothing will be poking your neck.
  10. Congratulations, you have finished making your own freediving neck weight! Now try it on and clip the buckles together to secure it in place. You can use this neck weight for general training or for competitions.

Now what are you waiting for, get into the water and test out your DIY freediving neck weight!

Tips to Keep in Mind

Regular Care

You should check the neck weight frequently for wear and tear. You may need to patch up any holes, or you may choose to make a new neck weight by taking the lead shots out of your old, worn out neck weight. It’s much easier to reuse materials from your old neck weight before it bursts open and all of the weights inside leak out. Also, the buckles are yet another material you can reuse.

Inner Tube Length

Consider whether or not you will be wearing your neck weight with a wet suit or without one. In addition to affecting your buoyancy significantly, the added thickness of a wetsuit around your neck can make the neck weight fit too snug and impede your breathing. On the other hand, making the neck weight too long will cause it to hang loose. A loose neck weight increases drag, can potentially fall off, and can get in your way when you are doing your dynamics.

Also, if you decide to trim the inner tube because it’s too long that you factor in the length of the buckle as well. It’s recommended that you do all of this before you add in any lead, since they are a nightmare to clean up if you spill them.

Getting Rid of Sharp/Frayed Edges

At any step of this process that involves cutting, such as trimming the inner tube or cutting the fabric that will loop through the buckle, be aware that the cut edges may not be smooth. You can use the flame from a lighter or candle to burn off the ends of sharp tubing or get rid of frayed edges from fabric. Just be careful not to burn the tubing or yourself.

Freediving Neck Weight Recap

In addition to (or in place of) freediving weight belts, you can also use freediving neck weights to help you achieve neutral buoyancy and reach depth more efficiently. They are also useful during training to perfectly balance yourself so that you remain parallel to the bottom of the pool and can glide to your heart’s content.

There are four main types of freediving neck weights: the Lobster, Chabaud neck weights, Apneautic weights, as well as DIY freediving neck weights. If you’re feeling up to the task, you can try your hand at making your own weights and potentially save money. If you’re a freediver who is serious about improving your performance underwater, then you should get yourself a freediving neck weight.

Photo: Jean-Marc Kuffer cc