How to Easily Weight Yourself for Freediving

The purpose of weighting yourself for freediving is to make it easier to descend to depth by counteracting against the positive buoyancy of your freediving equipment and the oxygen in your body.

It can be difficult to judge exactly how much weight you need to have in your weight belt or neck weight. Too much and you’ll constantly be sinking, which is dangerous when you’re trying to resurface. Too little and you’ll still have too much resistance when diving.

Furthermore, if you have any problems with weights while underwater, your diving buddy must be able to keep up with you and rescue you. Getting it just right requires some guidance, which we will be providing in this article, but expect to go through some trial and error due to the fickle nature of weighting yourself for freediving.

Weighting Yourself For Freediving Considerations

There are numerous ways a freediver can add attach weights to themselves depending, and the exact weighting method used depends on personal preference or their freediving discipline. For instance, one can freedive without any weights, with neck weights, a weight belt, or both.

The most common weighting method involves wearing a rubber weight belt with the exact amount of weight on it necessary to reach zero buoyancy. And that’s where we get to the point of this article: how to properly weight yourself so that you can reach neutral buoyancy for freediving.

The top factors that will affect how much weight you need are as follows:

  • Your body weight, composition, and gender.
  • Wetsuit thickness.
  • Dive depth.
  • Salt or freshwater.

Perhaps you’ve already freedived before and put on the same amount of dive weight only to find that this time you are no longer neutrally buoyant. What gives? Well, the first two factors probably haven’t changed, however you may be wearing a thicker wetsuit this time around, or you’re diving in freshwater instead of salt water. Let’s go over how this could affect your buoyancy.

Body Composition

It’s not about how much you weigh, it’s about what that weight is composed of. Here’s an example. Suppose there are two men both weighing 180 pounds (82 kilograms). One man could have an extremely low body fat percentage, meaning most of his weight comes from lean muscle mass. The other man could have 35% body fat and he would be absolutely, positively buoyant compared to the muscleman.

Here is why body composition is important. Muscle and bone is negatively buoyant, whereas fat is positively buoyant. The other tissues in the human body have a similar density to that of water. Thus, people who are naturally skinny or are lean fitness models will not float as much compared to people who have more fat on their body.

Similarly, women naturally have a higher body fat percentage compared to men. Men are typically denser than women and may not need dive weights at all. As such, women shouldn’t feel self-conscious if they need dive weights in order to reach zero buoyancy.

Wetsuit Thickness

Wetsuits are made from neoprene material and they come in various thicknesses. The air bubbles trapped in the neoprene cause wetsuits to be positively buoyant. The thicker the wetsuit is, the more air bubbles that are trapped inside and the more buoyant the diver will be.

As such, freedivers who plan on diving in cold water will probably insulate themselves by wearing thicker wetsuits, and thus will require more diving weights to achieve neutral buoyancy.

Salt or Freshwater

Someone who has calibrated their dive weights to be neutrally buoyant in saltwater may find themselves sinking in freshwater or vice versa, which has perplexed many a freediver. If their body weight hasn’t changed and they are wearing the same wetsuit, and they are diving to similar depths, why aren’t they naturally buoyant?

People often forget that objects in saltwater are naturally more buoyant than in freshwater. Each cubic foot of saltwater can displace 64.1 pounds of weight. On the other hand, freshwater will only displace 62.4 pounds of weight. There is a 2.5% difference in the amount of weight displaced, and that difference can make the difference between floating or sinking instead of staying in place.

Calculating How Much Weight You Need for Freediving

Knowing how much weight you need to wear while diving is so important that many have got it down almost to an exact science. There are even freediving weight calculators to help you figure it out if you enter your body stats. However, each of these methods should only act as guidelines because you need to do your own testing regardless.

Here’s roughly the formula used by freediving weight calculators when they spit out a number for you.

The Math

For each millimeter of thickness of your wetsuit, multiply that number by 1 kg (2.2 lbs) and then add another 2 kg (4.4 lbs) if you’re lean, or 2.5kg (5.5 lbs) if you’re larger. So if your wetsuit is 3mm thick, the math is: (3 * 1kg) + 2kg. You would add approximately 5kg (11 lbs) of weights to your weighting system.

ABT: Always Be Testing

Just because you used 5kg of weights that one time to reach zero buoyancy doesn’t mean you will always only need 5kg. You need to do regular testing to ensure that you have the correct amount of weights. You must always test your buoyancy prior to each training or freediving session for safety reasons.

As painful as it is to admit it, our bodies are constantly changing, especially as we get older. It’s possible that you’ve gained some weight over the holidays, or that you’ve lost some muscle mass. Even a difference of a few pounds will affect your buoyancy.

Thus, due to the ever changing nature of our body, as well as other factors that may not be so obvious, one should always endeavor to test their setup to stay safe. Use smaller weights to help make fine adjustments. They are less stressful on the body and are easier to evenly distribute their weight around your weighting system.

Weighting Tips
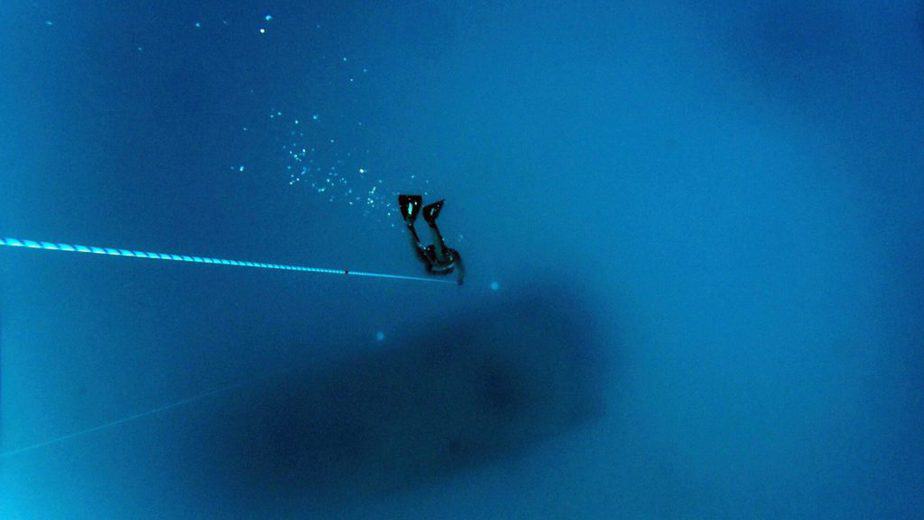
neutral buoyancy test

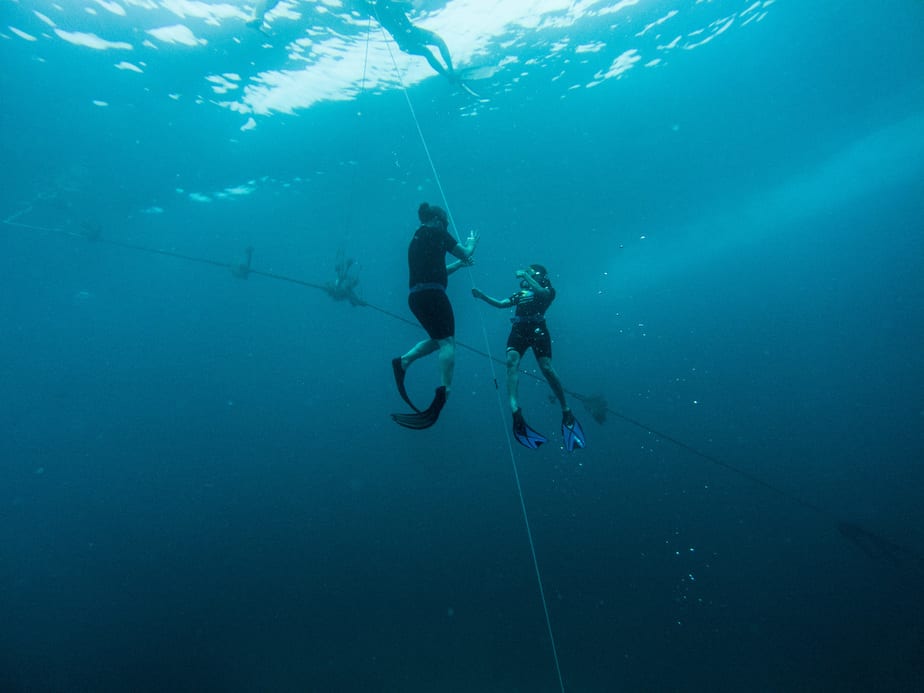
There are two common ways to test for buoyancy that beginner freedivers should start with. First is to test the buoyancy by the surface. The second is testing for neutral buoyancy at a depth of 10m or 33ft. Both methods work well, but just to be safe you should always have at least one other person around to watch your back.

What is the Significance of Being Neutrally Buoyant at 10m or 33ft?

First, being naturally buoyant means you are neither sinking or floating, you’re just floating in place. It’s hard to judge if you are precisely neutrally buoyant without a dive computer. You’ll also need to set up a line that has a marking at 10m to better keep track of your depth.

Second, the reason why it is ideal to be neutrally buoyant at this depth is because that is when the atmospheric pressure doubles compared to the surface. In other words, suddenly the positive buoyancy provided by the air in your wetsuit and your lungs is halved so that you are less buoyant.

However, the dive weights remain the same weight. The consequence is that if you’ve weighted yourself to be neutrally buoyant by the surface, you are now negatively buoyant at a depth of 10m and below, so when you want to resurface you will need to swim against the weight on your weight belt until you pass 10m and the atmospheric pressure returns to normal.

Depending on how far you are diving, that is extra weight you have to fight against for a long distance. Being weighed down is not ideal, so it’s better to weigh yourself to be neutrally buoyant at 10m (33 ft.) and to be somewhat positively buoyant by the surface.

Another reason why you’d want to be neutrally buoyant at 10m or below is due to the risk of shallow water blackouts. If you were to suddenly blackout near the surface, due to your positive buoyancy you would slowly float upwards and increase your chances of survival if someone saves you quickly enough.

Surface Buoyancy Test

Naturally, if you are a complete beginner we do not expect you to immediately dive down to 10m/33ft. to test if you are neutrally buoyant. Instead, there is a safer strategy you can employ at the surface. Here’s how it works.

Float by the surface in an upright position. Keep your hands by your sides and let your fins point downwards. You should be able to float without treading water. Now fully exhale (this causes you to lose buoyancy so you should sink a bit). The water level should rise up to be between your lower lip and your chin.

If the water level is below that, then you are still too positively buoyant and need to add more weights. If it is below that level, then you have too many weights and need to remove some.

The surface buoyancy test is a method for beginners to adjust their dive weights in a relatively safe environment without the need for fancy equipment like a dive computer. Although not nearly as accurate as testing for neutral buoyancy at a depth of 10m/33ft, it’s the optimal choice for people getting started with freediving.

Advanced freedivers would follow a different approach. They would measure their neutrally buoyant point at approximately one third of the depth of their maximum dive that day.

Consequences of Incorrect Weighting

You should try your best to weight yourself as precisely as possible. Even the difference between a few pounds of weight can be disastrous in an emergency. We’ve already covered the dangers of a shallow water blackout, and improperly weighting yourself can increase the chances of that occurring.

Insufficient Weight

With too little weight, you will limit how far you can dive. Since you are positively buoyant, you are constantly fighting against that buoyancy the entire time, making your descent harder than it needs to be. It will cause you to spend more oxygen and energy than you should, exhausting you and forcing a fast return.

It should be noted that while having some positive buoyancy is not ideal if you are trying to reach new depths, at least your chances of survival are greater in an emergency such as if you need to reach the surface faster or experience a sudden blackout.

Excessive Weight

Having too much weight on you will cause you to be negatively buoyant, meaning you’ll constantly be sinking. This is a very dangerous situation to be in. Sure, it’ll feel great as you’re diving down. However, once you’ve reached your desired depth and start your ascent, you will realize that you have to fight against this extra weight all the way back up.

This is basically the opposite situation of having too little weight. However, the difference is that you are far from the surface, probably running out of breath and panicking. Swimming upwards with extra weight will cause you to burn through your oxygen and energy much faster and can result in a blackout while underwater.

If you haven’t managed to release the weights and you suddenly blackout, then you will sink to the bottom and it will be too late to rescue you.

Freediving Weighting Systems

There are various weighting systems you can use for freediving. When selecting one, you must check that it has a quick-release mechanism that allows you to detach the weighting system along with all of the attached weights. The quick-release must be easy to use and able to be triggered with just one hand.

This way, you or your freediving partner can get rid of the excess weight provided by the weighting system and safely return to the surface in case of an emergency. The most common weighting system is the weight belt, but one may also use neck weights.

Freediving Weight Belt

Most freedivers prefer to wear a rubber freediving weight belt. The weight belt should be worn around the hips so as not to obstruct the diaphragm, allowing the freediver to inhale more oxygen during their breath-ups.

Small freediving weights can be evenly distributed around the weight belt to let you achieve equilibrium underwater.

The material of the freediving weight belt is important. Rubber weight belts are the preferred choice because they are comfortable and can stretch so as not to obstruct your breathing or movements. Even as the water pressure changes, rubber weight belts will expand or contract and provide a snug fit without issue.

On the other hand, nylon weight belts should be avoided because of how stiff they are. They will constrict your diaphragm and movement, making it impossible to perform at your best. Furthermore, their rigidity is uncomfortable and can cause irritation if worn for too long.

There’s also the issue of keeping the weights in place. Rubber weight belts tend to have more friction and will keep the weights in place without any help. Nylon weight belts require weight stops to stop the weights from shifting around as you’re freediving.

Overall, rubber freediving weight belts provide so many more advantages over nylon, the most important of which is how stretchy it is. By allowing you to breathe normally and move as if you were unencumbered, while providing the necessary resistance to make you neutrally buoyant, it is clear why they are the top choice for most freedivers.

Freediving Neck Weights

Depending on their freediving discipline, sometimes freedivers will wear a neck weight in conjunction with a freediving weight belt for better weight distribution. It can be difficult to remain both neutrally buoyant and completely parallel to the bottom of the pool while training, especially with no fins.

As for depth, neck weights are more efficient and streamlined freefalls. Some divers even prefer to use neck weights exclusively and forgoing a weight belt altogether. There are various types of neck weights: DIY, lobster, Chabaud, and Apneautic.

Whichever one you pick, they all share the same disadvantage: they require you to have strong neck muscles to support your head on the surface. If you don’t like how cumbersome they are on the surface, then neck weights may not be for you.

Weighting for Other Freediving Disciplines

Depending on which freediving discipline you are planning to partake in, the recommended weighting system may differ.

Static Apnea (STA)

You are not allowed to use any weights and your body should effortlessly float at the surface.

Dynamic Apnea with Fins (DYN)

The preferred weighting system for this discipline depends on where on your body you have the most buoyancy. Women tend to have more buoyancy in the lower half of their body, so they would benefit more from wearing a weight belt. Men are generally more positively buoyant by their head so neck weights are often a better option.

The goal of weighting yourself for DYN is to achieve a balance where you can fin and glide underwater without sinking to the bottom or floating to the surface. Achieving this may take a lot of trial and error. Further adjustments may need to be made if your body composition changes too drastically or you replace equipment.

Dynamic Apnea without Fins (DNF)

Similar to dynamic apnea with fins, weighting yourself for dynamic apnea without fins requires even more scrutiny because you are not able to rely on your fin/s to make micro-adjustments to your position in the water. You will not have the same propulsion and control so even the slightest miscalculation in your dive weights can cause you to float or sink.

If you find that your weighting set up changes each time you dive, just know that it happens to even experienced dynamic divers and is probably the most frustrating part of this discipline to deal with.

Constant Weight freediving with Fins (CWT)

When performing any dive deeper than 15m, in order to be safe you should aim to be neutrally buoyant at a depth of 10m. Shallow water blackouts are a serious risk that you want to be prepared for by being positively buoyant around this depth.

Competitive freedivers can, at their own discretion, aim to be neutrally buoyant at deeper depths so that by the time they reach the 10m mark, they don’t even have to fin anymore to float to the surface.

When beginners first learn to freedive, they are tempted to add so much weight that they become negatively buoyant to help with their dive down. However, one should not compensate for bad duck diving technique by over-weighting. This raises another issue of how will a beginner safely return to the surface with their poor technique while carrying all of that extra weight?

Furthermore, effort should be made to perfect one’s duck diving technique so that they can use the correct amount of weight to be neutrally buoyant at a safe depth.

Constant Weight freediving without Fins (CNF)

Those participating in constant weight freediving without fins should adhere to the same principles above. However, the urge to add additional weight is even greater for this discipline, since descending without fins is such a challenge. However, one must not underestimate the strain of the return trip.

From a psychological point of view, it is better to not be over encumbered so that ascending will feel easier. It is also much safer, since you will no doubt be low on oxygen and energy, and your muscles will be burning from the lactic acid build up.

Free Immersion Freediving

Just like constant weight freediving, aim to be neutrally buoyant around 10m deep. Unless you’re relying on free immersion techniques to practice equalization to shallow depths, you might feel more comfortable adding more weight so that you aren’t fighting to keep yourself at 3 meters.

Furthermore, you can also use ankle weights to assist with streamlining when practicing equalization feet first. This frees your attention to learning equalization instead of fighting against your positively buoyant legs.

Variable Weight Freediving

Here, no physical strength is required to bring you to depth and thus can utilize a lower point of neutral buoyancy to help with surfacing. Thus, no weight is needed except for a weight belt used only to help seal your suit and not to add weight. Typically, a thicker wetsuit is used for insulation and providing positive buoyancy at depth.

No Limits Freediving

Just like variable weight freediving, a weighted sled will take you to the desired depth so one does not need additional weight. Furthermore, a buoyancy device such as a lift bag will take you back to the surface. Thus, the main consideration is a thick wetsuit that provides insulation at depth, and some positive buoyancy in case the sled fails.

Recreational Freediving

The general weighting advice doesn’t apply to freedivers who are recreationally diving in shallow reefs. After all, what’s the point of being neutrally buoyant at 10m if the sea floor at your location is only 4m deep?

You would be positively buoyant the entire time and thus you should adjust your weights to be weighed down more than normal while still remaining slightly positively buoyant by the surface. Instead, aim to be neutrally buoyant somewhere close to the bottom so that you won’t crash straight into the sea floor and hurt yourself.

How to Weight Yourself for Freediving: Parting Words

To wrap up this article, we leave you with our final safety tips so that you can safely freedive with weights.

First, when deciding what depth you want to set your neutral buoyancy, also consider the limits of your diving buddy. After all, it is this individual that must be able to keep up with you and rescue you should anything go awry.

Second, since there are so many factors that can alter your weighting, you should keep a detailed freediving log book of how much weight you used under what conditions as well as all of the equipment you used. The log book can serve as an excellent reference for future dives.

Furthermore, it is a good idea to have some extra gear such as additional neck weights to help make micro-adjustments, as well as an extra half kilo weight for the weight belt.

And above all, you should always err on the side of caution and choose a conservative weighting setup that prioritizes safety and allows you and your buddy to watch each other’s backs without hassle.

Best Freediving Weight Belt Buying Guide

Getting the best freediving weight belt is not as easy as it seems. Unfortunately, there is a trap that beginners often fall into when shopping for a freediving weight belt. This mistake will limit your abilities as a freediver by causing you to lose speed and agility while underwater.

Furthermore, it will result in a poor freediving experience and may even result in an emergency in rare cases. How could a freediving weight belt cause so much trouble, you ask? Sure it can, if you buy one made out of the wrong material.

If you are serious about freediving and spearfishing, the only type of weight belts you should invest in are rubber weight belts. Rubber is the ideal material because it can stretch with your diaphragm as you breathe. Other weight belts will simply restrict your airway and prevent you from reaching your potential.

There are many more reasons why you should invest in a rubber freediving weight belt, and in this article we will discuss the best ones and what criteria to consider when shopping for them.

Our Top Picks:

Purpose of a Weight Belt

Before we talk about which type of weight belt is the best, you should know the reason why freedivers even need a weight belt in the first place is to offset the positive buoyancy caused by the neoprene wetsuit and freediving fins.

The neoprene material that freediving wetsuits and fins are made from is filled with air bubbles, making them naturally buoyant (in other words, you will constantly float). As a freediver or SCUBA diver, this means you will be fighting against the positive buoyancy unless you add weights to help you reach neutral buoyancy (you are neither floating or sinking).

There are various weighting systems such as weight vests and neck weights, but the most common setup is using a weight belt with small weights to achieve neutral buoyancy.

Why Use a Rubber Weight Belt?

There are two types of freediving weight belts: nylon and rubber. A weight belt constructed from nylon is lightweight, durable, and affordable. It sounds pretty good, right? However its one major downside is too big of a downside to ignore: it doesn’t stretch. On the other hand, a rubber weight belt stretches as you breathe and move around.

With a nylon weight belt, you will limit your freediving potential by restricting your breathing and impeding your finning technique. During your pre-dive, you won’t be able to inhale as much oxygen and therefore your dives will be much shorter. Unfortunately, the market is littered with nylon freediving weight belts. Avoid them at all costs.

What you should aim to get are rubber weight belts. They have some minor downsides, such as being harder to secure the weights onto them. However, the benefits they provide are too great to pass up if you are a serious freediver. Here’s a few reasons why.

It Doesn’t Restrict Your Breathing

best rubber weight belt

Rubber weight belts will allow you to maximize your pre-dive breath-up so that you can have the most oxygen in order to dive as long as you can without hindrance. And to achieve this, you must be able to inhale deeply into your diaphragm.

By not breathing into your diaphragm, you are not maximizing the amount of oxygen that can fill your lungs. In other words, without this technique all of your dives will be shorter and shallower than they could be. How does the material of the weight belt affect your breathing?

Simple. With a stiff nylon weight belt strapped on, you will not be able to fully inhale into your diaphragm since nylon does not stretch. Think back to the Victorian era when women wore tight corsets, and a nylon weight belt is something like that.

On the other hand, a rubber weight belt does stretch as you inhale. This allows you to maximize the amount of oxygen your lungs can inhale in order to fuel your body for the next dive. Honestly, this reason alone is already more than sufficient to recommend getting a rubber weight belt over a nylon one.

All of these additional reasons are just icing on the cake.

It’s More Comfortable

While in the water you must stay relaxed, calm, and comfortable whether you are freediving, SCUBA diving, or even snorkeling. If you feel uncomfortable, it will distract you, affecting how far you can dive and make it hard to enjoy the sport.

Wearing a weight belt made from something as rigid and inelastic as nylon even for just a few minutes will cause you to feel uncomfortable and restricted. This only gets exacerbated the deeper you dive and the water pressure changes affect you even more.

As things keep going wrong, you may start to feel anxious, and this can be quite dangerous indeed. As you know, stress will elevate your heart rate and cause you to panic. It will cause you to consume your oxygen supplies faster and potentially make mistakes you wouldn’t normally make.

By wearing a weight belt that can compress and stretch comfortably as you dive deeper underwater, a.k.a. a rubber weight belt, you’ll be able to concentrate all of your efforts on conserving oxygen and properly finning in order to reach deeper depths.

It Allows Greater Freedom of Movement

As you’re finning, you may feel your rubber weight belt stretching out to accommodate your waist and hip movements, letting you move with the proper range of motion in order to jet through the water.

On the other hand, a nylon weight belt will dig into your wetsuit and skin with its rigid material. In addition to restricting your breathing, it also limits your movements and slows you down, which is yet another way that it contributes to ruining your freedive.

In order to fin in comfort with perfect technique, you should definitely wear a rubber weight belt as opposed to a nylon weight belt. Now that you know why you should invest in a rubber weight belt, the question is which ones? Below, we will go over our picks for the best rubber weight belts for freediving.

Best Weight Belt for Freediving – Our Top Pick

Riffe Rubber Weight Belt

Riffe Rubber Weight Belt with Buckle
  • Total Load Control: Fully adjustable 54-inch (137cm) long x 2mm thick rubber belt lets you customize the perfect weight amount and distribution up to...
  • Built Strong and Secure: Glass-filled nylon cam-lock buckle paired with an inner ribbed 2-inch wide belt prevents shifting and retains weights...
  • Fast Ditch for Safety: Quick-release lever enables instant detachment of the belt for emergency surfacing situations - just pull for fast ditching.

The Riffe rubber weight belt is one of the top choices currently on the market. It is made from a highly flexible rubber that will accommodate the natural curves of your body which is necessary in order to maximize pre-dive breathing. Furthermore, the belt has a quick-release buckle just in case you need to rapidly return to the surface during an emergency. Let’s go over each feature in more detail.

Stretchable Rubber Material

The high-quality rubber that the Riffe is constructed of is ergonomic, comfy, and feels like you’re wearing a second layer of skin around your midsection. Thanks to how flexible and dynamic it is, you will never feel like your movements or breathing is restricted which contributes to the “second-skin” feeling.

It will bend as you bend. Furthermore, the stretchable, lightweight rubber will ensure that your hydrodynamics are not negatively impacted so that you can jet through the water to set new personal bests.

Quick Release Buckle

You never know when an emergency strikes and you need to surface ASAP. With the help of the cam-lock glass-filled nylon buckle, you can quickly remove the belt in one simple motion.

With just the flick of the hand, you can eject all of your dive weights and swim back without being encumbered. This buckle not only looks stylish, but you can rely on it in a life-or-death situation.

Highly Adjustable

Getting the perfect fit is possible with the Riffe rubber weight belt. Unlike most belt buckles which are constrained by the spacing between each pre-set hole in the belt, the Riffe weight belt does away with this issue completely.

Instead of inserting the buckle tooth through the holes, the Riffe weight belt buckle allows you to fasten it to your exact tightness. You never have to deal with wearing a belt that is either too tight or too loose; you can finally get one that fits just right.

Corrosion and Rust Resistant

For all the flack we’ve given nylon, we have to give credit where it’s due. The nylon buckle of the Riffe weight belt is very durable. Salt won’t wear down the belt’s natural shape or reduce the buckle’s strength. It’s not going to rust either. When you buy a Riffe rubber weight belt, you buy it for life.

Weights Won’t Move (Until You Release Them)

Rubber naturally has a high friction coefficient which keeps the weights from sliding around the belt as you’re diving. What’s more, the belt also has horizontal ribbing to further reduce any movement and act as a second layer of defense to keep the weights secure.

Specifications

The Riffe rubber weight belt is 54” long by 2” wide and has a 20lb weight capacity. In other words, almost everyone reading this can use this. You can even cut the belt down to size if you so choose.

Overall, the Riffe rubber weight belt is a highly affordable, high-quality belt that’ll help you maximize your freediving potential. Furthermore, it is durable and will last you a lifetime. You can get yourself one by clicking here.

As for weights to go with the belt, we recommend this one. They will fit snug and will not shift around as you dive.

Scuba Choice Weight Belt – Best Marseilles Weight Belt

Scuba Choice Spearfishing Free Dive Heavy Duty Rubber Weight Belt with SS Buckle, 53", 1.3-Meter
  • Available size: 53" (1.3M), 61" (1.5M)
  • Rubber belt self-compensates to changes in wetsuit's thickness at different depth
  • Sturdy stainless steel buckle.

If you’re not happy with clasp style buckles, then the Scuba Choice freedive weight belt should be right up your alley. It features a classical weight belt design with the tried and true stainless steel buckle and holes in it.

While it’s easier to open, you have to be careful about the length of the pre-drilled holes in order to make sure that it fits your hips. With its durable yet stretchy material, you can easily fit over 20 pounds on it without sliding around. This stretchy belt will remain secured on your hips and provide you with the neutral buoyancy that you need.

Cressi Elastic Weight Belt – Best Stainless Buckle Belt

Cressi Quick-Release Elastic Belt with Metal Buckle, Black
  • The Premium Elastic Rubber Belt is manufactured with a high stretch rubber to keep your weights comfortably in proper position during ascents and...
  • The quick-release stainless steel buckle provides instinctive and rapid emergency release.
  • The buckle pin passes through, is very strong and is riveted at both ends.

You can’t go wrong with a trusted brand like Cressi. Here, you have an example of a weight belt with a stainless buckle. This offers the same advantages as a plastic buckle weight belt like the Riffe belt above. In addition to that, stainless steel buckles are even more durable and easier to unclip, though slightly more expensive.

What to Look for in a Freediving Weight Belt

Buckles

How do you know if one rubber weight belt is better than another? Start by examining the buckles. There are two types to choose from: the clasp type, or the regular pin-through-hole type that is sometimes referred to as the Marseilles type buckle. Let’s go over their pros and cons.

Clasp Buckles

Clasp buckles are made from glass-filled nylon or stainless steel. They come with quick-release protection, so if you ever find yourself in an emergency you can lift up the clasp and slide the belt off immediately.

The main advantage of clasp buckles are how adjustable they are compared to the pin type. When you find the exact tightness you like, just clamp the buckle down and you’re done. With the pin type, you can end up in an awkward situation where one belt hole is too tight, but the next one up is not tight enough.

Marseilles (Pin) Buckles

Marseilles buckles are more secure and durable than the other types, while still giving you the option of a quick-release switch. The moment you pull on the free end, the spring-loaded pins on these buckles will eject out of the hole and stay open so they won’t get caught on the belt again.

If you choose a belt with a pin style buckle, it is important to look for any reviews mentioning how stretchy the belt is. If it is stretchy enough, you can potentially stretch the belt just enough that it can reach the next hole to ensure a tighter fit. Just make sure you aren’t constricting yourself too much, otherwise you will affect your breath-ups.

Diving Weights

When it comes to diving weights, you can choose between uncoated lead weights or vinyl-coated diving weights. Either one can work, just make sure that they aren’t sliding around in your weight belt even if you don’t have a weight keeper. Dive weights can come in weights between 1lb to 12lbs.

Silicone Weight Belts

Recently, silicone weight belts have entered the market. Though rubber weight belts are still the most popular choice for freedivers, silicone weight belts may soon change that because they have some slight advantages.

For starters, they are stretchier than rubber, which only makes the weight belt fit even better and more comfortably. Furthermore, silicone weight belts are even more durable than the alternatives.

They are resistant to UV rays, salt, chlorine, ozone, and heat. In fact, silicone’s operating temperature range is -60C to +315C, both of which are temperatures you would be unlikely to encounter while freediving. The downside of silicone weight belts is their price, which is why rubber weight belts will probably still remain the recommended choice.

freediving buoy and line

How to Wear a Freedive Belt

A weight belt will afford you no advantages if you wear it improperly. You should wear your freediving weight belt around your hips to ensure your breathing remains unimpeded. Wearing it any higher and you could restrict your airflow.

Another reason to keep the weight belt by your hips is it can seal up the bottom of your wetsuit jacket and prevent water from entering if you are wearing a two-piece wetsuit.

Next, you should be using small weights with your weight belt which allows you to evenly spread the weight for added comfort.

Most freediving weight belts are designed with a “one-size-fits-all” approach. In other words, they are probably too long for you and you are expected to slice off any excess length you don’t need. A mistake beginners often make is they cut the belt too short.

Instead, you should leave a little bit of extra length behind just in case you want to wear a thicker wetsuit in the future. Some brands offer more than one size, but keep in mind when buying: if a belt is too long, you can always cut some length off, but you can’t make a shorter belt longer!

Weight Belt Accessories

Correctly adding weight to your belt is a necessary skill to learn as a freediver if you are committed to improving and reaching your potential. In addition to knowing how much weight you should add, you might want to consider investing in these weight belt keepers.

You should consider looking into getting weight belt D-rings which give you the option to hang small accessories off of (such as a dive knife or torch). They also double as weight keepers (don’t you love it when things work out like that?) so if you want to keep your hands free while diving, give it some thought.

Best Freediving Weight Belt Recap

When selecting a weight belt for freediving, make sure to avoid nylon weight belts at all costs. You should look for rubber or silicone weight belts. Freediving weight belts need to be stretchy and comfortable. If you get one that’s too stiff, it will restrict your diaphragm and your movements, making it impossible for you to perform at your full potential.

With a stiff nylon weight belt, you will ultimately be incapable of freediving for as long, nor will it be as comfortable as a rubber weight belt. You also need to consider how easy the quick-release mechanism is to operate. It should be possible to quickly detach the belt from your body easily with just one hand.

The belt should have enough grip to hold onto the dive weights so that they aren’t sliding around your hips. You can get additional accessories, such as weight keepers or D-rings to hold onto smaller accessories, which can also double as dive weights themselves.

You can cut the belt down to size if it’s too long, however leave some extra length just in case you ever decide to wear it with a thicker wetsuit. When used in conjunction with a freediving line and buoy as well as a dive watch, then you will be diving in the most safe environment possible.

Why Are Freediving Fins So Long?

Sports such as swimming, snorkeling, and scuba diving all benefit from using fins. However, when you look at the average freediving fin, you’ll notice that they are significantly longer than fins designed for other water activities.

If you’ve ever had the opportunity to wear long freediving fins, then you will get to experience how initially awkward and difficult a task it is to move in them. Why are freediving fins so long? Doesn’t it just make it very cumbersome to use them?

The reason why freediving fins are so long is because it helps to displace more water per kick. In other words, you spend less energy per kick, increasing your efficiency and allowing yourself to propel through the water rapidly. While freediving, you need to conserve as much energy and oxygen as you can. Fins with long blades make it faster and easier to cover long distances while conserving oxygen, making them invaluable for freediving.

Travelling with Freediving Fins

The blade length on freediving fins run anywhere from 31.5 in. (80cm) to 38.5 in. long. This measurement excludes the foot pocket, which will add another few inches. As you can imagine, this makes travelling with freediving fins quite a hassle. Many long fins are simply too long to fit in regular bags and suitcases. You have two choices:

Purchase adjustable freediving fins. Adjustable fins are more expensive, however they give you the option to remove the blade which decreases the overall length. The fin blades are still long by themselves, but this makes packing slightly easier.

Purchase a dedicated fin bag. You can also invest in a fin bag that is specifically designed for storing freediving fins. Dedicated freediving fin bags should exceed 40 in. in length to accommodate even the longest freediving fins. The interior should be heavily padded to cushion your expensive fins and ensure they will survive the hardships of travel unscathed.

If you will be taking your freediving fins on an airplane, you definitely need to invest in a fin bag. Airport security will be rough with your luggage and they will almost certainly get damaged unless you have a sturdy bag.

Note: don’t try to sneak your fin bag onto the plane and use the “but it’s a carry-on” excuse. Carry-on luggage has maximum dimensions that vary across airlines, however a 40 inch or longer fin bag certainly exceeds those limits and can result in them getting confiscated.

Some airline staff may not care about your fin bag as long as it still fits in the overhead bin. Others may ask you questions because they are genuinely curious about your extremely long fins. However, you bring them on board at your own risk.

The safest option is to get the sturdiest bag you can find and get them checked-in. We recommend this fin bag for travelling. It’s large enough to store nearly any freediving fin. Furthermore, its numerous pockets can store additional items such as passports, masks, clothes, towels, and the like to make travelling very convenient.

Long Fins vs. Short Freediving Fins

Long freediving fins generate more thrust per kick, however it requires strong leg muscles to maximize its potential. Short freediving fins are easier to kick with, but generates less thrust and requires more kicks to achieve the same results.

So how does having powerful kicks that are harder to perform compare to having less powerful but more frequent kicks that are easier to perform? Is the net energy expenditure and distance travelled comparable?

It’s hard to say, as this isn’t an apples to apples comparison. Long fins are the preferred choice over short fins because they have more “potential” power with each kick. Imagine riding a bicycle on the highest gear compared to the lowest.

On high gear, it’s harder to pedal but you can go way faster. On low gear, you can pedal quickly but you can also end up just spinning your wheels without moving any faster. It’s the same idea when it comes to long blades vs short blades.

With long blades and strong legs to take advantage of them, you can get immense thrust with each kick. On the other hand, if you have strong leg muscles and try to kick with short blades, you can “cap out” or reach a limit where no matter how hard or fast you kick, you don’t move any faster. You are effectively “spinning your wheels” and wasting valuable oxygen and energy.

Every bit of oxygen is vital when freediving. Sometimes the difference between successfully resurfacing and blacking out is just a few seconds apart. Wasted energy can cause you to lose your life to freediving. Do you want to bet your life on a slower, shorter fin when you’re almost out of breath and gasping for air?

In order to achieve greater results and push past your limits, you need to be wearing long freediving fins. They will help you rapidly dash to the bottom and back up again by providing the thrust you need to freedive.

Short Freediving Fins Overview

best bi-fins for freediving

Even though we are primarily focusing on fin blade length and the advantages and disadvantages long and short ones have, obviously other factors contribute to the overall quality of a pair of freediving fins. For instance, fin material, flexibility, durability, type of foot enclosure, ridge styles, price, etc, all matter, all of which we cover in our review of the best freediving fins for beginners.

Thrust

It’s hard to get any thrust when diving without fins. Even short fins can provide significantly more thrust compared to barefoot diving. However, the difference between diving without fins versus with short fins is kind of like the difference between diving with short fins versus long freediving fins; you are not maximizing your kicking power and thrust.

With short fins, it’ll feel like each kick is choppy and short no matter what kicking technique you perform. Furthermore, the rapid kicking burns up your energy and oxygen reserves faster. Short fins also struggle to perform in strong currents.

Depth

The deeper you dive, the more negatively buoyant you become (instead of floating up, you get pulled downwards). This phenomenon occurs around the 10 meter mark (35 feet deep) and is great when you’re heading down. However, this may become an issue on the way back when you’re nearly out of breath and it feels like the ocean is dragging you down.

Thus, the deeper you dive, the more thrust you need to overcome the negative buoyancy in order to safely resurface, and short fins may let you down.

Maneuverability

Thanks to their short blade length, it is easier to perform turns and change directions underwater. Performing the same movements with long freediving fins can be cumbersome even for experienced divers. Furthermore, with short blades you are less likely to hit something or feel drag as you turn in the water. This makes it easy to reposition and chase after agile fish.

Comfort

Short blades will provide a more comfortable experience both in the water and outside of it. You don’t have to deal with the extra bulk, weight, and drag that longer blades have. Turning, finning, walking; just about every action you do will feel easier to perform.

That’s not all. Many short freediving fins feature open heel foot pockets. This lets you wear insulating dive booties with padded soles. If you are diving in cooler waters, this setup will help you stay cozy and comfortable. With that said, you are sacrificing lots of performance in order to experience these comforts, so any competitive freediver should still choose long freediving fins.

Usability

There’s not much difference between short freediving fins and the fins used for swimming, snorkeling or SCUBA diving. Even the kicking techniques are relatively the same and intuitive, so if you have any experience in the aforementioned sports, then you will feel right at home wearing short freediving fins. Also, you don’t need as much leg strength to perform a kick, so it’s a good stepping stone towards building stronger leg muscles.

Energy Consumption

Although short fins require less energy to perform a kick, if we are comparing it to traveling large distances quickly, you will need to perform numerous kicks in quick succession which will burn through your energy reserves quickly. Remember the bike analogy; swimming with short fins is like being stuck in first gear.

Cave/Wreck Exploration

When exploring tight spaces such as caves, wrecks, or coral-dense locations, having a pair of short fins is ideal. You won’t have to worry as much about damaging or scraping your fins, and repositioning yourself in tight space is easier.

Travel and Storage

Shorter fins are much easier to travel with and store because they can actually fit in most bags and suitcases. No need to buy a dedicated fin bag or shop for expensive modular freediving fins.

Long Freediving Fins Overview

best freediving fins with long blades

Thrust

The longer fin blades help you displace more water with each kick, generating more thrust to propel you through the water. With long freediving fins, you will focus on slower, larger kicking motions that start from the hips and utilizes your entire legs.

Depth

On your ascent, you will have to fight against the negative buoyancy slowing you down. With the help of long fin blades, you will more efficiently slice through the water and rapidly resurface, making them excellent for deep dives.

Maneuverability

Compared to short fins, it is cumbersome to perform precise, small movements due to the drag and resistance caused by the larger surface area of longer blades. This means turning and repositioning is more difficult, requiring a high level of skill and finesse for such simple actions.

Comfort

Most long freediving fins are designed with full foot pockets which provide a tighter fit, however they may feel cramped, clammy, and uncomfortable during a long freediving session. To avoid this, consider purchasing fins one size higher and wear diving boots to fill up the extra space and provide a snug fit once again.

Now you can enjoy padded soles while keeping your skin from getting rubbed raw against the heel. Long freediving fins are not as comfortable as other fins, but the performance they offer is undeniable, so you should do whatever you can to make it comfortable for you and eventually you will get accustomed to it.

Usability

Turning and performing precise movements is more difficult with long blades. There will definitely be an adjustment period as you get used to the new kicking technique. Furthermore, without strong leg muscles you will struggle to perform even basic kicks. With that said, it provides a great leg workout and eventually your muscles will develop enough so that you can handle long freediving fins easily and efficiently.

Energy Consumption

Though it is harder to perform a kick with a long fin, each kick will be very efficient in terms of distance, speed, and thrust. You will actually end up saving oxygen and energy with more effective and efficient kicks compared to diving with short fins. However, even the performance of long freediving fins doesn’t compare to the monofin.

Cave/Wreck Exploration

The long fin blades require space to use efficiently and should not be used for cave and wreck diving. They are expensive and sensitive, and you do not want to damage your fins by accidentally kicking something sharp. Furthermore, lack of mobility can make the situation dangerous, particularly if you are using stiff carbon fiber fins.

Storage and Travel

Long freediving fins are too large for most fin bags and suitcases which makes them hard to travel with or store. Ideally, you would invest in a dedicated freediving bag for long fins, or buy fins with removable blades.

This way, you can save some space though you will probably still require a medium sized bag to fit everything. Furthermore, long freediving fins are probably too large to bring aboard an airplane as carry-on since they have very strict size requirements.

Why Are Freediving Fins so Long Recap

Now that we’ve got the pros and cons of short and long freediving fins out of the way, it should be clear why the many advantages provided by long fin blades makes them the ideal choice for competitive freedivers.

With that said, you can still freedive with short fins! You just have to understand the trade-offs, particularly in regards to underwater time and depth. The benefits are that short fins are more comfortable, convenient, and easy-to-use.

If you are just starting out or have a limited budget, there’s nothing wrong with freediving with short fins. Particularly if you haven’t developed your leg muscles enough for long freediving fins, then use short fins to build up your leg muscles in the meantime. Once you’ve got the hang of freediving and want to invest into some better fins, then look into getting long freediving fins with removable blades.

SCUBA Fins vs. Long Freediving Fins

snorkeling fins vs scuba diving fins

What are the differences between the fins used for SCUBA diving and freediving? After all, both fins are intended for use deep underwater, but you might be surprised to learn that SCUBA diving fins are short because SCUBA divers want fins that are easy to kick with. Here’s why.

SCUBA diving requires lots of bulky, heavy gear that already increases underwater resistance and drag. For each dive, you need to lug around an oxygen tank, a breathing apparatus, dive weights, and more. Add on a pair of long fins which, as we’ve discussed, requires significant leg strength to efficiently utilize, and you have a SCUBA diver that struggles just to move.

Too much resistance will tire you out and you won’t be able to dive for very long. That’s why SCUBA fins are designed to be easy to use and relatively short. You should be able to kick with little effort and move at a slow, but constant pace while exploring the environment.

So if you want to perform well in both of these water activities, we recommend getting two separate fins for each activity: long freediving fins for freediving, and short SCUBA fins for diving.

Now that you have a basic understanding of SCUBA fins vs. freediving fins, let’s go over the materials that these fins are made of and how they impact performance in the water. Freediving fins are often made from these three materials from cheapest to most expensive: plastic, fiberglass, and carbon fiber.

Freediving Fin Materials

Plastic Freediving Fins

When you perform a kick with a long-bladed fin, it bends. The blade will try to straighten itself back into its original shape, and this snapping action helps propel you through the water and generates thrust. All blades do this, but the effect is more noticeable with long-bladed fins.

The snapping action is referred to as a blades’ responsiveness and is why long fins offer better performance than short fins. The power that the blades can generate depends on the material it is constructed of.

For instance, the cheapest and most common fin material, plastic, has very low responsiveness. When the blades are bent, they don’t “snap” back in place so much as they slowly return back to their original shape. This makes for a mediocre thrust, and you get less power per kick compared to higher-end blades constructed from carbon-fiber or fiberglass.

Furthermore, plastic freediving fins are very stiff. In other words, when kicking with a plastic freediving fin the blade remains rigid and barely bends. This results in the large surface area of the fins adding drag when it is supposed to help you overcome it.

With that said, plastic freediving fins are still better than diving without fins. Additionally, they are very affordable and should be the starting point for beginners who are on the fence about whether they should invest in fiberglass or carbon fiber fins in the future.

If you’re not sure which plastic or elastomer freediving fins you should be using, we recommend this one.

Fiberglass Freediving Fins

After you’ve used plastic freediving fins and you feel like it’s time to upgrade to better fins, then you should consider getting fiberglass.

The difference between fiberglass and plastic is like night and day. Fiberglass fins are more responsive and flexible compared to plastic. You will immediately feel the power that these blades provide as they snap back into place.

This will result in a significant speed boost and a greater return on performance to energy expenditure compared to plastic. Fiberglass fins are the middle option; more expensive than plastic, but cheaper than carbon fiber.

Carbon Fiber Freediving Fins

Carbon fiber freediving fins are the most expensive and high-quality fins to strive for. They are typically used for deep dives because they help divers resurface quickly. This is possible thanks to its responsiveness and flexibility.

With each kick, the blade can bend more than 90 degrees, and this impressive wind up results in an explosive snap back, propelling divers through all kinds of water resistance like a torpedo.

With carbon fiber fins, you can conserve the most energy which allows you to perform the deepest dives without gassing out as quickly compared to fiberglass and plastic fins. The carbon fiber fin’s strength lies in its flexibility, but you also need to have good stiffness as well.

Also, having a pair of high-quality fins does not make up for a lack of skill. A good freediver is a good freediver regardless of their gear, and only practice and experience can contribute to that. Furthermore, beginners most likely won’t invest such a large sum of money for carbon fiber fins until they have more experience.

If you are looking for a good entry-level carbon fiber fin, then check out these ones. In addition to their great flexibility, they are lightweight and will help you jet through the water like a torpedo. You’ll be amazed at how much thrust you can generate with each kick.

Long Freediving Fins Kicking Technique

Long freediving fins have a lot of surface area which causes you to experience more water resistance when kicking. Without strong leg muscles, kicking will feel difficult and you will likely compensate for this lack of strength by bending your knees.

This is not the proper way to kick with long freediving fins. You must keep your legs relatively straight, with only a slight bend in your knees. Each kick should start from the hips and incorporate the entire leg. The knees should not bend much, your body should stay straight, and your hips need only roll slightly. Check out the video below for a demonstration.

https://www.youtube.com/watch?v=N693LINxGZc

Also, make sure you move your legs an equal distance in front of your body as you do behind your body. This can be hard to do initially, since your body is not used to this technique, however you must drill this motion into your body until you’ve got it memorized. Soon, your leg muscles will develop and kicking with long freediving fins will feel like second nature.

Why You Need a Freediving Buoy and Line

All freedivers should use a freediving buoy and line in order to protect not only themselves, but other freedivers as well. Without these two essential pieces of equipment you are limiting your growth as freediver and jeopardizing your safety. In this article, we will discuss the benefits of using a freediving float and line as well as our recommendations for the best ones.

Why Should I use a Freediving Buoy & Line?

There are four major benefits that a dive buoy provides.

Comfort: Freediving buoys serve as resting areas between dives

Without a freediving buoy to provide you with a safe place to rest between dives, you are constantly depleting your stamina. No matter how fit you are, diving without a buoy means you are constantly treading water as you’re “resting”.

You will be surprised at how much valuable energy you are wasting, and this can result in your muscles fatiguing which will prevent you from finning effectively (and dive deeply).

Even worse than having tired muscles, being exhausted means you may lack the energy to resurface, or to stay afloat long enough to swim back to shore, increasing your chances of drowning.

Furthermore, by treading water, you are not allowing your O2 levels to fully replenish between dives, and this lack of oxygen may lead to a deadly shallow water blackout. For these reasons alone, you should get yourself a freediving buoy and line to improve your performance and safety while freediving.

Visibility: Freediving buoys let boats know someone is close by

Think about this: how is someone speeding around on a boat supposed to know where you are and avoid you if you suddenly surface right in front of them without any warning? It’s no wonder that so many boats are colliding into divers over the years, severely injuring them at a minimum, or outright killing them at worst.

With this thought in mind, you should begin to understand how important it is to let others know that you’re currently underwater and that you can surface at any time. With the freediving buoy and flag, boats will know to avoid that around, and thus prevent a potential collision.

For this reason, freediving floats are designed to stand out. Bright, fluorescent yellow, red, or orange are common colors you will find ona dive buoy. These colors are easy for boat operators to spot from a distance, and will save your life.

If you decide to freedive in the open waters without bringing a dive buoy with you, you’re essentially rolling the dice each time you surface and praying that you won’t be face to face with a boat that’s about to pulverize your face.

Safety: Freediving lines can be attached to a buoy

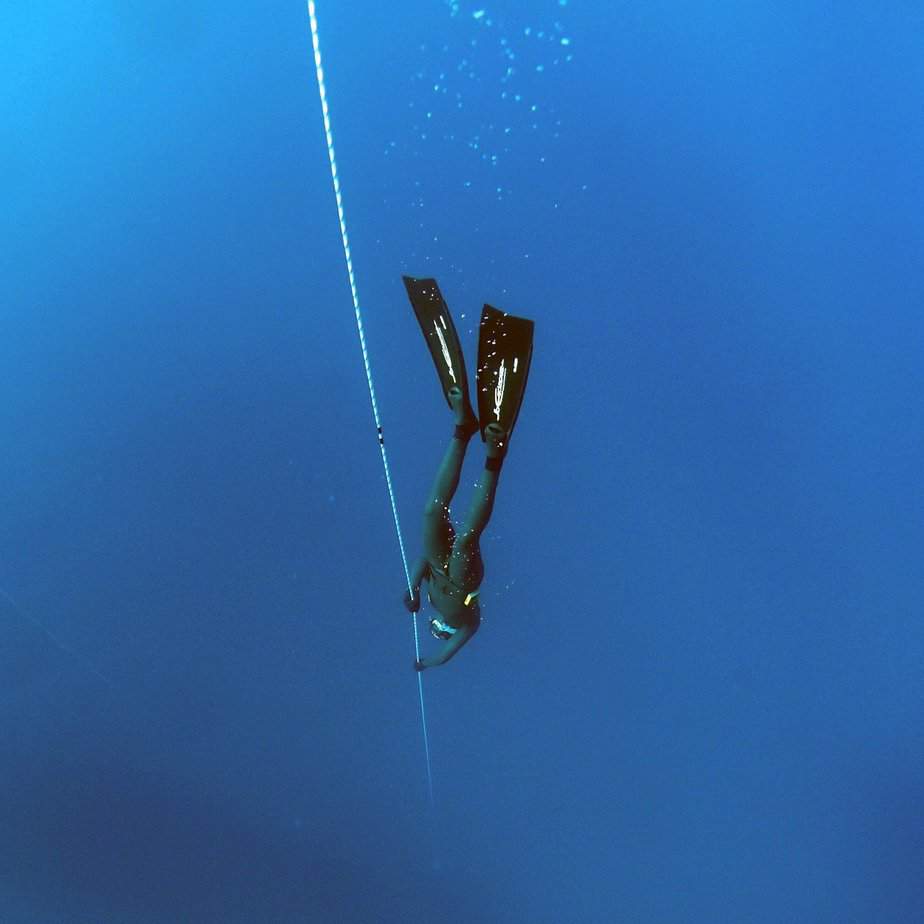
When freediving, you should be attached to a freediving line or at least use one to guide you to the surface. Being underwater can be disorienting. Having a line to assist you will help you get a feel for your diving depth, but also orient you in the right direction.

If you freedive without a line, you can easily get swept away by underwater currents or get lost, never to reach the surface again. “This actually happens to people?” you might be thinking. Yes, it even happens to the best of the best, so don’t think it won’t affect you. Freediving is already a relatively dangerous sport, but lines and buoys make them so much safer.

Storage: Keep small, useful accessories in buoys

Any decent buoy will have some storage space to hold your first aid kit, torch, or a cellphone (it needs to be kept in a waterproof bag or casing, naturally). This is so good for improving quality-of-life and may prove to be vital during emergency situations.

Rather than leaving a bunch of valuables or other small items by the shore or in your car, just bring them with you and store them in the dive buoy. You can also tie your freediving equipment such as dive booties, spare fins, snorkels, or dive weights to it. Overall, it’s convenient and a huge time saver.

The four reasons mentioned in this section should highlight how risky it is to freedive without a buoy and line. For a sport that is already inherently risky, it would be wise to invest in these two pieces of equipment to drastically improve your quality of life and safety.

Now that you know that you should get yourself a freediving float and line, the next question is which ones, and what criteria should you look for?

Best Freediving Buoys and Lines Review

Whether you are a beginner or professional, a freediving buoy is essential for all freedivers in open water. There are various models to select from depending on your particular needs and diving style. Here are our top picks.

Sopras Sub FreeDiver Buoy

The Sopras Sub Freediver Buoy Instructor Float is one of the top freediving floats on the market for good reason. It provides everything a freediver needs, making it a safe and effective freediving buoy. Here’s why you should get it.

Sturdy: Low-quality, cheap buoys have no weight to them and they float like a glorified balloon on top of the water, pushed around by the lightest gust of wind or calm waves. The Sopras Sub float actually dips into the water so that a small section is underwater. This reduces the center of gravity and allows it to remain stable in the water, like a tree that’s firmly rooted to the ground.

Spacious: The Sopras Dive Buoy has enough surface space that numerous freedivers can simultaneously rest on it between dives. Great for diving with friends.

Convenient Straps: Since it is so spacious, it also features four straps on each side for freedivers to hoist themselves onto the buoy to rest after surfacing. The straps make bringing it back to the boat much easier.

High Visibility: The Sopras Sub Freediver buoy comes in a bright red color which has a high contrast against the blue ocean, making it easily visible to boats and other divers because it sticks out like a sore thumb. Boat operators will know to steer clear of that general vicinity so you can freedive with relative peace of mind.

Numerous Pockets: Store various small items such as first aid kits, whistles, sunglasses, smartphones, etc., in the pockets of this dive buoy.

Inflatable with Your Mouth: You don’t need to use a scuba hose to inflate the Sopras Sub FreeDive buoy, whereas most diving buoys require one. The less equipment you need, the better, and you can think of inflating the buoy by mouth as a good warm-up routine.

With all of the benefits that the Sopras Sub FreeDiver buoy provides, it shouldn’t be a surprise that it costs more compared to other freediving floats and lines. However, you get what you pay for, and it is a small price to pay considering your life is literally on the line.

Cheaper buoys are abundant on the market and they are cheap for a reason. As we mentioned above, they are often made with low-quality, ultra-thin and weak materials. They have no weight in the water and get blown around like a leaf in the wind.

Personally, I’m more of a buy-it-for-life kind of guy. When I choose to buy something, I’d rather pay more upfront knowing it’ll last me for years than something that will break down after a couple months of use.

For this reason, I highly recommend the Sopras Dive buoy. Thanks to the 200D nylon material it is constructed from, it feels extremely sturdy yet lightweight at the same time. You can have peace of mind knowing that this buoy has got your back. Don’t waste money on a cheap knock-off product when you can get the real deal, and this is it.

Best Freediving Line: OMER Orange Float Line

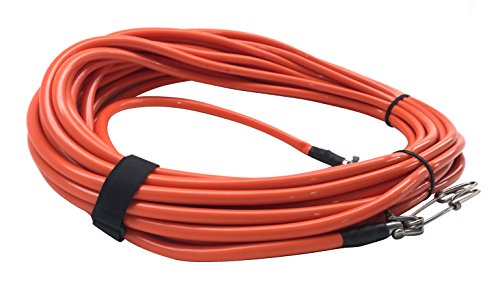
A freediving buoy is just one part of the equation, you also need to pair it up with a float line. We recommend the OMER orange float line, which is very durable and capable of withstanding the wear and tear of any pulling, tugging or travelling you will subject it to. Its bright orange fluorescent color will lead you through low-visibility conditions underwater.

Furthermore, the OMER orange float line includes a detachable Tuna Clip that can secure any object tightly so you won’t lose it against the crashing waves. Lastly, you can also use a diving lanyard to help you hold additional items.

Additional Freediving Buoys to Look Into

For those shopping with a limited budget, you can still get high-quality floats if you do some research. We recommend the Double Bladder Spearfishing float for a mid-range float. It is constructed from 400D Urethane Nylon and is also orally inflatable, which is convenient for many freedivers.

Next, freedivers who constantly travel should look into the Torpedo Buoy. This buoy already includes a line, but it’s also very convenient to deflate and pack up which is ideal for those frequently on the move. When it’s time to use it, just take it out of your bag and orally inflate it.

For the casual freediver that wants to occasionally do some coastal exploration and recreational dives, even using a basic surface marker is better than nothing. The DiveSmart Surface Marker Buoy fits this bill with its small, yet highly visible design. Priced to be affordable, there’s no reason why you shouldn’t at least set some kind of marker in areas with heavy boat traffic. The compact design is great for storage and taking it with you on travels.

Lastly, for those who not only freedive but also do some spearfishing, the SEAC Spearfishing Buoy is a great choice for both activities. Spearfishing requires more gear than freediving, therefore Spearos need a float that can store their extra gear.

As such, SEAC have come up with a multi-purpose float that not only acts as a marker, but also doubles as a storage unit with its various pockets, and Velcro straps to secure your spearguns, dive knives, and other accessories. The large surface area of the SEAC buoy provides a resting place for you if you need it, and it can also be used to hold the fish.

Additionally, the SEAC Sea Mate inflatable boat includes 7 D-rings for convenient anchoring, and is particularly useful for holding or fixing your equipment.

How to Set Up the Freediving Buoy and Line

We highly recommend you check out this video for an in-depth look at how to set up a freediving buoy and line.

Below is a brief summary of what the video covers.

To set up a freediving buoy and line properly, you will need the following: the dive buoy, the line, some ropes, weights, heavy-duty carabiners, and a nylon strap or weight belt.

Secure the Float

Securing the dive buoy is easy when you are in shallower water. In this situation, you can just anchor the float to a rock, or the attached weight will anchor the setup in place. Things get trickier when the water is deeper and you are starting off from a boat.

In this scenario, you must secure the the buoy to the boat using rope (not the same one you plan to use as the line). Connect the D-ring on the buoy to the rope, and tie the other end to the boat.

Prepare the Line

The freediving line will serve as your guide through dark, murky waters. It should be a thick, non-stretching rope that is tangle-resistant. You should mark it every 5m (16 ft.) to help you keep track of your depth at a glance. Next, secure the end of the line to the D-ring found on the bottom of the buoy using a sturdy carabiner to keep it in place.

Attach the Weight

To ensure the line stays taut, you need to attach weights to it. You can use standard diving weights placed in a bag, a freediving belt, or a durable nylon buckle. Attach your preferred weight to the other end of the line with a heavy-duty carabiner and check that the knot is secure.

Some freedivers have successfully used weightlifting plates as an alternate option, though this is complicated to handle. The key is to use a bottom plate beneath the weights. This setup is often seen in competitions. You can affix tags on the holes around the edge of the bottom plate. The competitors need to retrieve these tags and bring them up to the judges, otherwise the dive is considered invalid.

Double-Check the Carabiners and Knots

Before you throw the line and weights into the water, check if any knots have come loose and if the carabiners are in place. For added security, you can attach yourself to the line with a freediving lanyard.

Why You Need a Freediving Float Recap

A high-quality freediving float and line makes this activity a whole lot more enjoyable and safer. Many freedivers lsnorkose their lives every year because they were struck by boats or lost track of where they were underwater and couldn’t resurface in time. A dive buoy is a relatively cheap investment that can help you avoid all of this.

Thanks to its high visibility, boat operators will know to avoid areas marked by a dive flag or buoy. Furthermore, dive buoys provide a place for you and other freedivers to rest as well as a storage space for small accessories. It’s important for you to conserve your energy and fully rest between dives to ensure your safety.

Furthermore, with a freediving buoy, you can feed a freediving line through it and use it as an underwater guide. This simple tool can help you dive straight down and up without getting lost. You can also mark the line every few meters to help you keep track of your depth when diving.

It may seem annoying having to set up a freediving buoy each time you head out to the water, but this piece of equipment can literally save your life. In our opinion, when it comes to safety, you can never be too careful and any amount of time or money invested towards properly using a safety device is well worth it.

Best Freediving Snorkels Review

Since there are so many snorkels on the market, it can be hard to narrow down the options on the market and find the best freediving snorkel. Thankfully, for freedivers and spear fishermen, a snorkel with a simple design is the best snorkel.

With how popular water activities like snorkeling, diving, and spearfishing have gotten in the past decades, many strides have been made in snorkel technology. Nowadays, even entry level snorkels are a technological marvel compared to the hollow reed tubes our predecessors used to use.

You can get snorkels with dry tops and purge valves that keep water from entering the tube, as if it were protected by a magic water repelling barrier. As nice as these features are, they are actually detrimental to freedivers.

For us freedivers, there is only one type of snorkel we need. And that is the classic J-type snorkel sans dry-top or purge valve. The features we are looking for are a comfortable mouthpiece and some extras that might not be found on most snorkels.

Even though a traditional snorkel seems somewhat lacking in features, it actually has everything you need and none of the fluff. That means shopping for them will be a breeze, and you will save lots of money. Let’s go over what to look for in a freediving snorkel so that you can find the best one for you.

Our Top Picks:

Cressi Corsica, Black/Black [DUPLICATE]
Mares Dual Snorkel for Spearfishing and Freediving, Black

Best Freediving Snorkels Review

Cressi Corsica

Cressi Corsica, Black/Black [DUPLICATE]
248 Reviews
Cressi Corsica, Black/Black [DUPLICATE]
  • The Corsica is the ideal snorkel for freediving, spearfishing and scuba diving. Very light and comfortable.
  • Large diameter snorkel tube provides unobstructed ease of breathing.
  • Soft bendable snorkel tube to maintain proper and comfortable positioning.

The Cressi Corsica was designed specifically for spearfishing and freediving and it shows. With its soft and flexible large diameter tubing, you can adjust it into a comfortable position behind your head while maintaining consistent airflow on the surface.

When underwater, the mouthpiece will stay out of your way by resting gently beneath the chin for improved hydrodynamics. Comfort is once again a priority which is why the silicone mouthpiece is designed to be hypoallergenic and to fit ergonomically into one’s mouth. Thanks to its anatomical shape, the mouthpiece won’t dig into your gums or teeth even during long sessions in the water.

Pros:

  • Flexible snorkel tube allows for easy storage as well as comfortable positioning while underwater.
  • Large diameter snorkel tube and specially designed u-bend allows for easy and unobstructed breathing and clearing.
  • Soft and anatomical silicone mouthpiece is hypoallergenic and remains comfortable even during longer diving sessions.
  • Can easily fit into a BCD pocket thanks to the ultra bendable tube.
  • No closures or vents that may fail or hold air.

Cons:

  • The mask clip is low quality and can easily break. Replace it or you may end up losing the snorkel.

OMER Sub Zoom Pro Soft Snorkel

Sale
Omer Zoom Snorkel - Black
10 Reviews

The OMER Zoom Pro features an ergonomically designed air tube and mouthpiece made with hypoallergenic silicone. It naturally curves around the face and will not get in the way underwater. Fill your lungs with fresh oxygen thanks to the large internal tube that is 20mm in diameter, a dimension that optimizes the air flow rate.

In order to keep drag as low as possible, many components were kept to a minimum in size, such as the strap holder. The snorkel tube of the Zoom Pro is constructed from flexible plastic material that, despite being soft, has high mechanical strength. The material is often used in underwater devices subject to wear and tear, as well as heavy-duty engineering components so you know it is built to last.

Furthermore, the OMER Zoom Pro won’t discolor under UV light radiation, nor will it swell up in the water. This is due to its high rebound elasticity so divers can fold it up when not in use and it will simply snap back into shape once it is needed. The material is not so rigid that it vibrates during the ascent.

Pros:

  • Ergonomic design built to adhere to the profile of a diver’s face.
  • Mouthpiece made with hypoallergenic silicone, and the tube from Thermoplastic Urethane (TPU), a flexible and durable plastic material.
  • The snorkel tube is foldable for travel and has an internal diameter of 20mm for optimized air flow rate.
  • Dimensions of components kept as small as possible to still be functional and yet minimizes drag.
  • Will not swell up in the water or discolor when exposed to UV rays.

Cons:

  • The mouthpiece runs a little small, you may feel some discomfort using it for more than an hour.

Aqua Lung Sport Nautilus Roll Up Snorkel

Aqua Lung Sport Nautilus Roll Up Snorkel (Black)
112 Reviews
Aqua Lung Sport Nautilus Roll Up Snorkel (Black)
  • Merchandise, made by Aqua Lung Sport. It is a Nautilus Travel, Snorkel . Comes in Various Colors. Comes in Various Sizes. The package weight is approx...

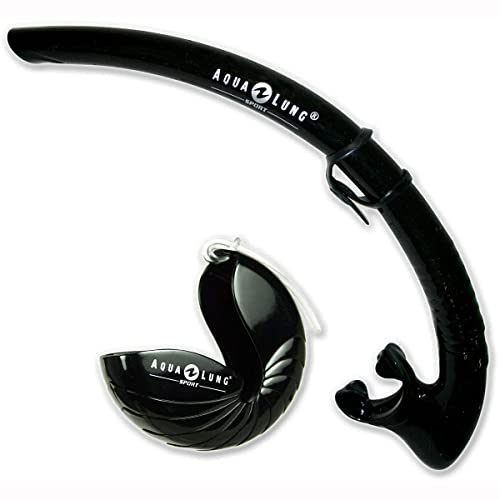
You will be amazed at how much space you can save when traveling with the Aqua Lung Sport Nautilus roll-up snorkel. Seriously, this thing can roll up to the size of your fist, allowing it to be easily transported within its holder or kept in a BCD or clipped to a D-ring when diving.

With how soft the silicone material is, you know that this snorkel is comfortable and extremely flexible. Despite how bendable the snorkel is, during strong currents you’d think it would flop around but it holds straight with no issues.

The Aqua Lung also comes with a useful, adjustable button clip that securely attaches the snorkel to the mask. This makes detaching it from the mask a breeze without ripping the band off the mask (which is what many other models do) and ruining your fit.

Pros:

  • Compact design, capable of rolling up to fit in a BCD pocket or save on bag space when travelling.
  • Silicone design is durable, yet flexible to allow it to roll up. Don’t worry, it will stay straight and functional during strong currents.
  • Comfortable mouthpiece.
  • Adjustable button clip that connects to the mask and allows for quick detachments without ruining your fit.

Cons:

  • Some users have complained that this snorkel is too floppy, while most reviews agree that it holds strong. Your mileage may vary.

Mares Dual Snorkel

Mares Dual Snorkel for Spearfishing and Freediving, Black
129 Reviews
Mares Dual Snorkel for Spearfishing and Freediving, Black
  • Optimized diameter and length to prevent air turbulence caused by emptying
  • Constructed from bi-materials with different textures to prevent irritation on the nape of the neck as well as providing flexibility without...
  • Hydrodynamic design reduces vibrations and noise during underwater movements

The Mares Dual Snorkel is perfect for freediving and spearfishing because of how it is angled to stay out of your way and help you be comfortable underwater. It is constructed with bi-materials with differing textures which keeps it from irritating the nape of your neck while also ensuring flexibility during use.

Next, this snorkel is built to be hydrodynamic, vibration-resistant and quiet, as well as flexible without causing any interruptions to the airflow. Perfect for spearfishing when you want to be able to sneak up on fishes.

The mouthpiece is made from hypoallergenic silicone and is designed to offer clear and easy breathing and is suitable for prolonged use without feeling uncomfortable. The Mares Dual Snorkel has an overall very simple design that does exactly what you need it to do and it does it very well.

Pros:

  • Anatomical design contours around your face and stays out of your way.
  • Optimized tube length and diameter to reduce air turbulence that occurs when emptying.
  • Hydrodynamic design makes almost no noises that can alert fish to your presence.
  • Low profile, low drag, flexible where it needs to be and otherwise very solid.

Cons:

  • The rubber mouthpiece may detach if you are not careful.
  • Some users complain about tube length.

Best Freediving Snorkel Buying Guide

Dry Snorkel Features – Purge Valves and Dry Tops

Purge Valves

You will find that most mid-range or higher SCUBA diving or snorkeling snorkels come with a purge valve, but once again, this is not needed for a freediving snorkel. For those unaware, purge valves are a one-way valve that is located near the mouthpiece, in a small reservoir on the lowest section of the snorkel.

If any water manages to enter the snorkel tube, it will accumulate in the reservoir and get vented out of the tube without letting any water re-enter. To clear the water, one simply needs to forcefully exhale from the mouth to do so.

As neat as this feature is, it does add an element that requires frequent maintenance. Furthermore, there is the potential of it malfunctioning when you need it most. Since it is not absolutely necessary and it does add extra bulk to the snorkel, freedivers tend to forgo it.

Dry Tops

Dry tops are yet another neat feature that freedivers do not benefit from at all. In fact, dry tops can actually be detrimental. But first, let’s explain what it does. Dry tops seal the tube opening whenever water is about to enter.

It uses a float valve mechanism that relies on a buoyant material to open and close the seal as the water level rises or lowers. If the snorkel gets submerged or an unexpected wave splashes on the tube, the float valve will seal the opening shut.

Due to the automatic process of the dry top, beginners feel confident that little to no water will ever enter the tube, and any that do will get vented out by the purge valve. Snorkels with this setup are known as dry snorkels.

Dry snorkels are excellent for snorkelers who only stay by the surface of the water, however they actually work against freedivers, spear fishermen, SCUBA divers, and even snorkelers who duck dive. The reason is that when the dry top seals the opening, it traps the air inside the tube. The remaining air adds buoyancy and will constantly pull the snorkel upwards.

In other words, you will have to actively fight against the trapped air and this constant tugging can actually break the watertight seal on your mask. Not good when you’re several meters underwater and water starts to flood in.

Mouthpiece

When selecting a snorkel, one important consideration is the mouthpiece. When snorkeling or freediving, you will spend a lot of time by the surface with the snorkel in your mouth compared to other water sports. Thus, it must be comfortable enough for you to use for many hours without feeling discomfort.

In order to ensure the mouthpiece is comfortable, first consider the material. You should look for mouthpieces made from soft silicone materials. In addition to being comfortably soft, it is also easy to clean and hypoallergenic. Mouthpieces are detachable to allow you to clean it more thoroughly.

Next, consider the size of the mouthpiece. You should not have to force your lips over the mouthpiece, nor bite down extremely hard in order for it to stay in place. You will know the mouthpiece is an appropriate size when your lips and jaw is relaxed and you do not feel pain, even when worn for a long time.

Lastly, the bite tabs in a snorkel mouthpiece should be soft as well. Some high-end snorkels have bite tabs that conform to the shape of your bite for greater comfort.

Size

When it comes to freediving snorkels, longer is not better. The snorkel should be as large and long as it needs to be and no more (the tube should be around a foot in length). This is because a bulky snorkel increases drag, and the longer the tube length, the more space there is for “dead air” to linger.

When breathing through a snorkel, the air in the tube must be cleared out each time you exhale. Otherwise, you will start inhaling some of the carbon dioxide (CO2) that didn’t get cleared out instead of a full breath of fresh oxygen.You will slowly asphyxiate if you breathe too much dead air in the tube. If you start to feel dizzy or lightheaded, surface immediately.

If your snorkel ever gets filled with water while you’re using it, you may accidentally choke on it and fresh oxygen won’t be able to enter. You must quickly clear all of the water out by forcefully exhaling in order to breathe through the tube again. However, the longer the tube, the more difficult this is to do.

Material

Snorkel tubes can be made from either soft or hard plastic. Higher end snorkels may incorporate both in their design.

Snorkels made from hard plastic are, unsurprisingly, durable and strong (and typically less expensive). Unfortunately, they are not very flexible. A rigid snorkel is not desirable because they are more likely to break as opposed to one that has some flexibility. It’s also common for hard plastic snorkels to catch on something and get stuck.

Flex Tube

A feature you will find on many snorkels is something called a flex tube. The flex tube is located near the bottom and it connects the main breathing tube to the mouthpiece (as opposed to one continuous tube).

The benefit of flex tubes is that when you’re by the surface and want to talk to your buddy, you can remove the mouthpiece and the flex tube will let it hang by your side out of your mouth’s way so that you can speak.

Unfortunately, freedivers and SCUBA divers do not benefit from this at all. When diving underwater, the flex tube will flap around, get in the way, increase drag, and will generally be a nuisance.

A foldable snorkel may be beneficial for SCUBA divers who may want to fold up their snorkel and store it in their BCD. Unfortunately, freedivers once again do not benefit from this, particularly those who prefer to leave their snorkel beneath their mask strap.

Mask Attachment

Snorkels must securely attach to the snorkel mask, and most snorkels come with either a plastic clip or a figure-eight style attachment. Mask clips can be either the quick-release type or the lift-to-attach type.

The figure-eight silicone keeper is ideal for snorkels with round tubes. Conversely, the mask clips are generally used for snorkels with oval or squarish tubes. The former is extremely cheap and easy to replace though it is slightly more of a hassle to attach it to your mask compared to the hard plastic clips.

Some freedivers leave their snorkels clipped to their masks and dive with the snorkel. However, some freedivers will leave their snorkel floating at the surface so they can dive unencumbered by it. To do this, you can either get a floating snorkel and ask a dive buddy to hold onto it for you, or attach the snorkel with a string to a freediving float.

Color

We don’t like to mention colors on a product unless they serve a practical purpose. In the case of freediving, colors do matter a bit. For instance, beginner freedivers may want to use a snorkel that is brightly colored.

A bright colored snorkel will stand out even from a distance. In case you are in trouble, it is very easy for help to spot you. You might want to stand out so that boats, snorkelers, or others in the water can see you and can avoid colliding into you.

If you plan on spearfishing, then you want a snorkel that is a dull, dark color, such as blue or black. This can allow you to blend into the water better and avoid detection from sea creatures. While fish can’t exactly see colors, they can still tell when there is a difference in contrast.

Casual snorkelers or freedivers can pick whatever color or style they prefer.

Snorkel Safety Tips

Snorkel in or out?

A simple way to spot a newbie freediver (perhaps someone who is transitioning from snorkeling to freediving) is to check if they have the snorkel in their mouth or not in the middle of a dive. Beginners will keep the snorkel in their mouth, but experienced freedivers know better than to do that.

It isn’t safe to dive with the snorkel in your mouth. Experienced divers know better than to do this because in the event of a shallow water blackout, your body will subconsciously clench your jaw, locking the snorkel in place and raising your chances of drowning.

Keep in mind that while submerged, a snorkel will essentially act like a funnel of water that will get poured straight into your lungs the second you blackout. You don’t want the first thing you do after surfacing to be frantically removing a snorkel from your mouth so you can breathe. Having to clear water out of the tube when you are already out of breath is even worse.

New freedivers will often make the mistake of keeping the snorkel in their mouth when freediving, so if you catch somebody doing this, make sure to let them know that it is unsafe to do.

With or Without A Snorkel?

Instead of asking whether the snorkel should be in or out of your mouth, how about whether you need a snorkel at all? For an in-depth answer, we recommend you read this article in its entirety. Otherwise, here is the summary.

Depending on how far you plan on diving, the type of diving you’re doing, as well as what depths you will reach, the answer may differ for each scenario.

For example, if you are spearfishing then you will most likely be within 80 feet of the surface. In this case, just dive down with your snorkel. Spearos need to be aware of their surroundings at the surface, so a snorkel is a necessity.

If you are freediving at medium depths then it is up to personal preference as well as the setup you have. For instance, if you have a freediving float that you can safely and securely tie your snorkel to, then you can use it by the surface and just leave it there when diving.

On very deep dives you are better served diving without a mask or snorkel. Any equipment will increase drag, and having a snorkel floating behind you can be distracting. When depth matters, you cannot afford to have anything holding you back, and a snorkel would simply get in the way.

Best Freediving Snorkel Recap

Modern snorkels come with many advanced features, many of which are unnecessary or even detrimental to a freediver. Snorkels with dry tops or flex tubes will actually get in the way of your dive. Ideally, the best freediving snorkel will be a traditional J-type snorkel that can be quickly and easily cleared.

When it comes to material. you want a snorkel that is made of soft plastic. Soft plastic is flexible and can withstand more motion. They are also more comfortable to wear. Hard plastic is prone to breaking, particularly if there is a strong wave or if it gets caught on something. You need to find a snorkel that is soft enough to bend, yet rigid enough to maintain its shape.

Lastly, keep in mind how you intend on using the snorkel. It’s not a good idea to dive underwater with a snorkel in your mouth. If you ever experience a shallow water blackout, the snorkel will funnel in water into your lungs and you will almost certainly drown.

Furthermore, you may not even want to have a snorkel hanging around when diving. Set up a freediving float that you can attach the snorkel to, or have a buddy around to grab your snorkel, and you are clear to freedive without worrying about where your snorkel is.

You may also be interested in checking out our other gear reviews:


Best Freediving Fins for Beginners

You need to have a reliable pair of freediving fins in order to travel farther and faster underwater. There is a big difference between the freediving fins that pros use and what beginners use. The best freediving fins for beginners should be affordable with soft fin blades so that it is easier to ease into.

Even with an entry level freediving fin, you will be shocked at how easy it is to surpass your previous depth records. It will almost feel like you’re cheating compared to diving without fins or with the wrong type of fins

However, in order to achieve results like this, there are a few factors to consider when shopping for beginner freediving fins. In this article, we will go over everything you need to know about the best freediving fins. You will learn about the top brands, materials, design style, how to take care of them and safely bring them when traveling.

Our Top Picks:

What to Look for In the Best Freediving Fins

What features should you look out for in a pair of freediving fins? To start, there are two features that are absolutely essential, and they are 1) closed heel foot pockets and 2) long and soft blades. Of course, these aren’t the only factors you should consider, but they are the most important. Let’s go over why.

Closed Heel Foot Pocket

If you are serious about freediving, you shouldn’t even consider using open heel fins; your only option is closed heel (full-foot) fins. For those unaware, the closed heel foot pocket design on a fin means that the foot pocket completely wraps around your feet, similar to wearing a shoe. This design allows for superior power transfer resulting in greater finning speeds.

On the other hand, the open heel foot pocket design leaves a space by your heel. Much of your foot is left uncovered by material, and the fin is held in place by a small adjustable strap that wraps around your ankle.

Wearing fins with open heel foot pockets feels similar to wearing sandals. You even need to wear water socks or dive booties to keep the strap from digging into your leg. This style tends to result in inefficient power transfer resulting in lower finning speeds.

Alright, now you know a bit about these two fin styles, so what makes closed heel fins better for freediving? Once again, when the rubber material completely wraps around your feet, you get a secure, tight fit. This stable fit gives you greater power transfer per kick, which is important when freediving because you can fin faster with less effort, thus saving you precious oxygen.

In a sport like freediving where each second counts, you need to make every single optimization you can and closed heels are strongly recommended. Going forward, assume each fin we will be discussing is a closed heel fin.

If you just prefer open-heel fins, then we recommend you pair them up with a pair of dive booties. Without dive booties, your feet will be left exposed to the cold water and unprotected from the strap which can dig into you and cause discomfort.

Similarly, closed heel fins can also chafe your skin, so we recommend you wear them with a pair of neoprene water socks for added protection.

Long Blades

best freediving fins with long blades

The second important factor to look for when shopping for freediving fins for beginners are long fin blades. Do NOT get short fin blades.

Freediving fins with long blades displace more watch with each kick, resulting in greater kicking efficiency. In other words, when you kick with long-bladed fins, you will travel longer distances at faster speeds all while exerting less effort and conserving precious oxygen.

With short fins, you will be rapidly kicking and feel like you’re barely moving. It’s like trying to pedal a bike on first gear; you’re spinning your wheels and burning through your energy and oxygen reserves and not getting anywhere. Meanwhile your competitors zoom past you in fifth gear and can stay underwater for longer.

Again, if you are serious about being a competitive freediver and realizing your full potential, you should get freediving fins with long blades.

Now that we’ve covered the two most important factors when selecting beginner’s freediving fins, next we’ll cover some additional considerations that you can keep in mind as well.

Soft Blades

If you’re a freediving novice, you’ll want to keep an eye out for fins with soft blades. These will let you get used to them and develop your leg muscles as well as finning technique during shallow dives.

More often than not, beginners will purchase a super expensive, ridiculously long and durable carbon fiber fin – because that’s what the pros wear – only to find that they can’t handle the physical strain that it puts on their body. They end up disappointed that their legs get cramping up, they were out of breath the whole time, and they couldn’t get the performance they expected.

Learn the proper technique and build up your fitness level with soft blades

Even if you are very physically active, you should probably still practice with soft blade fins. Why? You want to learn the perfect technique as a beginner, because it’s hard to break out of a bad habit later on. It’s very easy to develop poor finning habits if you start out with stiff blades.

In a sport, athletic ability is certainly important, but technique is just as important. A good athlete will excel not only in terms of raw power but also due to skillful movement. Learning any new activity requires repetitive and diligent training so that you can perfect the motions needed to perform the task.

The reason that stiff fins are not recommended is that due to their inflexibility, an inexperienced diver will bend their legs by the knee to instinctively compensate for the strong resistance. This is a mistake. Your legs should remain relatively straight, which can feel awkward if you’re not used to finning.

Furthermore, regardless of one’s fitness level, there is a tendency for beginners to develop an imbalanced stroke where they kick back harder since moving the fins is easier in that direction. Having to undo these bad habits later on can be a nightmare, but starting out with soft blades will keep you from developing most of them.

Conserve Energy Along the Surface

As a novice, much of your freediving activity will take place near the surface of the water, where you can easily tire yourself out from the difficulty. You don’t want to exhaust yourself before you’ve even had a chance to practice deeper dives. Only when you have become proficient at finning and have improved your overall fitness level should you consider upgrading to a stiffer fin.

Best Freediving Fins for Beginners Review

Cressi Gara Professional LD

Cressi Gara Professional LD [44/45]
  • Sport Type: Outdoor Lifestyle

Without a doubt, the best freediving fins for beginners is the Gara Professional LD by Cressi.

Affordable: To start, they are high-quality and affordable, making them the ideal candidate for a low-risk, entry-level investment for beginners looking to get into the sport. You can expect the average high-end freediving fin to be at around $300. As an advanced freediver, this is a fair price to pay.

However, as a beginner that is a huge sum of money to spend on something that you aren’t even sure about. Your goal should be to find a solid pair of long freediving fins that are good enough to get you started with technique training and building your endurance. Once you’ve perfected that, then you can consider investing in high-end equipment (more on “high-end” equipment later).

Blade Material: The Gara Professional LD comes with elastomer polypropylene blades which are durable and economical. However, these blades have a downside which is that they can feel uncomfortably stiff starting out. It may take a few training sessions for you to get comfortable with its stiffness and the effort needed to kick with them.

You won’t be used to finning with long blades starting out. There’s no way to get around it other than to train until you develop strong, powerful legs through diligent training with long fins. Thankfully, the Gara Professional LD fin blades are made from an elastomer-polypropylene blend which makes the blades softer and more pliable.

What this means is that you can get the same power of stiffer fins with less effort. Once you put these fins on, you will soon be slicing through the water at incredible speeds while spending less energy and conserving oxygen levels. It’s not cheating, it’s being smart.

Full-Foot Fin Pockets: We said it before, but closed-heel fins are the ideal design for a freediving fin. The Gara Professional LD will wrap around your feet in such a way that the blade will be angled at a higher insertion point above your feet.

This will help you perform highly efficient kicks with great thrust that propels you through the water until you reach your desired depth.

With the Gara Professional LD, you get performance that almost rivals high-end freediving fins from a trusted, reputable brand in the water sports market. You should also pick up a pair of 2-3mm neoprene socks to prevent chafing, provide insulation, and achieve a snug fit.

Best Bi-Fins for Advanced Freedivers

Once you’ve got some freediving experience under your belt, you might start to feel like you’ve “outgrown” your plastic/elastomer fins. It is common to experience this feeling after one to two years and that means it is time to upgrade your fins to something more sophisticated.

Generally, the average freediver will follow this upgrade path:

  1. Start with Plastic Elastomer Fins and use for one to two years.
  2. Upgrade to Fiberglass fins and use for one year.
  3. Upgrade to Carbon Fiber and use it for 5+ years.

You can even skip step 2 and just go from plastic freediving fins to carbon fiber for both practical reasons and economical ones.

The upfront cost is more because carbon fiber is $100 more expensive than fiberglass, however you are paying for the best. However, in the long run it is cheaper if you invest upfront since you don’t have to buy an extra pair of fins only to upgrade it a year later.

Additionally, with carbon fiber fins you can get instant gratification once you experience the speed boost that only the freediving fin made with the best materials on the market can provide.

Leaderfins Pure Carbon Fiber

Leaderfins Pure Carbon Fiber Freediving and Spearfishing Fins (EU 33-34 / US 3-4, Hard Stiffness)
  • The blade is made from a high quality mixture of epoxy resin and carbon fibre.
  • Angle 20 degrees
  • Foot pockets are very different from regular shoes and hence we strongly recommend you to follow the guide in the last picture of the listing in order...

A good starter carbon fiber fin is the Leaderfins Pure Carbon Fiber. This fin features stiff foot pockets for additional thrust, with a soft fin blade that is simultaneously easy on your legs while packing a powerful kick. Seriously, this fin is unbelievably easy to fin with (you don’t need legs the size of tree trunks to use it).

For its price, you are getting an incredible deal when compared to the cost of other carbon fiber fins. Once you’ve had a chance to try out the Leaderfins Pure Carbon Fiber fins, you will be blown away by how far one kick will propel you; it almost feels like you’ve got boat propellers instead of fins.

C4 Martin Stepanek

C4 Martin Stepanek Signature Carbon Freediving Fins 40 Stiffness (45/46)
  • NEW Industry unique TR50 Carbon fiber construction
  • 22 Degree Angle
  • Comes with OMER foot pocket

Since you’re already spending a pretty penny, you might want to consider investing in the best overall carbon fiber freediving bi-fins, and that is the C4 Martin Stepanek freediving fins. You can select from three fin stiffnesses so that you can choose the optimal fin that is both comfortable and offers great performance in the water.

What makes the Martins stand out is how light they are. Swimmers and freedivers need swimsuits that are form-fitting to reduce drag. The next optimization to make is to wear incredibly light fins so that freedivers can slice through the water to outperform the competition. Your gear should help you perform better, not hinder you!

Since the C4 Martin Stepanek is light as a feather, you can be fast and agile in the water, allowing you to swim like you’re part fish.

Traveling with Long Freediving Fins

No matter how you plan on traveling – by plane, boat, or car, you need a durable and robust bag that is large enough to carry all of your freediving gear. Unfortunately, due to the length of freediving fins, they won’t fit in any diving bags.

Most diving bags measure in at 35 inches in length. Most freediving fins are longer than that by about 3-4 inches. In other words, good luck trying to pack your fins in that. And no, bending the fin blades is not an option!

It’s not a bad idea to invest in a dedicated bag for your freediving fins. However, you could also invest in the Palantic Fins bag (B00BQ1DUE0), currently one of the top fin bags on the market. At 40 inches long, this bag can just barely hold most long freediving fins.

We strongly believe that you should invest in a dedicated freediving fins bag. Particularly if you have invested in a pair of carbon fiber fins, you should not be exposing your expensive fins to scratches and dents. They must be kept in a bag, otherwise your fins will suffer wear and tear at an extremely fast rate.

Particularly if you are traveling by plane, your fins must be kept in a bag. We even recommend you bring it with you as carry-on. Relatively speaking, the cost of a fin bag is very low compared to what you’d have to pay to replace your trusty pair of fins.

If possible, try to bring your fins with you as carry-on. In my experience, airline staff don’t mind but they may be curious about your fins. In any event, whether you check your luggage in or bring it with you, your fins ought to be kept in a bag.

Freediving with a Monofin

monofin and bi-fins emma farell
Left: Monofin. Right: Bi-Fins. Photo Credit: Emma Farell CC By 2.0

As a beginner, you don’t need to concern yourself with this. However, if performance is what you’re looking for, then one day you may end up using a monofin. They are the most efficient and effective type of freediving fin you can get.

When you use a monofin with good dolphin kicking technique, you will achieve speeds that surpass bi-fins. Monofins are different from bi-fins in that there is only one fin blade instead of two. That singular large blade is similar to the flipper found on dolphins. Both foot pockets are located next to each other and connected to the same fin.

Since you cannot separate your feet, turning in the water becomes a nightmare, and both feet must move at the same time in order to kick. Despite this, monofins provide the best performance, allowing freedivers to achieve speeds 10% to 40% faster than bi-fins.

When it comes to efficiency, speed, and depth moving in straight lines then the monofin is the best option for you. Since monofins are so different from other fins, it will feel very awkward using them in the beginning.

With that said, we do not recommend investing in a monofin if you plan on doing any water activities other than competitive freediving. They are not ideal for cave diving, underwater photography, spearfishing, or casual diving.

Monofins are designed and intended for competitive freedivers that are trying to set new world records and surpass other freedivers. They are not made for the casual freediver; they are built for unmatched speed. For the vast majority of freedivers, the bi-fins mentioned above will be sufficient for almost all cases.

If you are still interested in getting a monofin, then check out the Leaderfin Monofin. Measuring in at a whopping 28” x 28”, the large blades will displace large amounts of water with each kick. The blade is flexible and will snap back to their original position after each kick (this is the secret behind the monofin’s exceptional performance).

Leaderfins FINSWIMMER Monofin for finswimming, Dynamic apnea and CWT Freediving (XXL / EU 45-46 / US...
4 Reviews
Leaderfins FINSWIMMER Monofin for finswimming, Dynamic apnea and CWT Freediving (XXL / EU 45-46 / US...
  • The blade is made from a high quality multilayered fiberglass
  • Supplied with free neoprene socks
  • Foot pockets are very different from regular shoes and hence we strongly recommend you to follow the guide in the last picture of the listing in order...

Freediving Fin Buying Guide for Beginners

Design

If you’re just starting out, then the best freediving fins for beginners are ones with fixed blades. They are cheap, easy-to-use, and very durable. There’s no need for any complicated assembly or maintenance, just slip them on and dive in. The downside of fixed blades is that as you improve as a freediver, if you want to make an upgrade then you have to purchase a new pair of fins.

On the other hand, there are modular freediving fins which give you the option to upgrade the blades as you see fit. Beginner modular fins come with plastic blades, and you can upgrade to carbon fiber of fiberglass blades in the future for better performance. The downside of modular fins are their high price compared to fixed blade fins. Also, they are not as durable so you will have to take extra care to keep them safe.

Durability

As mentioned above, entry-level freediving fins with fixed plastic blades are more durable than carbon fiber or fiberglass blades. Sometimes the stiffness and durability of fixed blades is taken advantage of by spear fishermen and advanced freedivers who prefer the lower sensitivity.

Some divers also prefer to use their inexpensive, basic plastic blade fins for diving in rocky or rough areas where the risk of damaging their high-end blades is higher. If you have a spare pair of fins, then use them whenever you aren’t boat diving or training to keep the risk of damage lower.

You must be careful to avoid damage even when traveling. That is why you should buy a dedicated fin bag to store your fragile modular fins when not in use.

best bi-fins for freediving

Stiffness

If you opt for fixed plastic blades on your beginner freediving fins, check that the stiffness is something that your body can handle. You can do this by searching the fin manufacturer’s website or product description about its hardness.

For the most part, as a beginner or someone who simply wants to do long distance swimming by the surface, it is recommended to choose blades that are soft or have a medium stiffness rating at the most. Stiff, rigid blades are difficult to swim with.

To properly use stiff blades, one needs to have powerful leg muscles and a large body type to have the power to continuously propel their body through the water using stiffer blades.

Price

When starting out, you should look for affordable freediving fins. While learning the ropes on how to properly freedive, it is really common to damage the blades due to rocks or improperly storing them when traveling. There’s no need to get the best of the best for your first pair of fins.

Even after you’ve got some experience with freediving and are looking to upgrade to the next pair of fins, don’t just look at the price. We’ve listed many other considerations in this guide, and if a pair of fins fulfills your needs and can help you reach your freediving goals, then get that pair.

Sizing

Sizing is always an issue when you shop online and can’t try it on in-person. For something as important as freediving fins where a snug fit is necessary, correct sizing is crucial. Here is where most people go wrong.

The majority of freediving fins are made by European manufacturers, so the best point of comparison is to take European size convention into account when buying a pair. Unfortunately, this is not foolproof because the conversion from US to European sizing can vary across retailers.

The best way to solve this issue is to manually measure your foot yourself, instead of relying on your regular size and converting it to European standards. Also read the customer reviews to see what other people have found out regarding sizing for a particular fin.

Barefoot or with Water Socks?

When you are shopping for a freediving fin, you have to consider if you will be wearing neoprene water socks or wearing the fins barefoot. Most fins are sized such that a correctly sized pair fits a little loose barefoot. The expectation is that you will be wearing a 2-3mm water sock in order to achieve a snug fit.

Even if you only plan on swimming in tropical waters, you should probably still wear neoprene socks for the extra insulation. The deeper you dive, the colder the water gets even in a warm climate, so extra insulation to keep your feet comfortable and warm is nice. It can also help you conserve energy, since cold feet don’t work as well.

Length

Travelling with a full-length pair of freediving fins can be a hassle, and we recommend you purchase a dedicated bag for them. The bag should also have extra space to accommodate your snorkel and mask, and perhaps a wetsuit as well.

Since these bags are long, you might be tempted to check it in. However, we feel it is safer to bring with you as a carry-on luggage when flying. These items are fragile, and you don’t want inconsiderate airline staff to pile a bunch of heavy baggage on top of it and damage it.

Freediving Fin Care

The materials that freediving fins for beginners are made from are durable when used in the proper context. They should be able to withstand wear and tear, however their long length does make them more fragile than standard snorkeling or SCUBA fins. This is especially true if you bought yourself a pair of modular fins.

It is better to err on the side of caution and treat them like they are fragile. This will put you into the right state of mind for when you decide to upgrade to the more expensive and delicate carbon fiber or fiberglass fins.

When you’re not wearing them, always store your fins in the dedicated bag. After each freediving session, thoroughly rinse them and dry them in a well-ventilated place away from direct sunlight.

When putting them on and taking them off, try to do so exclusively in the water so that you don’t have to walk very much in them. Not only is it very easy to trip over the fin blades, but you can easily damage them. Just treat them like they are special equipment (because, well, they are) and you should be able to keep them safe.

Best Freediving Fins for Beginners Recap

When shopping for a pair of freediving fins for beginners, the two most important factors are a closed heel foot pocket design, and long, soft fin blades. Fins with a full-foot design will wrap tightly around your feet for the most secure fit.

Long blades are important because they will generate more thrust with each kick. The fin blade should also be relatively soft for beginners otherwise they will be too hard to practice with. When starting out with freediving, one must quickly build up their leg muscles to be capable of kicking with long fins.

Furthermore, one must learn the proper finning technique when diving in order to be more efficient underwater. Entry level fins are typically made from plastic, and higher end ones are made with carbon fiber or fiberglass. Beginner freedivers should start with long plastic fins and use those for a year to learn the technique and get used to the fins.

Afterwards, one can decide to upgrade to modular carbon fiber or fiberglass fins. These materials are lightweight and help slice through the water with each kick. Once you have expensive fins like these, you must strive to take good care of them.

You should invest in a dedicated fin bag for your freediving fins. Since most freediving fins are around ~38.5” in length, your bag should be even longer than that. Without a bag to store your fins, they can easily get scratched, especially when traveling. When traveling by plane, try to bring your fin bag as a carry-on if possible.

Try to put on and take off your freediving fins only in the water. This will limit how much you need to walk with them. Since freediving fins are so long, it is easy to trip over them or damage them when walking.

Once you’ve got yourself a solid pair of freediving fins for beginners, you will be able to jet through the water to depths you’ve never reached before. Furthermore, by taking proper care of them you will be able to use them for years to come.

You may also be interested in our other gear reviews:

  • Click here to read our freediving weight belt review.
  • Click here to read our freediving watch review.
  • Click here to read our dive buoy and line review.