Best Freediving Watch Review & Buying Guide

Freediving is a hobby that requires your absolute effort and focus in order to reach the deepest depths and make the return trip as well. Therefore, you do not have time to be worrying about things like how long you’ve been underwater, how deep you currently are, how long you need to rest between dives, and so on.

These things do matter, but they can also lead to overthinking, panic, and loss of focus. Rather than keeping all of this in your brain, you should outsource it to an external brain otherwise known by diving enthusiasts as a freediving watch.

The best freediving watch will take care of all of this information and will automatically track all aspects of your dive data so you can review it later. In freediving mode, a dive watch will provide numerous alarms and warnings to keep you informed about your dive progress. Some have such advanced tracking that they can even monitor your oxygen level and notify you when the levels are dropping so you have time to return to the surface.

In this freediving watch review, we will go over the best freediving watches currently available on the market. We will also cover our selection process, and how you can find a freediving watch yourself. Let’s get started on our review.

Our Top Picks:

Best Freediving Watch Review

Shearwater Research Teric

Shearwater Research Teric Color Wrist Dive Computer
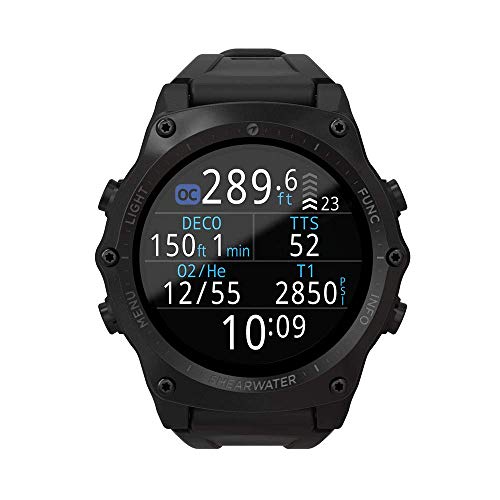
  • Nitrox Trimix decompression dive computer in wrist-watch form factor
  • B�Ã�¼hlmann ZHL-16c algorithm with configurable Gradient Factors
  • Supports optional wireless tank pressure transmitters

The Shearwater Teric is the first watch-sized dive computer from Shearwater. Despite its small size, it is designed for experienced, no-nonsense technical divers and competitive freedivers as well. Don’t be afraid to take the Teric with you out of the water as it is a stylish, full-spec watch that deserves to be worn daily.

Despite having five different diving modes, of particular note is the fact the freediving mode is not tacked on like it is on some other dive watches. In freedive mode, you can customize “Freedive Sets” to set up alerts for various freediving disciplines. By default, the presets are: deep, pool, and repetitive.

Store up to 500 hours of dive data in the logbook memory. With its 200m (650ft) depth rating, you never have to worry about the water pressure damaging the device. Avoid decompression sickness thanks to its detailed CNS tracking and Buhlmann ZHL-16C algorithm with gradient factors.

Check out our full review of the Shearwater Teric here.

Customizable Features

The Tetric has a plethora of customizable features. To start, it has a stretchy and durable silicone strap that comes in six color options. With its standard 22m strap size, most off-the-shelf straps should work with the Teric as well.

Next, the Teric has three different faces to choose from, and each one has a slightly different interface. Customize how your interface looks with 15 screen color choices, and the option to switch the font color as well.

The home screen of a dive watch is crucial, as this is what displays all of the important dive data you need to see. Switch between the “standard” or “big” layout to change how the information is displayed. In standard layout, you can fully customize what information is displayed on the home screen for each dive.

No matter which layout you pick, all of the information is accessible by scrolling through the computer. Any information that you deem not important enough, such as the temperature or your maximum depth, can still be accessed but it will not get priority display.

Furthermore, the Teric also provides a function button. This button can be configured to open up your most frequently used tool, such as the compass or gas switch function.

With all of these functions, it sounds like the Teric would be nightmarishly complex to use, but that couldn’t be further from the truth. Thanks to its four navigation buttons and intuitive interface, using the Teric is a breeze. Each button has an icon next to it to hint at what functionality it provides if you press it. In just a few minutes, you will have already memorized each function.

Alarms

The Shearwater Teric has two types of alarms: audible and haptic (vibration). You can customize which ones will turn on: one or the other, both, or completely off if you don’t want to get beeped at during a dive.

These can be further customized for freediving so that they warn you when you reach certain points of the dive or at certain time intervals. This is particularly useful for freedivers that don’t wear a mask.

Battery

Recharge your battery wirelessly using the induction charger that the Teric comes with. Even better, the Teric works with Qi-compliant chargers, meaning you can wirelessly charge your dive computer using the same wireless charger that your smartphone uses. This saves you bringing an extra charger when traveling. What’s more, the battery lasts for 50 hours in watch mode and 30 hours in dive mode.

Overall

If you are serious about improving your freediving skills, Shearwater has designed a powerful dive watch just for you. Whether you are a recreational diver looking to grow with the watch, or a competitive freediver who prefers the extra haptic alerts, the Teric can accommodate a wide range of divers from beginner to advanced. Furthermore, it looks extremely good out of the water and can be worn as your daily watch.

Garmin Descent MK1

Garmin Descent Mk1, Watch-Sized Dive Computer with Surface GPS, Includes Fitness Features, Silver...
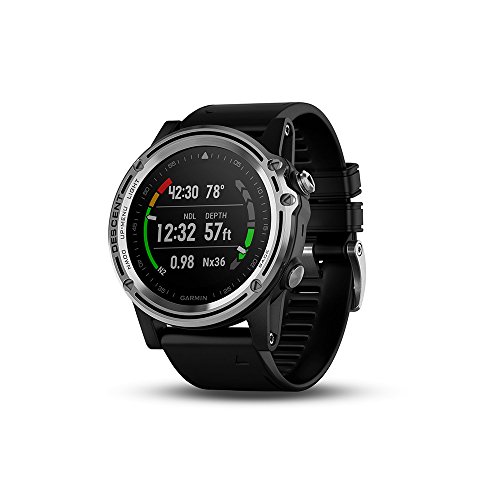
  • Premium full-featured GPS dive computer in a sleek watch-style design; with bright 1.2” color display and topo mapping
  • Built-in sensors include 3-axis compass, gyroscope and Barometric altimeter as well as GPS and GLONASS capability that lets you Mark your dive entry...
  • Supports single-gas, multi-gas, gauge and apnea diving, including nitrox and trimix; plan your dives directly on the device

The Descent MK1 by Garmin might look like an everyday watch, but it is also a highly advanced freediving watch that is packed with useful features for freedivers and technical scuba divers. Garmin has combined its expertise of environmental measuring tools and put it all into a sleak, all-in-one, full-spec dive computer.

Apnea Hunt Mode

The Descent MK1 has five dive modes, but of particular is its Apnea Hunt mode designed with spearos in mind. Once activated, as soon as you descend the device will start tracking your dive information, and end tracking as soon as you return to the surface.

GPS Tracking

The Descent MK1 is the first dive computer to provide GPS maps and tracking on its 1.2-inch vibrant color display. View plotted points and maps on the screen or a smartphone connected to the device using the Garmin Connect app. Never forget a dive location ever again by storing the GPS coordinates in your device.

The GPS tracking is activated automatically while in dive mode. Points can be plotted manually on both land or water. Mark the launching and landing points from wherever you’d like.

Alarms

Set alerts for surface intervals, dive time, depth markers and more in the dive settings. Faster data readouts are shown on the display during a dive on a single breath. The Descent MK1 will calculate data in realtime as it detects changes in hydrostatic pressure.

All of the settings and alerts can be customized before you embark on a dive, which we found very useful. Let your freediving watch track depth and time and give you helpful alerts while you remain completely focused on your breath-hold.

Dive Information

The Descent will store all of the data of your recent dives in its logbook. Each log is saved internally once you reach the surface of the water. While diving, the real time information shown on the screen includes: current depth, max depth, water temperature, time of dive, and heart rate.

Log the GPS coordinates of the dive by sticking your arm up with the watch and wait for the red ring around the device to turn green. This signals that the GPS coordinates have been saved.

Overall

The Garmin Descent MK1 is another powerful dive watch with numerous freediving and spearfishing functions that make it stand out from other dive computers. Specifically, the GPS tracking is useful for tracking where you’ve been so you can return for more freediving and spearfishing in the future.

If you are an active spearfisher or freediver and have the budget, then you should definitely consider getting the Garmin Descent MK1. Due to the Fenix 5X platform, in-water readouts, and GPS tracking, you are looking at an industry-leading product.

Read our full review of the Garmin Descent MK1 here.

Suunto D4i Novo

Suunto D4I Diving Watch Novo Black With Usb
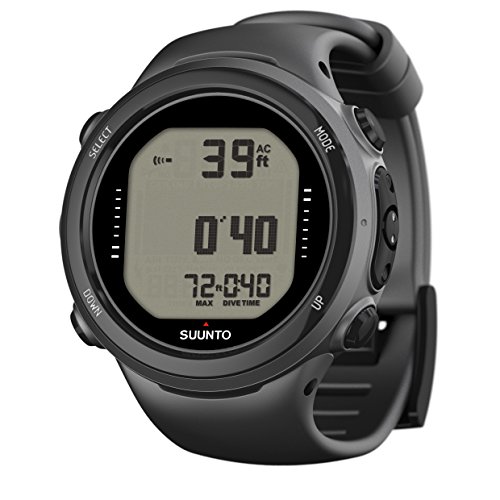
  • 4 modes incl. freediving
  • Light weight
  • Optional wireless air integration

The Suunto D4i has a very comprehensive freediving mode that makes it invaluable for freedivers and spearos. Its clean and clear display and intuitive layout will keep you comfortable and safe while underwater.

While in freediving mode, the D4i operates as a timer and depth gauge only, and no longer provides any deco or wireless air integration information, nor does it track the ascent speed.

What it does offer is two specific alarms that are exclusive only to the freedive mode. They are the Depth Notify and Surface Time Notify alarms.

  • Depth Notify: This alarm activates once you reach the depth that you set before you started diving.
  • Surface Time Notify: This alarm will remind you of how much time you need to spend at the surface between dives.

While in freedive mode, the Suunto D4i’s main display will show the following information:

  • Total dive time in minutes and seconds.
  • Max depth.
  • Current depth.
  • Any applicable notifications.

Additionally, the freediving mode has a function called Day History. When accessed, it will display the following information:

  • Average depth of all dives for the day.
  • Longest dive.
  • Time and deepest depth reached for the day.
  • Total amount of dives and time spent underwater for the day.

By starting a new dive in freedive mode the following day, the D4i will reset the data from the previous day and start with a clean slate.

There are a few downsides to the Suunto D4i, and both are in regards to its battery. First, you cannot replace the battery yourself. You must send it into a dive shop to get it serviced. Second, the battery cannot be “hot-swapped”, meaning all data on the device will be lost once the battery is removed. Before sending it in for a battery replacement, make sure to transfer all of the data from the watch to your computer.

Overall, despite the battery issues described above, the Suunto D4i has lots to provide from every recreational Scuba diver and freediver, regardless of their skill level. The D4i has a high degree of customizability, and it has numerous alarms to keep you safe. All of the settings are structured logically and easy to learn. If you are a freediving enthusiast, you need this dive watch!

You can check out our full review of the Suunto D4i Novo by clicking here.

Sherwood Amphos

Sherwood Scuba Amphos 2.0 Dive Computer and Watch
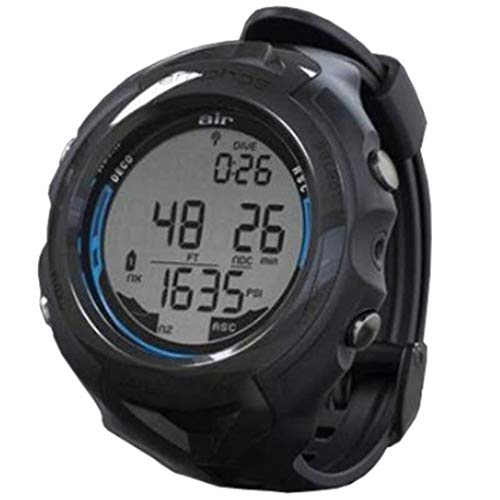
  • Wear the stylish Amphos 2.0 watch every day and use the dive computer when diving.
  • Large characters and easy to read screen is 15% larger than most watch style dive computers.
  • Four Mode Watch including: Time, Scuba Dive, Free Dive, Gauge Only.

The Sherwood Amphos is capable of supporting diving with double-nitrox mixes, and was designed with full watch functionality as well. It looks slightly bigger than your standard watch, however we found it sits comfortably on the wrist and can be used for everyday wear; perfect for people who want both a dive computer and wrist watch in one.

Using the Amphos is simple thanks to its four navigation buttons. They are large enough and spaced far enough to press easily even with thick gloves on. The display is sectioned into top, middle, and bottom areas. The screen is large enough to show the important data thanks to its clear and sharp digits.

Next, the Sherwood Amphos has three modes: Normal (air and nitrox), Gauge, and Freedive mode. In freedive mode, the Amphos makes its nitrogen and depth gauge calculations based on the default FO2 of air, as well as how much is remaining from the previous dives in the last 24 hours.

Once in freediving mode, you can see the following information displayed in either the main or alternative displays:

  • Current and max depths.
  • Dive time remaining (DTR) and No-decompression (NDC) icon.
  • Nitrox Loading Bar Graph (NiBG), as well as if you have any remaining nitrogen from past dives.
  • Time.
  • Temperature.
  • Remaining Countdown Time.

In freediving mode, the Amphos has specific displays and sets of alarms can be activated when certain conditions are met, such as:

  • Freedive Elapsed Dive Time (EDT) alarm, which is different from the EDT in Nitrox and Air modes.
  • CDT alarm which will beep once the time reaches 00:00.
  • Freedive depth alarms (FDA); three can be set at progressively deeper depths.
  • NiBG alarm that activates if the nitrogen accumulated from recent dives raises to the Caution Level (4 segments on the bar) while freediving. An audio alarm will trigger and the NiBG will start flashing.

If you ignore the warning and allow the watch to increase to Deco level with all 5 bars filled up, then the watch will enter Violation Gauge mode for 24 hours, which soft-locks the device for your safety.

The Sherwood Amphos can store your previous 24 dives in its logbook. Using History mode, you can check detailed information of past dives, such as number of dives, total time spent underwater, max depth achieved, which dive modes you were using. To view the information in greater detail, you need to transfer the dive history to your computer by purchasing an interface capable and downloading special software.

Overall, the Sherwood Amphos is a great wrist-watch full of functions that is durable, comfortable, and stylish both as a dive computer and a wrist watch. It is easy to set up, and tracks plenty of information about your dives. The freediving mode is very extensive, and the amount of customization it offers will keep you safe while diving.

Cressi Leonardo

Cressi Leonardo, black/grey
3,020 Reviews
Cressi Leonardo, black/grey
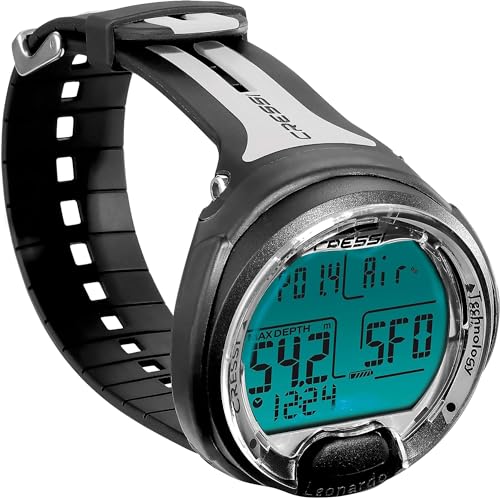
  • A single button Dive Computer makes it effortless to set Air, Nitrox and Gauge modes. Ideal for beginners in Scuba Diving. It is easy to use and easy...
  • FO2 adjustable between 21% and 50%. PO2 adjustable between 1.2 bar and 1.6 bar. CNS oxygen toxicity graphic indicator.
  • Three levels of user adjustable conservatism. Visual and distinct, easy-to-hear audible alarms

If you’re looking for a budget freediving watch, then the Cressi Leonardo should be on your radar. It features a simple and intuitive design and has a single-button interface that simplifies its usage.

The Leonardo will display your max depth, current depth, battery level, temperature, and dive time on its front screen. You will be able to easily see all of this information at a glance because the Leonardo has an edge-to-edge, high-definition LCD screen. Each piece of information is sectioned with thick lines, and the font is clear and easy to read.

There are there diving modes to select from: Air, Nitrox, and Gauge. Of note is the Gauge mode, which basically serves as a bottom-timer and can be used as a freediving mode. Unfortunately, the Leonardo does not have a dedicated apnea timer, however you can make do with the Gauge mode.

Even with its generous screen-size, the Leonardo is slim enough to be travel-friendly. It’s probably a bit large to be worn for daily use, but for freediving it’s the perfect size for displaying your dive data.

Next, the Leonardo comes with a CR2430 user changeable battery. This battery is standard and can be purchased in any dive store and most supermarkets. You can expect the battery life on the Leonardo to last 2-3 years if you are casually freediving.

Additionally, the Leonardo has a maximum operational depth of 120m (393ft), and altitude adjustments up to 3,700m (12,139ft). The dive log has a capacity of 60 dives or around 70 hours.

The Leonardo runs on Cressi’s RGBM algorithm and it is considered to be very conservative. You may find yourself with less bottom time, however its calculations will help you avoid decompression sickness.

Some customers feel that the strap is slightly too long when the grabber is released, which can be an issue when you’re underwater with a loose band. However, the Leonardo is a solid watch for those on a smaller budget and it can serve well as a first freediving watch.

You can read our in-depth review the Cressi Leonardo here.

Oceanic Geo 2.0

Oceanic Geo 2.0 Wrist Computer, Slate Blue Grey
215 Reviews
Oceanic Geo 2.0 Wrist Computer, Slate Blue Grey
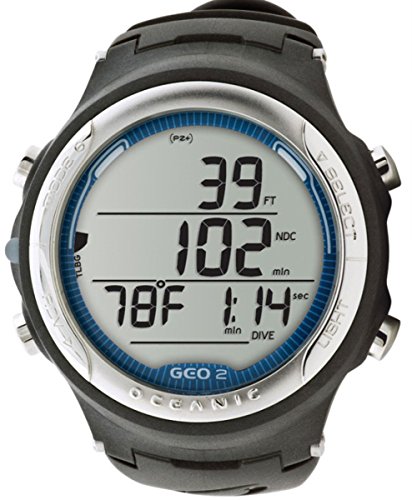
  • 2 nitrox mixes to 100% oxygen, deep stop with countdown timer, intuitive user interface with step back, time, date & temperature
  • Audible alarms with user acknowledgment, gauge mode with run-timer, history mode and 24 dive/99 free dives on-unit log book
  • Last dive display: max depth and dive time, diver-replaceable battery with data retention, user upgradeable firmware

Yet another freediving watch for the budget-minded freediver is the Geo 2.0 from Oceanic. We like how the segmented screen is large and easy to read at a glance. Furthermore, the interface is easy to navigate because the Geo 2.0 has four menu buttons, including buttons that allow you to move forwards and back easily, something the Cressi Leonardo struggles to do.

The Geo 2.0 features four diving modes: NORM (Air and Nitrox), Gauge, Free, and Watch mode. The Watch mode has its unique functions like Alternate time, Countdown Timer, Alarm, and Chrono. Free Mode will monitor the dive calculations and allows seamless switching to NORM mode. The Gauge mode comes with a run timer.

Capable of withstanding the water pressure up to 100m (330ft), the Geo 2.0 also comes with a powerful backlight to help you read the display in the low-light conditions at deep depths. You can adjust the duration of the backlight to save battery.

Furthermore, the Geo 2.0 features exclusive dual algorithms that can be customized so be more conservative or liberal depending on which you prefer. For instance, there is an option to remove deco times. The Geo 2.0’s strap comes with an extender to make it easier to wear over a wetsuit. It also comes with a wristband to sit comfortably on the wrist.

Many customers like how the Geo 2.0 has a clear contrast between the crystal clear background and large black lettering to make the numbers and letters pop out. It is also easy to distinguish between the information, and is one of the reasons why Scuba divers and freedivers like using this dive watch.

Lastly, the Geo 2.0 is intuitive to use; it only took us a few minutes of pressing the 4 buttons to learn how to navigate its interface. You can check the quick start guide to learn how to fully customize each feature. Overall, the Oceanic Geo 2.0 is a reliable and affordable dive watch for both beginner and advanced freedivers.

You can read our full review of the Oceanic Geo 2.0 here as well as our review for the newer Geo 4.0 here.

Digital Multifunction Sports Wrist Watch

Pyle Digital Multifunction Sports Wrist Watch - Waterproof Smart Fit Classic Men Women Water Sport...
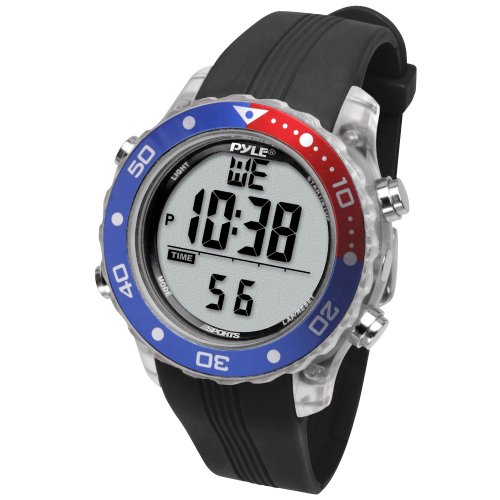
  • 5 MODES: The Pyle Sports Multifunction Digital Watch act as your own data center all within arm's reach. Provides you w/ function modes such as...
  • WATERPROOF DESIGN: The smart sport fitness wrist tracker provides water resistance up to 10 atmospheres or 330 feet. Works in fresh and saltwater w/...
  • UNDERWATER DIVE MODE: Automatically activates once over 1.5 meters deep. It displays water temp, depth, dive time, current time w/ submerging and...

If you are a beginner freediver, swimmer, or snorkeler on an extremely tight budget, then you should consider getting the Digital Multifunction Sports Wrist watch by Pyle. This watch was designed for highly active individuals participating in all manners of water sports.

First, it is designed to last thanks to its highly durable, marine-grade waterproof material. It can withstand the water pressure up to 100m (330ft), and works in both saltwater and freshwater while still providing accurate tracking. Just make sure to select which one before going on a dive.

Second, this sports watch features a smart diving alarm that will automatically monitor your speed and beep if you ascend faster than 6m/minute. Fast ascents can lead to decompression sickness and shallow water blackouts, so the various alarms will remind you if you are about to do something potentially dangerous.

Third, the Digital Multifunction watch comes with numerous operating functions to make your dive smoother. The functions are: dual time, current time, chronograph, countdown timer, and diving mode.

Next, this watch from Pyle features an electroluminescent backlight display which means that it will glow in the dark so that it is easy to see even in low-light conditions. One annoyance we had was that the watch quickly resets the data once you emerge from a dive. However, the dive is stored in its logbook memory, which can hold 100 dives of data, so you can review it at a later time.

Mares Smart Apnea

Mares Smart Apnea Dive Computer - Black/Grey
  • Digital chronograph with backlight for easier display reading
  • Water resistant up to 20ATM/293 PSI
  • High quality Swiss quartz motion

The Mares Smart is a sleek and versatile dive watch that can be worn both in and out of the water. It has a watch mode that includes a wake-up alarm, date functions, stopwatch, second time zone, and the like. Its screen and interface are easy to read, and we’ve never had a problem seeing the data.

There are many modes to switch between including a freedive mode. You can change the settings using the two side buttons, which are intuitive to use. We would have liked more buttons to make navigation even smoother.

Before embarking on a dive, make sure the right mode is selected and that you are using the plan function. Dive planning is crucial if you are doing multiple dives a day, and the Mares Smart will take into account your past and current dive data to give you the best recommendations.

Keep track of all of your dives by viewing the dive log or transferring it to your computer to plan for future dives. You’ll need to purchase a USB cable separately, but this is par for the course for many dive watches. The logbook memory can store the last 35 hours of diving, or roughly 25 dives. This is on the low-end, however the Mares Smart has an impressive 5-second sampling rate.

Next, the Mares Smart has a safe mode which can help to preserve battery life. The Smart uses a user-changeable CR2430 battery, which is quite common and can be purchased in most supermarkets. The battery should last 2-3 years for recreational use. Avid divers may have to replace the battery once a year.

Thanks to the slim profile of the Smart, it’s lightweight and small enough to be worn like a normal watch. This also makes bringing it along while travelling much more convenient, since you can just wear it like normal.

For an entry-level freediving watch, the Mares Smart is a great choice at an affordable price. It can also be used as a normal watch when you switch to watch mode, and looks very stylish to boot. Whether you are Scuba diving, freediving, or just going about a normal day, you can rely on the Mares Smart to help you out.

You can read our in-depth review of the Mares Smart here.

Suunto Zoop Novo

SUUNTO Zoop Novo Wrist Scuba Diving Computer, Black, Without USB
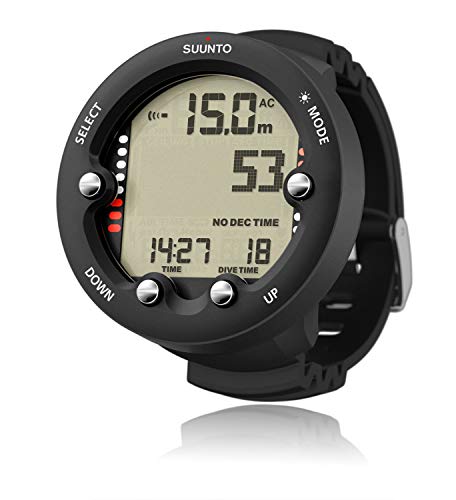
  • Operating modes: air, nitrox, gauge and freedom modes
  • Programmable for 21% to 50% oxygen mixtures
  • Imperial or metric programmable, decompression stop data, audible alarms

The Suunto Zoop Novo is a large and powerful dive watch that is easy to operate thanks to its four menu buttons. It runs on the Suunto RGBM algorithm, which tracks multi-day diving and multiple dives in a day. The recommendations it gives you, such as the surface interval time and no-decompression limits, factors in your most recent dives for greater accuracy.

You can use the four menu buttons to seamlessly switch between its Air, Nitrox, Gauge, and Freediving modes. The Zoop Novo weighs 120g (4.23oz) and has a logbook memory of 140 hours with an adjustable sampling rate (default 20 seconds) and bookmarking functionality.

Due to the Zoop Novo’s large size, at 1 ⅓ inches (40mm) in diameter, divers can easily see what is displayed on the screen. It is designed with durability in mind, which is why it is made from hard-wearing acrylic that can withstand the occasional impact. Although the Zoop Novo is wrist-mounted, due to its large size, you probably won’t be wearing it as an everyday watch.

It is a good habit to turn on the Dive Mode during your pre-dive checks, but if you do forget then the Zoop Novo will automatically turn it on once it is 0.5m (~1.5ft) underwater. Additionally, the standard dive alarms are fully adjustable so you can set it to be more liberal for additional dive time and depth.

The Zoop Novo uses a user-changeable CR2450 battery. It should last for about two years before it needs replacing, though you may have to switch it out once a year if you dive frequently. Just a reminder, you should replace the O-ring each time you change the battery.

Overall, the Suunto Zoop Novo has great functionality for entry-level and recreational freedivers. Thanks to its large screen, automatic water activation, and four navigation buttons, the Zoop Novo is easy to operate. In addition to its affordable cost, it is another great choice for a first dive computer.

Read our full review of the Suunto Zoop Novo here.

Aqua Lung i200C/i300C

Aqua Lung I200c Wrist Dive Computer Dark Charcoal
110 Reviews
Aqua Lung I200c Wrist Dive Computer Dark Charcoal
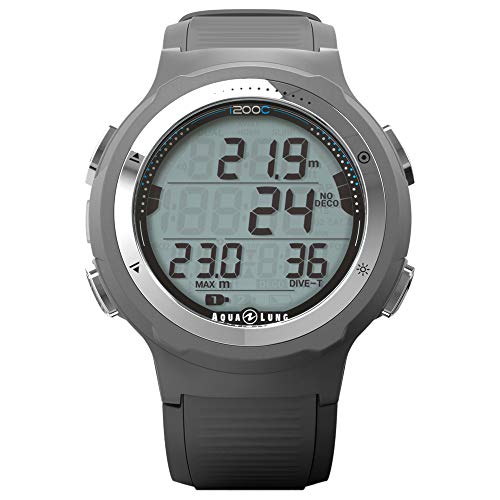
  • 4 operating modes. Air, Nitrox, Gauge (with run timer), and Free Dive (tracks calculations to allow unrestricted switching between Dive and Free)
  • User-changeable standard battery and data retention. Uses globally available standard batteries found at supermarkets and drugstores. Maintains...
  • High visibility LED alarm light. For additional diving safety

The Aqua Lung i200C features a fresh and sporty design. It has four menu buttons located on its sides and all it takes to learn how to use them is to press it a few times. One of the buttons is dedicated to switching between its dive modes: Air, Nitrox, Gauge (with run timer) and Freedive mode.

To ensure that the dive watch fits you, the i200C comes with an extender strap so that it can be worn over a wetsuit if needed. There are also numerous color options to select from, however the extender strap only comes in black, so it can be tough to match the colors.

Of particular note in the i200C is its wireless Bluetooth connectivity. You can easily transfer your dive logs to your smartphone using Bluetooth and the Dive Log+ App. Using this app, you can also change the settings on your dive watch through the smartphone. So if you find using the buttons to switch menus to be annoying, just do change all of the settings using the app.

You can also use the Bluetooth function to share images, videos, and notes alongside your dive log to your social media accounts. Let your family and friends know what you’re up to.

Once again, we have recommended a dive watch that has a user-changeable battery. Being able to change the battery yourself can save a lot of time and money if you know what you’re doing. Furthermore, the computer’s calculations and memory will be retained after changing batteries.

Overall, we really enjoyed the convenience that the i200C provided, especially due to its Bluetooth connectivity. Furthermore it is comfortable, full of useful features, and easy to use. We can’t stress just how convenient the Bluetooth functionality is. Nowadays everybody has a smartphone, and using your phone to change the settings is very appealing. If you want a reliable and versatile dive watch that can also be worn daily, then this is for you.

Check out our full review of the Aqua Lung i200C here and the i300C here.

Do You Need a Freediving Watch?

Think of a freediving watch as your co-pilot, and you are the pilot. Technically you don’t need one, but having one around will not only give you peace of mind, but the information it provides can literally save your life. It will give you warnings and reminders so that you won’t do anything reckless, like diving too many times with insufficient rest in between.

When you’re diving and in the zone, it is very easy to lose track of your depth and how long you’ve been underwater. Furthermore, constantly worrying about these things will affect your performance. Why not leave this up to the dive watch to track automatically?

The dive computer will log plenty of useful information about the dive every few seconds, such as the current depth or the water temperature. You can compare the differences in temperature at different depths which may be useful to spearos.

For instance, if you find a fish at a certain depth, knowing the water temperature can help you increase your fishing knowledge and gives you a reference so that you can compare it to the estimates provided in books or online.

Additionally, many dive watches come with an integrated GPS system. If you find the best fishing or diving spot, you can save the coordinates in the GPS system. You will never have to worry about losing a dive spot ever again.

Nobody likes to hear an alarm early in the morning. However, when you’re underwater, hearing an alarm may save your life. Dive watches are not just passively logging your information in the background. When certain thresholds are met or exceeded, such as a rapid ascent rate, low oxygen levels, or dive depth reached, then its alarm system will activate.

Without a dive watch, you may not realize that you were in any danger so it is crucial to pay attention to your dive computer. Not all dive computers are equal; some have more safety features than others and can track more data.

Freediving Watch Features

Dive Planning

Doing too many dives in rapid succession is risky without getting enough rest. This period where the diver is resting at the surface between dives is known as the surface interval, and it is an important period because many divers don’t rest long enough before heading back underwater.

Diving is very taxing on the body, and a rest period that is at least two to three times the length of the last dive is required. The dive watch will recommend you a surface interval time and start the countdown for you. Don’t rely on your own estimations which may or may not be accurate and just focus on resting at the surface.

Most dive watches will calculate the no-decompression limit (NDL) based on the algorithm they are using, however some models allow you to enter your own data to receive a custom result.

Next, all dive watches allow you to change between the type of water you will be diving in: saltwater or freshwater. Depending on which one you choose, the calculations to the NDL will be different, and this also affects any other calculations. Remember to switch the setting to the correct one, otherwise there will be a slight discrepancy between the data shown and the actual numbers.

Depth and Location Tracking

All freediving watches have a maximum operational depth, around 80m on the lower end, to well over 120m. The pressure at those depths is immense, so you need to make sure that the dive watch you are interested in can withstand the pressure.

The dive watches track your depth as well as ascent and descent rate. These indicators are important so you have an idea of how far you are from depth. There is also a mode that will display the maximum depth for your dive, and an alarm will trigger once you reach it.

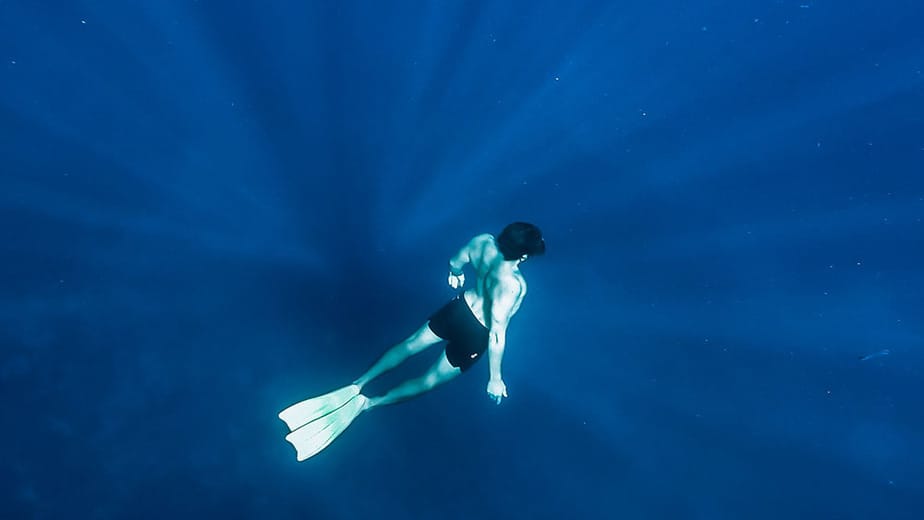
GPS signals can’t be reached underwater, so you may need to stay at the surface until your start and endpoint coordinates are recorded before diving. An easy way to do this is to raise your hand above water and the GPS signal should be received quickly by your watch.

depth and location tracking

Dive Modes

During any dive, you can view your dive data, such as the dive conditions and your physiological data. Dive watches have many modes, most of them designed with Scuba diving in mode. However, the modes to pay particular attention to are Gauge mode (bottom-timer) and Freediving mode.

When diving in gauge mode, the dive watch will display the current dive conditions, a dive compass (if your particular model has this feature), dive stopwatch, and heart rate. Gauge mode is not commonly used by recreational divers.

Another mode that freedivers and spearos should use is Freedive mode or Apnea mode. When it is activated, your surface time, current dive conditions, heart rate data, map, and even last dive data will be displayed.

Dive Straps

When it comes to wearing dive watches, there are two common ways it is mounted. The majority of dive watches are worn on the wrist. Some can be mounted onto your chest, a strap, or even your BCD.

Wearing the watch on the wrist is the most popular option since watch straps are easier to replace and affordable. Most straps are made from rubber, and extension straps are available if you need some extra strap length to wear it around a wetsuit or any other reason.

Additional Features

Most freediving watches should have a heart rate monitor. It may be displayed all the time, or only when gauge mode is on. As to how accurate the heart rate monitor is, it should be accurate because divers primarily rely on their legs to help them while their arms (and dive watch) hang idly by their side which makes tracking much easier.

Some freediving watches allow 3rd party apps to be installed. Just keep in mind that they may be disabled during a dive since there is a possibility that they could interfere with the critical functionality of the dive watch.

Lastly, some freediving watches have wireless Bluetooth connectivity so that it can sync up with your smartphone. If your dive watch does not have any wireless features, then you will have to purchase a USB connector separately in order to transfer the data on the watch to your computer. Whether you are using a smartphone or computer, you must download the specific app for your watch in order to access the data.

hands-free equalization

Freediving Watch Maintenance Tips: How to Make it Last

Battery Care

How often should you charge your freediving watch?

You should check that your dive watch is fully charged before each dive. Charge it the day before a dive just to be safe. Just like with other electronic devices that use rechargeable batteries, such as your smartphone, the battery’s capacity to hold a charge will decrease over time.

In other words, the battery will become less efficient as time passes. Thankfully, many dive watches have user-replaceable batteries, such as the CR-2430 battery, which you can buy at most supermarkets and dive shops. Other models may require you to send the device to a service shop, where they will also calibrate your device in addition to changing the battery.

Check the user manual to see how long the battery is expected to last for. The estimates provided are based on a casual diver that dives 50 times a year. In this case, a battery may last as long as 2-3 years before it needs to be replaced (can’t hold a charge for long anymore). More frequent divers may need to replace the battery as quickly as once a year.

Charging the Watch

When charging electronics, it is generally a good practice to unplug the device once it has fully charged. Leaving it plugged in when the battery level is full may deteriorate the battery faster. As such, we do not recommend leaving it plugged in overnight.

Typically, a charging cycle can last around 3-5 hours depending on the watch and how low the battery was prior to charging. The larger devices with bigger batteries will take longer to charge.

How long the battery lasts during a diving session also depends on the battery capacity and how large the display is. The backlight is a major drain on the battery, so the duration should be adjusted to be shorter.

Additionally, freediving mode is a major drain on the battery as well. Unlike in other modes where there is a larger interval between each sample of data, in freediving mode the data is recorded every couple of seconds. You can expect the dive watch to last 6-12 hours depending on how heavily it is used.

Firmware Updates

Keeping your freediving watch up-to-date is important because it can provide new functionality and fix any bugs in the old firmware. If there is a new update available, we recommend you take it. It may also extend the battery life by utilizing the hardware more efficiently or changing how calculations work behind the scenes.

In order to update your dive watch, you either need to use a USB connector or use the wireless Bluetooth function if your device has it. These features are also what allow you to transfer the data off your device so you can analyze the data.

Cleaning Your Dive Watch

After each diving session, you must remember to thoroughly rinse your dive watch along with all of your other diving equipment using freshwater. If you forget to do this, a sophisticated piece of equipment like a dive watch can start to malfunction or wear down faster than intended.

Make sure to rinse every nook and cranny. Doing so will remove salt and other debris that have been deposited onto the external components. Salt can cause the band, backing, and housing to deteriorate and crack. Even if you only used the device in the pool, you should rinse it all the same to get rid of any chemicals.

Let the watch dry in a cool, dry place away from direct sunlight along with the rest of your equipment and they will last you for many years.

What to Look for in a Dive Computer

Brand

A dive watch made by a reputable manufacturer is often more reliable and easier to troubleshoot or repair if anything goes wrong. Dive computers are a major investment, so you want to make sure that you have one that is high-quality and reliable. Established brands have a reputation to uphold, and newer ones want to make a name (they aren’t all bad), and we’ve identified the best brands to look out for in our review section.

There are examples of many knock-off products in the market offered by unknown sellers, and these can be easily identified by how few reviews there are, or if every single review is suspiciously positive. If a product has a price that is too good to be true, the quality will probably not be what you expect.

We don’t want to say that established brands are always better, because that isn’t a true statement either. However, there’s a reason why some brands have survived for decades and made a name for themselves, so they are at the very least a safe bet.

There are so many dive watch brands and models on the market, but when it comes to your safety you should be very choosy. There are trusted companies that have been manufacturing diving gear for decades, and those are the ones you should pay attention to. Some examples are: Cressi, Suunto, Mares, and Oceanic.

Price

If you’ve been freediving for a while, then you know that freediving focused watches are quite the investment. As with products from any niche hobby, the good ones cost a fortune because there are few alternatives. Freedivers on a tight budget already know this harsh reality, and it would be a shame for potential freediving hobbyists to be held back by this.

As such, we’ve had to make a few compromises in our review. We want as many people who are interested in freediving to get access to proper gear. We’ve scoured the market for freediving watches in various price ranges. You will find pure freediving watches, and you will also find Scuba dive watches with a freediving mode built-in in our review. This way, there are more options available.

Intuitive User Interface

Few things are as frustrating as wasting time and oxygen underwater trying to figure out how to get your freediving watch to display the information you want. A complicated watch is basically like diving without a watch. That is why you want one with an easy-to-use interface so that it can actually be a benefit to you instead of a source of frustration.

Dive computers with at least three buttons are easier to navigate the menus with. They can also allow you to switch dive modes and features seamlessly with just the press of a button. It is harder to do this on dive computers with only one or two buttons.

Another key feature is to look for freediving watches with a strong backlight so that you can always view the information in low-light environments.

diving at night

Large Logbook Memory

During freediving mode, the dive watch is recording data every couple of seconds. This takes up lots of memory very quickly, so watches with low memory will run out in just a few dives. A larger logbook memory means you can dive for longer without worrying about erasing past data, or being in a rush to upload it to your smartphone or computer.

How likely are you to transfer your data every single day? It would be more convenient to get all of your diving done for the trip and transfer it at the end. Also, you may not have access to your computer all the time, so having more internal memory gives you leeway to dive without worrying about transferring your dive log.

Alarms and Alert Types

One of the most important features on a dive watch for freedivers are the alarms. When descending, you have to keep your arms to your side and thus you cannot keep an eye on your device. Alarms help a lot in this regard, and there are many types and ways they can be activated.

For example, there are dive depth alarms which will trigger once you have reached a certain depth. This is a common feature and you can choose to set multiple depth alarms for specific points, such as the point at which you reach neutral buoyancy and also when you start to freefall.

You might set an alarm to remind you to relax and stop finning during a dive. The second alarm could be to remind you to equalise just before reaching depth. Perhaps a third alarm can be set for when you reach depth and remind you to start heading back up.

There are other types of alarms besides depth alarms. There are also alarms for heart rate, dive time, minimum surface recovery time, depth intervals so you can set an alarm every few meters, and so on.

Alarms are only useful if you can notice them going off. You will find dive watches that have audible, visual, and even physical warnings (vibrations). For visual alarms, there are auto-backlight illuminations, glowing LEDs, and flashing warnings. Specific alarms can be turned off, for instance if you prefer only to feel the vibrations but want to turn the rest off.

Dive Watch Depths

A feature that doesn’t get talked about often but is actually really important is the maximum operational depth of the dive watch. Some of the dive watches we recommend can only go as deep as 80m (260ft).

This sounds unbelievably deep right now, but top freedivers have blown past this depth. Who knows, perhaps in a year or two you might be able to reach this depth with serious effort and dedication. Since dive watches tend to last for years, you need to consider how deep you plan on diving before buying a watch.

dive watch max depth

Types of Dive Watches

Freediving Watches vs. Scuba Watches

Not all the dive watches that we covered in this review are pure freediving watches. The majority of them are Scuba diving computers that have a freedive mode on them. There are a few that are designed solely for apnea use, and you will find that these have more functionality for freediving built-in.

Since so many dive watches are designed with Scuba diving in mind, as a freediver you need to find ones that have the features you want. For instance, we recommend looking into watches where you can customize what’s shown on the main display. Freedivers should prioritize seeing the current depth and dive time at a glance, for instance.

You also have to factor in the size, since a bulkier dive watch is extra weight that can cause you to become negatively buoyant. Remember to adjust your dive weights to compensate for this, whether it is taking a small weight from the weight belt or neck weight. With that said, a bigger watch is easier to read with larger fonts, so the trade-off is up to you.

Spearfishing Watches

Spearos spend hours in the water, which could be over a hundred dives or more. It is important that the dive times are not too long, otherwise the surface interval times will be even longer. When searching for a spearfishing watch, you want one that can simplify your hobby.

As such, you want to look for ones that can accurately track dive times and surface times. We also recommend a watch that has a conservative algorithm so that you can stay safe while diving. You will have less bottom time, but you will also drastically reduce your chances of shallow water blackout.

Frequently Asked Questions

How does a dive watch help?

Freediving is an inherently risky hobby. There are ways to mitigate some of the danger, such as by always diving with a buddy. The thing is, humans are error-prone, and we often make mistakes in judgments.

That is why having a freediving watch is so important. It’s like having a reliable and objective partner with you (in addition to your actual diving buddy, who should also have his own watch) to ensure you’re following all of the dive protocols instead of relying on guesswork. Even a cheap dive watch has features that can save your life, such as surface interval timing and calculating your CO2 levels.

Scuba divers are more likely to experience nitrogen narcosis and decompression sickness (DCS) than freedivers since they are constantly inhaling compressed air and spending a longer time underwater.

With that said, freedivers can still experience DCS if they do not spend enough time resting at the surface. That is why it is so beneficial to have a dive watch calculate your current dive data, including your most recent dives, so that it can provide accurate surface interval times and keep you safe.

All it takes is one shallow water blackout and that could be the end of you (this is a reminder to always dive with at least one other person). Any time you do a breath-hold, you increase your CO2 levels to potentially dangerous levels. Particularly when you can stay underwater for several minutes at a time, the risk only increases.

You want to be able to focus on your dive instead of worrying about factors like how long you should be resting between dives. Let a dive watch take care of tracking time and performing the complex calculations so you can free up your mind to other important matters.

Can I use a dive watch for both Scuba and freediving?

Yes, you can. Whether you are a Scuba diver, freediver, or someone who dabbles in a bit of both, you should definitely get a dive watch. A dive watch provides so many benefits, not just in terms of convenience but also for your safety.

For instance, you can track surface intervals, dive depth, heart rate, CO2 levels, GPS coordinates, safety warnings, and so on. If you also scuba dive, there are plenty of other features you can take advantage of like switching between gas mixes and deco stop warnings.

Don’t rely on your own intuition or estimates when diving. Let a freediving watch take all of the guesswork out of a dive. Keep track of your dive statistics with perfect accuracy while focusing entirely on your dive, and you will be safer and happier for it.

How many dives can it log?

The amount of dives kept in the logbook depends on how detailed the logs are (based on the sampling rate and how many factors it keeps track of) and how large the internal memory is in the device. Once the memory is full, the oldest dive will be wiped to make room for the latest dive. Before this happens, you should transfer your logbook to your smartphone or computer.

Some dive watches allow for expansion cards, such as microSD cards for additional storage space. If you are a number junkie and want a meticulous log of all of your dives, then you should get a device with a large internal memory and an expansion slot.

Keeping a backup of your logs on your computer is recommended in case your dive watch breaks. Some people like to play it old-school and log their data by hand. This way they avoid the need to purchase a USB connector. Bluetooth wireless connectivity also removes the need for a cable to transfer logbook data.

How do you want it to look?

When selecting a dive watch, you want to strike a balance between a watch that you are proud to show off and one that can display the information in a clear and concise manner. Most watches come in one of two shapes: round or square. Typically, round watches are what most people pick due to fashion purposes, but square screens usually display more information than round ones for more practical reasons.

Which strap material do you want?

The dive watch band needs to be made from a durable material, but it also shouldn’t hurt your wrist when you wear it for hours. A common band material found in most dive watches is polymer because of how tough and resistant to water damage it is.

Most straps have a common length, however some straps can be fitted with extension straps to increase the length. This is useful for wearing the watch over a thick wetsuit or if you simply have large wrists.

Furthermore, some freediving watches have a metal band that is sized to your wrist when you purchase it. However, we do not recommend this because the band may not fit over a thick wetsuit, so you should look for a non-metallic band instead.

How big of a dive watch do you want?

When talking about the size of a watch, we are referring to the screen size. Small screens are sleek, fashionable, comfortable to wear, and lightweight. However, it is harder to see the information displayed on the screen and the buttons may be difficult to press since there is so little space to work with.

On the other hand, larger screens are bulkier, heavier, and less comfortable to wear, but they display more information at a larger text size. You can see all of the information all on one screen without having to navigate to a different menu for less important information, such as the temperature.

With that said, a large screen will drain the battery faster resulting in a shorter battery life and longer charge times. With that said, visibility is often an issue underwater, and being able to see all of the information at a glance is a huge benefit that cannot be understated.

What is your budget?

The more expensive a dive watch is, the more advanced the features that it has are. For these high-end models, what you should be paying attention to is whether you need those features or not. For instance, many advanced features have to do with Scuba diving, such as air integration or Trimix. Unless you also Scuba dive, you’re paying a premium for no reason.

With that said, freedivers can take advantage of some advanced features like the digital compass, color display, GPS, and more detailed dive tracking in a high-end model. Even a cheap freediving watch is better than nothing, since they have all of the basic functionality like surface intervals, stopwatch, and alarms to assist you with your dives.

You can read our reviews on beginner dive watches and dive watches under $500 for a few examples of reliable dive watches that won’t break the bank, though some of these do not have a freediving mode.

Best Freediving Watch: Final Thoughts

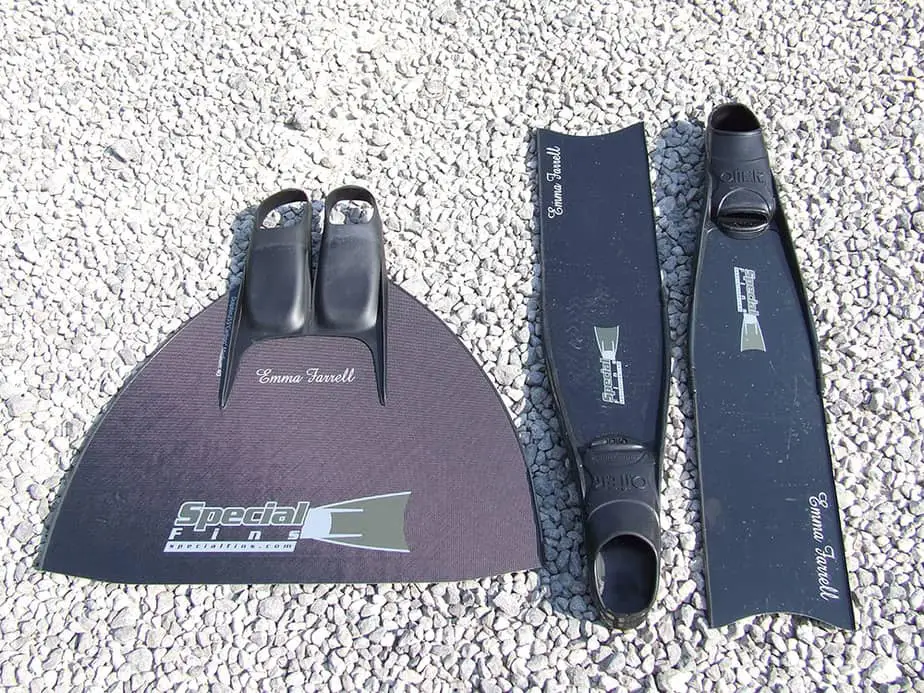
To be frank, a freediving watch is not an absolute necessity when freediving the way a dive buoy and freediving line or freediving fins are. Not everyone has the money to purchase advanced diving equipment like this, even the budget ones.

With that said, if you do have the money, we highly recommend you invest in a freediving watch. Not only does it enhance your overall freediving experience, but it allows you to view vital dive information and provide crucial warnings that can potentially save your life one day.

When selecting a freediving watch, first consider its appearance. Are you comfortable with the size? Is the display clear and is the information easy to read? Ideally, you want a high-definition screen with segmented or sectioned data. We also prefer a watch that has at least three buttons for easier navigation.

Next, how are its functions? All of the watches we recommend in our review have a freediving mode, which typically provides exclusive alarms and displays not found in the other dive modes. You may also want to have watch functionality so that you can also wear your dive watch as an everyday watch.

We also like to recommend watches that have user-changeable batteries. Especially if you are an avid diver, being able to replace your own battery will save you lots of time and money. Having to send your watch into a dive shop once a year is annoying and costly.

Lastly, the freediving watch must fit your budget. There are many dive watches that are designed with Scuba diving functionality in mind, and you may be paying a fortune for features you will never fully use. Make sure a dive watch has the functions you need at the price point you want, and it will probably be a good choice for you overall.

Now, what are you waiting for? Get yourself a dive watch, go out there, and smash all of your old depth records!

How Blood Shift Helps with Pressure While Freediving

Blood shift is a natural reflex that the human body automatically performs when it is exposed to intense underwater pressure. It is one of the adaptations of the mammalian diving reflex and is a physiological response to diving deep that can help you survive longer underwater.

The mammalian diving reflex is the phenomenon whereby the body automatically slows down its heart rate (bradycardia) and narrows its arteries to slow down blood flow (vasoconstriction). However, when diving deeper, two more adaptations present themselves: blood shift and the spleen effect.

Unlike vasoconstriction and bradycardia which are immediately triggered when submerged in water, blood shift and the spleen effect only occurs when there is an increase in water pressure, which all freedivers will eventually experience. Without these reflexes, freedivers would not be able to reach the incredible depths that they have without suffering tissue damage, particularly in the no-limits category.

In this article, we will discuss what the blood shift effect is and how it benefits freedivers, as well as common side effects that can occur.

How Do Freedivers Endure the Increasing Water Pressure?

As you know, the deeper one dives, the greater the water pressure they are exposed to. According to Boyle’s Law, with an increase in pressure, the volume of gas in a closed system gets compressed. In this case, the closed system is our lungs, and the gas is the oxygen within.

It is the reason why at 100 meters below the surface, our lungs will get compressed so much to the point that it is only 1/11th of its original volume.

Up until the 1960s, it was believed that it would be impossible for a human to dive deeper than 50 meters below the surface because the lung and chest cavity would become too compressed for a human to withstand.

It was believed that the rib cage would essentially fold into the empty space that the lungs would normally occupy and that the organs would be damaged by the pressure. To put it frankly, it was assumed one would die.

However, a freediver by the name of Enzo Maiorca decided to test this theory by being the guinea pig and attempting to dive further than 50 meters. He succeeded in 1961 and he survived with no injuries which baffled physiologists.

What aspect of the human physiology kept Enzo Maiorca’s rib cage from compressing and piercing his internal organs? Is Maiorca some kind of death-defying superhuman, or can his feat be replicated by other freedivers?

It wasn’t until 1974, during a study on freediver Jacques Mayol, that scientists finally found the missing piece of the puzzle: blood shift and the spleen effect.

How Blood Shift Keeps the Chest from Getting Crushed

CO2 tolerance

As part of the mammalian dive reflex, due to vasoconstriction blood travels from the diver’s extremities to the organs in the chest cavity, causing them to occupy the space that the lung normally does.

But even more important than that is this little detail: blood travels to the alveoli (small sacs in the lungs where gas exchange happens) and engulfs it in blood plasma from the nearby tissues. Since blood does not compress under the water pressure it is exposed to, it will retain its volume no matter how deep the diver goes.

Since the fluid fills the empty space left behind by the air in the lung after it is compressed, the lungs and chest are not crushed by the water pressure.

The Important Role of the Spleen Effect

For a long time, physiologists thought that the spleen was basically a smaller back-up liver, performing the same function of destroying old red blood cells. Its role is non-essential; in fact, this organ can be completely removed from an individual without impacting the vital processes of the body.

However, in the context of freediving, it plays a much bigger role thanks to its secondary function. Due to the large volumes of blood that passes through the spleen, it also acts as a reservoir of blood.

When additional blood is needed for the blood shift, the spleen sends the blood into the diver’s system where it is needed. As the blood flows out, the spleen shrinks, having emptied itself of its contents.

The spleen effect can even improve the duration of long breath-holds during freedives by distributing oxygenated red blood cells throughout the body at a time when oxygen is running low.

Downsides of Blood Shift and the Spleen Effect

The spleen effect and blood shift adaptations experienced during freediving are incredible and necessary for freedivers to reach any significant depth beneath the surface, though it does not get triggered during static apnea.

As amazing as these adaptations are, they do come with a few downsides, namely immersion diuresis and a fast build-up of lactic acid.

Immersion Diuresis

Do you feel like you often have a sudden urge to pee while freediving? This phenomenon is known as immersion diuresis. Due to the increase in blood in the chest cavity caused by the blood shift, the body senses this sudden increase and removes water from blood to normalize it.

This causes rapid synthesis of urine, causing freedivers and SCUBA divers to want to pee very badly, and it also leads to rapid dehydration.

Lactic Acid

Due to the reduction of blood flow and volume in one’s extremities from vasoconstriction, lactic acid builds up faster in the limbs. This can also lead to soreness and cramps.

Training to Improve the Mammalian Diving Reflex

The mammalian diving reflex is in everybody, and it is activated automatically when submerged underwater. However, through training and stretching, it is possible to strengthen its effects and thus help improve one’s freediving abilities. Here are some ways to do so:

  • Warm up and practice in shallow water first. Before diving, first exhale to decrease lung volume, and then submerge yourself. This will force the dive reflex to activate, and get the body primed for diving deep. Do not pack your lungs.
  • Stretch the intercostal muscles, particularly before a freedive, to improve their thoracic elasticity and strengthen the diaphragm.
  • Regularly practice freediving and gradually push yourself to reach new depths

Blood Shift Freediving Summary

The mammalian diving reflex is an important adaptation that the body has developed in response to being underwater. It includes various physiological reactions such as bradycardia (reduced heart rate) and vasoconstriction (narrowing of arteries to slow blood flow), both of which occur in shallow water.

Once a freediver reaches a depth where their lungs start to get compressed, that is when the blood shift and spleen effect kicks in. The reservoir of blood that resides in the spleen is sent out, helping to fill the space left behind by the reduced air volume and preventing further compression of the lungs.

The mammalian diving reflex is the key to humans freediving to depths previously thought unreachable. It allows us to spend longer periods of time underwater. If a freediver can improve their mammalian dive reflex response, then they can strengthen their freediving performance.

How to Do Hands-Free Equalization (BTV/VTO)

The hands-free equalization technique, also known as BTV (béance tubaire volontaire) or VTO (voluntary tubal opening) in English, is a very useful but optional technique one can add to their repertoire in order to become a better freediver.

Some people are already capable of hands-free equalizing,  but not at a level adequate for equalizing during freediving. For instance, if you are able to go up a mountain or fly on an airplane without feeling the increasing pain in your ears due to the changes in pressure (without resorting to the popular pinch-and-blow Valsalva maneuver), then you have figured out how to open up your Eustachian tubes without help from your hands.

The difference between hands-free equalizing during a flight, and dozens of meters underwater, is that the water pressure is much greater and occurs more rapidly due to the speed at which you descend. This makes the VTO technique more complicated than opening one’s Eustachian tubes mid-flight. With that said, by learning about the VTO maneuver, you will be able to more reliably open those tubes without any assistance from your hands.

Why Learn Hands-Free Equalization?

There are three main reasons to learn hands-free equalization:

  1. It is known to be the least risky and efficient equalization method, which means you can most likely dive deeper while staying more relaxed.
  2. Since you don’t have to use your hands to pinch your nose, you can instead use them for other activities like spearfishing or underwater photography.
  3. The hands-free method, out of all the methods, resembles what the body naturally does daily, such as swallowing, yawning, and burping. Despite these actions being done involuntarily, you can learn how to train these muscles to activate at will.

If you are an experienced freediver who has already reached great depths without hands-free, you may find that you can dive deeper by doing hands-free equalization. Furthermore, these techniques can also be applied to your mouthfill while wearing a mask.

Getting Started

Before we get started with hands-free training, you must first understand that successful equalization follows a two-step process. There is an air shift phase and equalization phase. Most guides and instructors only focus on the equalization part due to their complexity, but not so much on the air shift. Unfortunately, this results in many beginners not realizing that they are using air from their lungs to equalize.

What is air shift? It is when one shifts the air from their lungs to their mouth. One can perform an air shift with various methods, such as reverse packing or with abdominal contractions. Furthermore, one can bring up small or large amounts of air, depending on their preference. For instance, a small amount may be all that’s needed for the Frenzel maneuver, whereas advanced freedivers prefer bringing up a large amount to perform a mouthfill.

Regardless of which equalization method you prefer, the air shift is necessary since bringing air from the lungs into the middle ear is what compensates for the compressed air in the middle ear. No matter how you equalize, the goal is to open up the Eustachian tubes so that air can pass through.

A successful equalization cycle will combine both the equalization technique and air shift to pull off. There is more than one way to air shift, as mentioned above. You can decide to do one large charge (shifting the air from the lungs to the mouth) and numerous equalizations in a row before doing another charge.

Or you may prefer to do one small charge for each equalization. Or one can try to do the largest charge they can, filling their mouth to the limit with air, and using this stored air for as many equalizations as possible (in other words, this is the mouthfill method).

Whether you are learning hands-free equalization or any other method, you must get comfortable with air shift in addition to the hands-free method itself. Perhaps the reason why so many fail to learn hands-free is because they focus all of their efforts on the equalization technique, but not the air shift portion.

Equalization and air shift are two sides of the coin. You cannot simply pick one and not have the other. That is why many only seem to be able to do hands-free on land, but they struggle to do it underwater.

What’s Going On When You Hands-Free Equalize?

Knowing what’s going on in your body will make it easier to understand the process of hands-free equalization. First, understand there is something called the Eustachian tube which connects the middle ears to your nasal and oral cavities. In other words, this tube is the link between your ears and your mouth and nose, and by extension your lungs. The goal is to get air from your lungs to your middle ear to equalize the pressure there.

Seems straightforward right? The problem is that the Eustachian tubes are closed at rest. This is necessary to protect the ears from infection and foreign materials. However, they open up whenever we chew, swallow, talk, burp, or yawn in order to regulate pressure and get rid of waste from the middle ear. This happens naturally, and most people cannot voluntarily open the Eustachian tube unless they train for it.

Hands-Free Equalization Exercises

We are going to focus on three exercises. The first exercise will show you how to open your Eustachian tubes. The second will show you how to equalize your dive mask. The last exercise is a combination of the first two. Putting everything together, what you should do while in the water is to equalize your mask and then open your Eustachian tubes.

Exercise 1 – Opening the Eustachian Tubes

Begin by pinching your nose and then sucking air out of your middle ears by swallowing. Your eardrums should feel like they moved towards you, similar to the feeling as you descend underwater. This is the opposite of equalization; you are temporarily removing the air from your ears.

At this point, your ears will feel like they are blocked and you may feel slightly uncomfortable. Feel free to release this pressure by yawning. Elongate the space between the floor and roof of your mouth. Do many variations of yawning. Play around and exaggerate the action. You can also try swallowing in various ways too.

For instance, you can try stretching out the space next to the sides of your mouth as if your ears were being pulled very hard. You can also try wiggling your ears or moving your jaw side to side, or even do a Frenzel maneuver.

The point of all of these seemingly pointless movements is to experiment with unblocking your ears and reverting the eardrums back to their original position. Right now, most of your attempts have probably ended in failure. It may take you ten tries before you succeed once.

By experimenting with different ways of yawning or swallowing, you will eventually find a movement that can reliably unblock your ears. Instead of a 10% success rate, perhaps you can increase that to 30 to 50%. The goal is to figure out which movement works best with your body and increase that success rate to 100%.

So pretend you’re a kid again who is trying to unlock the mysteries to freediving success. Once you find a movement that you like with a moderate chance of success, keep practicing it everyday. Memorize how to perform that movement until it becomes second nature. You need to be able to do it even when under pressure (literally) to successfully equalize your ears.

Exercise 2 – Equalizing the Mask

Without exhaling or inhaling any additional air, start grabbing balls of air and continuously spitting them out. This shouldn’t be too difficult, and it may feel like you can do it indefinitely. The next step is to spit this air out through your nose instead. You can try using your tongue to extract air from your mouth and vent it out your nose like a classic reverse packing movement.

If you’re not sure whether you’re doing it correctly or not, lightly press on your nose and feel the puffs of air leaving your nose as you do this exercise. Your belly should not move while performing this movement.

To make this more interesting, treat it like a game. As you’re spitting the air through your nose while holding your breath, count how long you can do it for and how many spits you can do. Spit at a rhythm to mimic depth. Try spitting a ball in one second intervals.

Try to spit out different sizes. Move your tongue all the way down to collect a large blob of air and spit it out through your nose while imagining your mask loosening from the pressure getting equalized. Not spit a small one and picture the mask moving only slightly.

If you struggle to reverse pack, instead try exhaling out. Keep on exhaling mini puffs of air through your nose. After a small exhale, relax your belly, then perform another. Keep doing this. Essentially, you are doing an air shift with abdominal contractions.

Another way to perform an air shift with abdominal contractions is by doing a Grouper Call. Make a humming sound and feel your mouth expanding like a balloon. Afterwards, remember to relax your belly.

Regardless of whether you equalize the mask through exhaling or reverse packing, air should be consistently flowing in one direction from the lungs to your mouth, past the soft palate and through your nose. It should not return to your lungs because the glottis will be constantly closing.

Exercise 3 – Mimicking the Descent

By combining exercise 1 and 2, we can mimic what it is like to descend in the water. Start by exhaling some air out of your nose (exercise 2) and then perform one hands-free equalization (exercise 1). Next, try one spit and two hands-free equalizations. Next, try one spit and perform three hands-free equalizations, and so on.

Keep repeating this until you run out of breath. This is similar to what you will be doing during an actual dive. It is not only a fun training method to practice equalization, but it can train your breath-hold. You need to practice this so that you can consistently move air from your lungs into your mouth and equalize while carbon dioxide levels keep increasing.

Practicing in the Water

Once you have performed all of the exercises on land and feel confident that you can translate it into the open water, then let’s head there. You should start with free immersion since it is slower paced and gives you the opportunity to grab the line if needed.

Now, do your breathe-up and enter the water. Stay calm and relaxed. If you notice any tension, try to relax and let it go. As you descend, you will feel the increasing pressure on your ear drums, similar to the pressure when performing exercise 1. And just like in exercise one, perform the movement to release that pressure.

After a short while, you will feel your mask becoming tighter due to the increasing pressure. Here is where exercise 2 comes in. Do an air shift and move the air into the mask either through abdominal contractions or reverse packing to equalize it.

Essentially, you will keep repeating these two movements. One to release the pressure in your ears, and the other to equalize pressure in the mask. How successful you are at hands-free equalization depends on how well you can perform these two alternating movements.

If you don’t yet have a rhythm down, then try doing one mask equalization to three hands-free equalizations. Adjust this to your preference.

When starting out, you may descend very slowly because of how hard you need to think about each action. The more experience you have, the more automatic each movement becomes until it is simply part of your muscle memory. And the less you need to think, the faster you can get at descending.

What Really Happens When Opening the Eustachian Tubes

The normal ways of opening the Eustachian tubes, such as yawning, isn’t possible while freediving and thus you must find another way to open them. When hands-free equalizing, you must voluntarily contract two muscles near the Eustachian tubes, the soft palate and the tensor veli palatini (TVP), which will open up the Eustachian tubes.

The TVP is a tiny muscle connected to the skull in the soft palate space beside the last molar and on the roof of the mouth.

Some people have been known to activate their TVP unconsciously during an airplane ride, however not everyone is able to manipulate their TVP right off the bat without some guidance. While learning how to voluntarily activate the TVP, you can rely on audible, visual, or tactile cues to get a clearer view of your uvula.

Furthermore, activating your TVP will stimulate the palatopharyngeal muscle. If done correctly, as the TVP is activated you will be able to see the uvula rising and the larynx (Adam’s apple) closing. You might be able to see the larynx closing from the outside as well.

The Eustachian tubes are normally sealed shut due to their intrinsic elasticity, as well as the pressure exerted by nearby tissues and the tension of the moist mucosa.

Additionally, when activating the TVP, a gentle crackling sound is sometimes heard in the ears like two sticky surfaces being peeled apart. You can even feel the TVP activation with your hands by lightly touching the area beside the last upper molar.

Once you are capable of activating the TVP voluntarily, you should determine if its range of motion and strength is enough to open the Eustachian tubes. To test this, try to hum audibly. What you are looking for is if the sound can pass through the tube opening and fill up your head.

Some adjustments may be needed to create sufficient space for the tubes to remain open. For example, you may need to wiggle the jaw from side to side or protrude it forward slightly to do so.

Training to Open the Eustachian Tubes

Since the average person doesn’t contract their TVP often even out of the water, consistent and diligent practice is necessary to improve the strength and coordination for use during freediving equalization. One should work on their TVP training in equal measure with their diaphragm and shoulder flexibility training. We recommend training every day.

To begin, try to open the tubes by twisting your TVP and test them by humming. If the sound doesn’t fill your head even after you’ve activated the TVP, then the tubes aren’t open. When starting out, you won’t always get it right the first time and it is a part of the learning curve.

Try to wiggle your jaw from side to side or protrude it forward while activating your TVP. You may need some slight pressurization to help the tube open up. You can do this by pinching your nose and using the Frenzel maneuver to equalize, then holding for 15-20 seconds.

Repeat this 3-5 times to relax the muscles surrounding the tube. Once you have managed to open your Eustachian tubes and can hear the humming fill up your head, it’s time to begin working on coordination training by opening the tube for numerous repetitions. Try to progress all the way up to 300 repetitions. That sounds like a huge number, but it’s really equivalent to a few hours of freediving and can be done within five to ten minutes while training.

How strong one’s TVP is will determine how great of a depth that they can continue to open their tube against the increasing water pressure, which squeezes the Eustachian tubes tightly and makes them difficult to open. Challenge yourself to keep your tubes open for progressively longer periods of time

BTV/VTO Maneuver

The VTO maneuver is basically a variation of the popular Frenzel maneuver, supported by the voluntary opening of the Eustachian tubes. One must have a firm grasp of the Frenzel Maneuver if they wish to successfully deep dive with VTO. Thus, if you are not comfortable with the Frenzel maneuver, stop and learn that first. You will not be able to perform the VTO without it.

When equalizing with the Frenzel maneuver, the result is that the air is pushed through the closed Eustachian tube to open it, similar to how a bent garden hose can be straightened if sufficient water pressure builds up and pushes through.

The VTO maneuver supports the Frenzel maneuver by voluntarily opening the tubes and not relying on extreme pressure to push the air through to the middle ear. Thus, it is not necessary to pinch the nose for this technique.

To perform the VTO maneuver, do the following steps:

  1. While wearing a mask, put the tip of your tongue behind your front teeth and make a small ball of air above the tongue.
  2. Close your throat and lower the soft palate.
  3. Simultaneously pull the tube open and push the air back and up. Think swallowing while yawning.

VTO Maneuver Exercises

You should first practice VTO on dry land before testing it in the water. Wear your dive mask and make sure the mask strap forms a watertight seal. Even on dry land, you want to make your training as close to the real thing as possible.

After you establish the muscle memory to do this maneuver, then you can think about trying it in the pool. Start in the shallow end with your head facing forward and lowering it only a few feet underwater. When this gets easier, move to a deeper area of the pool but maintain the vertical head-up position while training.

Once the deeper end of the pool is no longer a challenge, it’s time to take your practice to the open water line. Practice doing head-up pull downs to see how well you can perform VTO at depths slightly deeper than the deep end of the pool. No need to go down too far, staying within the 10-15m range is adequate at this stage of your training.

As soon as you are confident with the head-up VTO training, the next thing to practice is doing VTO in a prone position (face down). Practicing this in a pool while wearing a weight belt to keep you negatively buoyant allows you to enjoy a nice, slow descent so that all your mind needs to focus on is perfecting the technique and monitoring your body’s feedback.

Progress only when you feel comfortable and perform consistently well. You can add even more weight to the belt to increase the descent speed while maintaining a prone position. Gradually increasing the speed while prone based on how comfortable you are with your technique can help you train the muscle coordination and timing for equalizing with VTO.

Once you are more proficient in the prone VTO technique, the next step is to try VTO in an angled descent, and eventually in a proper head-down descent as you would be when freediving. It may be helpful to try hanging upside-down on dry land first to get accustomed to the discomfort of the blood rushing to the head before trying it underwater.

Just like in the other exercises, start with a gradual and controlled descent and slowly increase the depth and speed that you are willing to reach. The key is to progress at a comfortable pace instead of rushing it.

Common Issues with Hands-Free Equalization

In order to successfully hands-free equalize during a dive, three criteria must be satisfied:

  1. The glottis must be closed.
  2. The soft palate must remain neutral so that the air can pass through to the Eustachian tubes.
  3. The Eustachian tubes must be open.

If you experience difficulties, then most likely at least one of the three factors listed above is not being met. From here, you must ask yourself some questions to help you figure out the problem.

Are you relaxed?

Being stressed out or nervous will cause your muscles to be more tense than normal, and this can negatively impact the hands-free method. So look for any unwanted tension and try to release it. In order to remain calm, do every step slowly and methodically.

When learning a new technique, you should be as introspective as possible and make mental notes of what went right, what went wrong, so that you can look up the solution and do better next dive. To do this successfully, don’t be too hard on yourself and give yourself time to learn and improve.

Keep repeating a step that you are struggling with. Don’t get impatient and move on before you’ve mastered it. You must reach a level where you can dive and be conscious of what’s going on with your body at each step of the process, particularly with the glottis, soft palate, and mask space. Going too quickly will cause you to get overwhelmed and lead to panic.

Open glottis

If your glottis is open, it will cause the air in your mouth to move into your lungs. This is called “swallowing” and it is a common mistake. Generally, if you feel the mask is starting to dig into your face from the pressure, then it means your glottis is open.

Also, keep an eye out for any leaks in your masks when your body is experiencing contractions. Some freedivers have difficulty keeping their glottis closed when they experience a contraction. If this happens to you, try to tuck your chin in to lessen the impact and work on getting better control of your throat.

Closed soft palate

A closed soft palate will prevent the air in your mouth from entering your nose and ears. Since the Eustachian tubes are located in the nasal cavity above the soft palate, in order to successfully equalize the soft palate must remain neutral so that air can transfer from the mouth to the middle ear.

If the soft palate is either closed upwards or downwards instead of in the neutral position, you will feel a blockage and fail to equalize.

Can Everyone Do Hands-Free Equalization?

The VTO method is very difficult to teach according to various experts, and how well one can reliably perform it depends on the shape of their Eustachian tubes. It is estimated that only 30% of divers have successfully learned how to perform VTO even after receiving personal instruction. Some experts are so pessimistic, they believe that VTO cannot be learned even through training, and that only those with favorably shaped Eustachian tubes can succeed.

Despite how few people can do VTO, experts at least agree that it is one of the safest equalization maneuvers, and since it is completely hands-free, it can help the diver conserve energy and will not impede their movement.

Regardless of whether one has successfully managed to learn VTO or not, the training exercises will strengthen the muscles that hold open the Eustachian tubes, which is beneficial for all divers regardless of which equalization technique they prefer. Learning how to activate these muscles to loosen up the Eustachian tube opening when equalizing means less force is necessary to successfully equalize.

Benefits of Learning Hands-Free Equalization

Judging by how long this article is getting, learning hands-free equalization will certainly take some hard work. Is it really worth investing all of this time to learn something so complicated? Will mastering this technique all of a sudden make you into a top freediver? In this section, we will go over the main advantages of hands-free equalization in great detail.

Gives you a buffer when wearing a mask

You can choose to dive with a nose clip or with a mask. With hands-free, wearing a mask is beneficial because the air from your mask can act as a buffer in case you forget to do an equalization.

The lingering oxygenated air will help you catch your rhythm and get back to equalizing. Those who prefer a nose clip will have to turn back if they ever forget an equalization.

Many people see the mask as a hindrance, but to those who do hands-free equalization, it is an extension of their nasal space. As such, freedivers can factor this extra space into their air management and intentionally put air into the mask during the initial descent and inhale it back as the air expands during the ascent.

Freedivers who do this often excel at pulling air into their mouth and some may not even need to pack or rely on a nose clip to reach the same depths as those who Frenzel.

Alternative to Frenzel Method

The hands-free method is another option for those who cannot do Frenzel for some reason. Perhaps you are too used to doing the Valsalva and have ingrained certain patterns that are hard to unlearn, and thus you would rather just learn an entirely different method to help you reach depth.

With that said, you can always learn the Frenzel method in the future after learning how to do hands-free. However, if you manage to learn hands-free, then the idea of going back to a more energy-consuming method will not seem as appealing. However, if you want to be an all-around great freediver, it doesn’t hurt to be well-versed in more than one equalization method.

Disadvantages of Hands-Free Equalization

There are a couple of downsides that I’ve found when doing hands-free.

Extreme Sensitivity to Pressure

Since this method is so reliant on sensitivity to pressure for performance, I’ve had some terrible experiences with some mild middle ear squeezes.

In my experience, if I have an ear strain on an eardrum that causes it to be more sensitive than the other, it complicates my dive. The less sensitive eardrum will feel fine but the other one will feel extremely sensitive to the pressure and force me to equalize just for that one ear.

Where Frenzel Outshines Hands-Free

Hands-free relies on creating a negative pressure that has to be released. On the other hand, Frenzel works by inducing a positive pressure that is naturally neutralized as one descends. As a result of this preemptive pressure difference that acts as a natural protection against the increasing pressure, some may find it more comforting to use.

Frenzel, when done on time, will not allow one’s ear drums to stretch further than the neutral position, which is one aspect in which Frenzel outshines hands-free.

How Deep Can You Equalize with Hands-Free?

The deeper one dives, the greater the water pressure squeezes on the body, which makes it difficult to force air through the tightly compressed Eustachian tubes. If the depth limit is not very deep, then it begs the question “why learn it at all?”

By looking at people’s answers online (and people never lie on the internet, right?) figures ranging from 20-50m have been given. From this, we can average the number out to 35m for hands-free equalization using the VTO method. For many, reaching a depth of 35m is already impressive, and there may be no need to learn additional techniques to dive further.

So if you are comfortable with the VTO method of equalization, you may be able to continuously equalize until around 30m, where the water pressure may make it too difficult to continue using hands-free methods. Those who want to push beyond should try combining the hands-free method with the Frenzel maneuver.

With that said, it’s not like there is any data that confirms there is an arbitrary depth limitation for the hands-free equalization method. Perhaps a few years from now, someone will shatter all of the preconceived notions regarding the limitations of hands-free. After all, it is an equalization method like any other, so theoretically the only limit is one’s ability to hold air in their mouth after an air shift, their ability to air shift despite the water pressure, and their hypoxic limit.

Dive Masks and Hands-Free Equalization

Dive masks are often seen as a hindrance by many freedivers. To them, it is another place where they must waste precious oxygen to equalize, otherwise the increasing pressure will damage their eyes.

However, for hands-free equalization, wearing a mask and equalizing should not be seen as an issue. Top freedivers who use hands-free reach depth with their mask without being in extreme pain. How is this possible?

The difference is in how air is managed with the hands-free method and the Frenzel method. With hands-free, the mask will always be equalized since the mask is treated like an extension of the nasal space. With Frenzel, the constant pinching of the nose causes the mask space to be isolated from the nasal space, resulting in a pressure difference.

As a result, those who practice hands-free do not see the mask as a hindrance. In fact, the mask is necessary since the air in the mask will equalize the middle ears. On the other hand, someone who Frenzels must deal with the mask pressure separately by exhaling some air to prevent the mask squeeze.

Thus, those who use the Frenzel method often view the mask as a waste of precious oxygen, and they find it liberating when they switch to using a nose-clip as they dive deeper.

As an aside, you may think that you are wasting precious oxygenated air when putting so much of it into the mask during the initial descent. However, towards the tail end of the dive when you are most hypoxic, you can inhale this relatively oxygenated air. Remember, in hands-free the mask is basically an extension of the nasal space.

No air is ever “wasted”, and in fact this extra bit of air may be what gives you the last remaining bit of energy to push through to the surface. Regardless of whether you prefer Frenzel or hands-free, the next time you dive try inhaling some of this air and see how it makes you feel.

Tips to Keep in Mind

Don’t feel bad if you feel like you haven’t made much progress even after a few days of training. Learning VTO for some can take weeks and even months for some. For a lucky few who naturally have good control over the muscles surrounding their Eustachian tubes, perhaps only a few hours of training is needed.

Divers are also faced with anatomical and physiological differences. However, those who have already been equalizing the pressure in their ears on airplanes without using their hands are already several steps ahead and it is only a matter of some training before succeeding with VTO.

For the rest, being warmed up and properly hydrated prior to training is a must. A simple trick is to chew gum for 5-10 minutes prior to the exercises or a dive session to warm up the jaw muscles and increase blood flow to the critical areas needed to equalize. Insufficient hydration will only result in sticky membranes covering your Eustachian tubes and nasal passages.

When performing VTO, keep in mind that since it uses less pressure to equalize than Frenzel, once the Eustachian tubes are squeezed tightly by water pressure, it becomes very difficult to open up again. Thus, this results in another skill that may need to be developed: a higher equalization frequency than Frenzel.

Conclusion

While many have failed to learn how to hands-free equalize, that doesn’t mean it is impossible. It’s a technique you can learn just like Mouthfill or Frenzel. Depending on your freediving experience and unique anatomy, learning one equalization method may be easier for you than another.

However, as long as you maintain good awareness, practice diligently with the recommended exercises, and give yourself sufficient time, then you can learn any equalization method you wish. Be prepared to work harder than others if it doesn’t come naturally to you.

Lastly, no matter what equalization method you prefer, you must never subject your ears to the pain of the increasing pressure! Should you fail to equalize, consider the dive a failure and just head back to the surface! Do not try to salvage a dive where you cannot equalize. It’s not worth the risk just to get a silly certificate or place higher on a competition.

Freediving Equalization Techniques You Must Know

Many beginner freedivers find great success in their early dives only to be suddenly limited by the increasingly painful pressure squeezing against their ears and eyes due to the mask. Unfortunately, the good old pinch-and-blow method that people do when on airplanes or on mountains stops working, and new freediving equalization methods need to be utilized.

In this guide, we will go over the popular freediving equalization maneuvers that freedivers use to equalize the pressure and alleviate middle ear pain. Each technique has their advantages and disadvantages, and some will be harder to perform than others. But with frequent practice, you can eventually master and possibly even modify one of these techniques to make it more suited for you.

Why Do We Need to Equalize While Freediving?

Our body has small spaces where air lingers. When exposed to pressure changes during freediving, it can result in barotrauma (a pressure related injury). Thus, any pressure changes in the facial air cavities and mask must be equalized with the help of several equalization methods to prevent blocked ears from occurring.

Keep in mind that what is needed for equalization can be different from person to person, and that there is no ‘correct’ technique that one must use at certain depths.

The Valsalva Maneuver (Pinch and Blow)

The Valsalva maneuver is named after Antonio Valsalva who was the first person to document the pressurization of the middle ears. To perform it, simply pinch both nostrils closed with one hand and then forcefully exhale by contracting your diaphragm.

This squeezes the air from the lungs into the middle ear if the Eustachian tube is open, equalizing the ear against the external water pressure. This is probably the most common technique that freedivers use. In fact, people who have been on an airplane or up a mountain have probably already done this technique.

With that said, this technique is only effective in shallow waters. At depths of 30 meters or more, it is rendered ineffective because there is not enough air left in the lungs to equalize the pressure in the sinuses and ears. Furthermore, this technique relies on contracting the lung muscles, which uses up pressure oxygen.

The greatest strength of the Valsalva maneuver is how easy it is to learn and use. The disadvantages are that it wastes precious air and is slow to fully equalize both ears during a fast descent. At deep depths, it requires significant diaphragmatic effort which not only consumes oxygen, but can result in barotraumatic injury to the lungs and ears at depth.

The Frenzel Maneuver

The Frenzel Maneuver was pioneered by the Luftwaffe commander Herman Frenzel who instructed dive-bomber pilots on their use during World War II. The basic idea of this technique is to close one’s vocal cords as if they were lifting a heavy weight. Meanwhile, pinch the nostrils closed and try to make a “k” or “guh” sound. Doing so will force the back of the tongue to rise and elevate the “Adam’s Apple” of the throat.

This also makes the tongue push air up like a piston. The Frenzel maneuver can be done relatively easily and conserves more oxygen than the Valsalva maneuver. Furthermore, it can be performed numerous times in succession quickly while underwater and is effective even at depths of 80 meters.

The BTV/VTO Hands-Free Maneuver

The BTV maneuver stands for “Beance Tubaire Volontaire” and it was first used in the 1950s by the French navy. This technique is capable of equalizing the middle ear and it is also known in English as “Voluntary Tubal Opening.” Unfortunately, this hands-free technique is difficult to perform, and roughly only 1 in 3 people can use it reliably.

The general idea is that while underwater, flex the muscles surrounding your Eustachian tubes to “open” them. The tubes haven’t actually opened, however the nearby muscles will prevent them from contracting despite the increasing water pressure. This makes it more likely that the air from your lungs will move to the Eustachian tubes, which helps maintain equal air pressure.

To perform this maneuver, the muscles of the soft palate are contracted while the upper throat muscles are simultaneously pulling the Eustachian tube open. This maneuver is highly reminiscent of what the throat muscles are doing during a yawn. Similar to how very few people can wiggle their ears, not everyone can effectively perform this maneuver at will.

The strength of this technique is in its energy conservation, as well as how safe it is to use compared to other equalization techniques. However, training the muscles surrounding the Eustachian tubes is difficult, and some may find it impossible due to their small size. Additionally, a slower descending speed may be necessary, and this technique may not be as effective at depths below a diver’s residual lung volume.

The Saline/Sea Water Wet Equalization Maneuver

This maneuver is to be performed when the diver can no longer equalize with air. First, allow water to flood the sinuses. With sea or saline solution in the sinuses, the freediver does not need air in order to equalize the pressure in the sinuses and middle ear anymore. Next, the freediver can use the Frenzel maneuver to force water into the inner ear and reduce the air space further.

This method is difficult to perform and significant training is required to prevent aspiration of water into the lungs and drowning. Furthermore, improperly performing this technique can result in infection of the sinuses and ears, vertigo, blackout, impaired motor control, and lung or trachea barotrauma.

However, when performed perfectly, the wet equalization method can make rapid descents possible. Furthermore, it may be used at depths far below residual lung volume.

The Toynbee Maneuver

The Toynbee maneuver is named after Joseph Toynbee, a man who lived in the 1800s who was one of the first to identify the crackling sound due to the anatomical opening of one’s Eustachian tubes when swallowing.

The technique involves pinching the nostrils shut while swallowing. Doing this allows the muscles in the back of the throat to open up the Eustachian tube and let out some air to equalize if a gradient is present. While performing the Toynbee maneuver during a freedive, there is a low chance of it failing to work if the Eustachian tube doesn’t equalize on the first try.

Mask Equalization while Freediving

In order to equalize the pressure in the mask, simply exhale a small amount of air through the nostrils into the mask. This is the reason why one cannot simply wear swim goggles, which have no nose pocket, when freediving.

Typically, when performing the popular Valsalva or Frenzel maneuvers to equalize ear pressure, some lingering air will leak out of the nose and into the mask and thus equalize the mask as well. At deeper depths, it becomes more difficult to equalize the mask when the air volume in the lungs is reduced.

As such, many top freedivers who regularly dive to great depths forgo wearing a mask or rely on Fluid Goggles, which are filled with liquid and thus do not require equalization.

Freediving Equalization Tips

lung packing for freediving

There are numerous factors which make freediving equalization difficult. The first and most prevalent one is the fact that when descending, you are head down. Since air is always traveling up, the air that you are trying to equalize will go to the highest point (which is your lungs while facedown), and away from your ears.

While we cannot do anything about our head position while descending, below we will go over some basic tips that can help freedivers equalize their ears, some of which can even be done out of the water.

Hydrate

It’s always a good idea to be well-hydrated and it is no exception when it comes to freediving equalization. If one is hydrated, their mucous lining will become thinner and less sticky. This makes it easier for the Eustachian tubes to let air pass through without impediment.

Head Position

Our head is going to be pointing downwards while descending, there is nothing we can do about that. However, we can slightly alter our head position to make equalization easier. First, keep your head in a neutral position (how you would keep it when standing straight).

Avoid the urge to look toward the bottom (tilting your head up) as this stretches out and creases the Eustachian tube. This can make it extremely difficult for you to equalize and thus you should avoid it at all costs.

Equalize Often

Be liberal when equalizing. Yes, equalizing too much can waste some energy. However, many beginner freedivers go to the opposite extreme where they wait until they feel unbearable discomfort before equalizing. That’s already too late. Equalize BEFORE you begin to feel any discomfort.

Always pre-equalize prior to a dive, and while underwater, equalize frequently. A habit of mine is whenever my left leg kicks forward, I equalize. Establish a good habit of equalizing liberally so that you never feel any discomfort.

Do not continue descending if you cannot equalize the pressure in your sinuses and ears. If you feel any pain or discomfort, do NOT push past it, as this can cause injury. For example, ruptured eardrums are common and may result in permanent hearing loss.

Additionally, an injured ear can result in sinus squeeze and can result in permanent damage to the skull. Should you find yourself unable to equalize the pressure, then you should be resurfacing immediately.

Nasal Irrigation

People who experience respiratory congestion due to allergies or cold may want to look into passive nasal irrigation or using a Neti pot. Passive saline irrigation, when used directly, may provide significant relief of cold and allergy symptoms in the nasal passages and sinuses.

Ear Plugs

Cold water can make equalizing one’s ears difficult. With the assistance of vented ear plugs such as JBL Hydroseals or Doc’s Pro Plugs, you can more easily equalize in cold water. These ear plugs designed specifically for underwater equalization work by allowing a small amount of water to enter the ear canal and trapping it there.

The water will get warmed up by the body’s temperature, providing a cozy environment for your inner ear. The small hole venting is designed so that additional cold water will not enter and flush out the warm water from the ear canal. Equalizing with warm water against your eardrums has a higher chance of success compared to cold water.

By applying these tips above, you should be able to more reliably equalize your ears and make freediving that much more enjoyable.

Personalization

As mentioned above, there is no “correct” equalizing method as it is a very individual thing. Not everyone does the same equalization method exactly, over the years different iterations of the techniques outlined in this guide have been developed and perfected.

For instance, I personally push my jaw downwards and outwards while swallowing to equalize. It works for me, but I don’t know it would work for you. The important thing is to keep an open mind and give everything a shot. You won’t really know what works best for you without significant trial and error.

Physiology of Equalizing

To help you understand how the air has to travel in order to equalize the pressure in your ears, this section will provide some context. First, the tube that stretches to the lungs is the Trachea. The epiglottis is a small flap that, when open, allows air to pass through, and when closed, directs food and water away from the larynx and windpipe.

The tube that leads to the stomach is the esophagus. The opening to it is generally closed, except during the act of swallowing when food needs to enter the stomach. Next, air flowing in or out of the lungs is guided by the soft palate. It can be fully opened, closed, or neutral so that air can enter from the nose and mouth simultaneously.

When the soft palate is fully raised, the nasal cavity is blocked off, and only air from the mouth will pass through. When lowered, only air from the nose will pass through. The goal is for air to reach the Eustachian tubes in the nasal cavity. By performing the equalizing techniques outlined in this guide, air will be able to reach the Eustachian tubes and equalize the ears.

Parting Words

You will be able to equalize your ears using any of the maneuvers outlined in this guide and break through your plateaus. A word of advice: if your current diving record is limited because of pain caused by the water pressure, the techniques taught in this article will remove those limits. This is both a blessing and a curse.

Some beginners, eager to reach new depths, may decide to dive farther than they have ever gone and forgetting that they must save enough energy for the swim back up. By dramatically increasing one’s depth potential in such a short time, following proper dive progression and staying cautious is necessary now more than ever.

After all, all of the risks associated with freediving are still present. Furthermore, equalizing gets increasingly difficult at deeper depths. Forceful equalization with the diaphragm at depth increases the chances of suffering lung and ear barotrauma. Always have a diving buddy in case of blackouts, lung squeeze, or barotraumas.

How to Deal with Diaphragm Contractions While Freediving

When holding your breath, at some point you will feel the urge to breathe. This signal can appear in various ways, but the most obvious way is through diaphragm contractions. Freediving contractions can throw off a lot of beginners who fear that they are about to black out. In this guide, we will look at the causes of freediving contractions and how to manage them so that they don’t negatively affect our freediving.

My First Encounter with Freediving Contractions

The first time I encountered a freediving contraction, like many beginners I panicked and quickly resurfaced. From that point on, my diaphragm contractions became a mental block for me; each time I felt them, I felt a sense of impending dread that I was about to black out and had to resurface.

Then I saw a professional freediver practicing static apnea in a pool. During the first part of his breath-hold, his body stayed perfectly still. After a few minutes, I noticed his upper body occasionally twitch, indicating that the contractions had started. “He will soon surface”, I thought to myself. Looks like even the pros can’t avoid it, but he sure held off for a long time. To my surprise, this would only be around the halfway point of his breath-hold.

He kept his head underwater while his contractions became more frequent until it seemed like his entire torso was convulsing violently. “My god, he’s going to drown!” I worriedly thought from afar. But he had a buddy nearby who was monitoring him, and he didn’t seem worried at all so clearly this was something he’s used to. The freediver ended up with a breath-hold of over 7-minutes.

My mind was blown. The violent convulsing scared me, but clearly this man knew his limits and showed me what was possible with sufficient training. With renewed vigor, I continued my breath-hold training with the goal of overcoming my fear of freediving contractions and staying underwater for much longer.

What are Diaphragm Contractions When Freediving?

Diaphragm contractions are the double-edged sword of every breath-hold. Contractions are one of the indicators that your body is starved of oxygen. Unfortunately, for most people, the start of the first contraction is the beginning of the struggle, or the contraction phase of a breath-hold.

Contractions help increase the blood flow from the heart. Each contraction means a momentary increase of blood flow to the brain. For a body that is deprived of oxygen, this is technically a good thing.

What Causes a Diaphragm Contraction?

The natural urge to breathe when we deprive our body of oxygen comes from rising levels of carbon dioxide in the blood. As our lungs convert more oxygen into carbon dioxide without exhaling, the body will realize something is wrong and stimulates itself to breathe. That is what diaphragm contractions are.

A diaphragm contraction can be very subtle, almost like a flutter, or it can be so severe it basically shifts one’s entire upper body. Some freedivers say they barely feel their diaphragm contractions, and others feel it more violently and very early on.

For me, my contractions start approximately after one minute and never eases off. In fact, it only gets more and more intense and. To an outsider, it may look like I am writhing in pain after being punched in the stomach. Some freedivers experience them in waves where it can temporarily stop for a minute or so before resuming. For me, once I get them, they just keep coming until I resurface.

In addition to CO2 build-up, the increasing water pressure can also lead to getting diaphragm contractions early. Many freedivers start to feel the contractions during their descent which can cause them to lose focus because they haven’t even reached the halfway point of their dive.

Stress is another major factor that can lead to contractions, as can cold water. If you decide to freedive in cold water and something happened earlier to you that is stressing you out, then expect to feel a very strong diaphragm contraction during your breath-hold.

Strong contractions can sometimes lead to a lung injury, so we recommend warming up carefully for each dive, increasing depth at a comfortable pace before you try to dive to new depths.

When Do Contractions Start During a Breath-Hold?

breath hold training

The first part of the breath-hold will feel relaxing and comfortable because the contractions haven’t started yet. When you still have plenty of oxygen to work with and barely any CO2 buildup has occurred yet, you will be able to achieve mindfulness more easily. Take this time to enjoy the calm and tranquility as you continue diving down. This peace won’t last, and in short order you will be fighting a tough mental battle, but for now just relax.

The middle part of the breath-hold begins when you start to feel the urge to breathe, which is signaled by your diaphragm contracting. When your stomach starts to involuntarily twitch and squeeze, you are experiencing a contraction. Sometimes the contractions will occur gently and slowly. Other times they will be more pronounced, and may cause a beginner freediver to panic.

As you approach your limit, the contractions will only worsen. After all, it’s your body signalling to you that you are about to blackout. Beginners may find it difficult to determine when exactly they should resurface and when they should endure their contractions. Unfortunately, this is something that can only be determined with experience, so it’s best to practice with a dive buddy in case you black out.

Additional Factors that Cause Freediving Contractions

Sometimes contractions can occur within 30 seconds of a dive. Sometimes they can take up to three minutes into the breath-hold to occur. There are various factors which can influence this, including what type of breath-hold you are doing and how well you have trained for the dive. But there are also many minor factors that can contribute stronger contractions.

For example, compare an experienced freediver who is doing static apnea with their face submerged underwater to an absolute beginner. The advanced diver has done this hundreds of times before, and they are likely able to stave off their contractions for a long time with their well-trained body and mental fortitude.

Now imagine if conditions are not so favorable. Imagine trying to do the same static apnea hold with strong currents. Perhaps it’s the first dive of the year and you’re out of practice. Perhaps you’re feeling anxious and you didn’t sleep well the night before, and on top of that you didn’t eat that well. Maybe the weather is cold and windy on the surface. These factors could make your contractions occur much faster.

Your surroundings as well as physical and mental preparation can drastically affect your diaphragm contractions during a breath-hold.

Beginners often ask, “How come I can’t hold my breath for very long” or “How come my contractions kick in so early?” First of all, everybody is unique, and everybody’s mind is even more unique. We’ve already gone over some of the factors that can affect your breath-hold time.

Mental Preparation and Freediving Contractions

Did you know that even your thoughts can have a major impact on how long you can hold your breath? What you are thinking can cause a shift in your body and affect your body’s balance. For example, if you suddenly have a scary thought that you are drowning, that thought can increase your stress levels and heart rate, causing your body to consume more oxygen.

This is what we mean when we say that you need mental preparation just as much as physical preparation. When training, you must not only train your body, but your mind. This is also why some freedivers learn meditation in order to enter their own bubble and block out all the distractions to focus on the task at hand.

No matter what you feel, what you hear, or what you sense, you must not let external factors cause you to lose focus. This is what professional freedivers do. They do this so often it’s become almost second nature to them, something that they can switch on at will. Once they start their breath-hold, their body and mind knows exactly what to do.

Without the ability to switch into this focused breath-hold mode, they wouldn’t be able to perform well in competitions where there’s huge excited crowds watching them and their reputation is on the line.

When you’re low on oxygen, the contractions become more severe and it gets really difficult to handle them. As the CO2 builds up in your body, the urge to expel it becomes almost unbearable. With your diaphragm contracting so heavily, it can turn your breath-hold into a miserable hell.

On top of this, you know that you’re close to your limit and are approaching the danger level where you could blackout. It’s difficult to know exactly when you will blackout especially for an untrained freediver. The threshold is different from person to person, so you need to take small steps and determine this for yourself (with the help of a trusted spotter).

With that said, the basics remain the same, you must stay calm and relax. Even when the pain of the contractions becomes nearly unbearable, at this stage it is almost entirely one’s willpower that keeps them pushing. But before even getting to this point, the longer you remain calm during your breath-hold, the more oxygen you conserve which delays the contractions.

Tips to Prevent Diaphragm Contractions when Freediving

breath hold tips

There’s no way to fully prevent freediving contractions, but there are ways to lessen their intensity and delay the onset of contractions. For instance, during static apnea approximately one minute into your breath-hold (or around the time you normally experience contractions), keep your body as still as possible and maintain some slight tension in your diaphragm.

Another method to lessen the severity of the contraction is to swallow. When holding your body still isn’t working anymore, try swallowing. You may be able to buy yourself a few seconds where you aren’t contracting. However, expect them to resume at some point.

Breath-Holding Tips

Doing a breath-hold on land vs. underwater is different when it comes to the surrounding. However, the basics remain the same: take a deep breath, close your mouth, empty your mind, and relax. Anything else you can become a distraction.

If you have a dive watch resist the urge to take small peeks. Your curiosity will break your focus. The only time you should look at your watch is when you’re at your limit and you are about to resurface. In other words, after the dive you can check to see how long you lasted. The data is important for future reference, but it is not something you need to frequently check in the middle of the dive.

Relax. Relax your shoulders, neck, hands, arms, feet, stomach, basically anything that is currently not in use, just relax it. Particularly if you’re diving down in a straight line and especially when you’re free falling, relax every muscle that you can. When the contractions start coming in, you need to relax. Let your body do what it needs to do without trying to fight the urge but putting tension on your stomach area.

How Strong Can Contractions Get?

If you’re asking this question, you might also be wondering whether stronger contractions means someone is close to their limit. That’s not necessarily true.

Going back to the anecdote I told at the beginning of this article where I witnessed  a professional freediver practicing static apnea until he was convulsing violently. It was so bad that it looked as if his feet were bouncing his body off the floor. Was this man pushing his body to the extreme and putting himself at great risk?

Again, not necessarily. Your diaphragm contractions can get really bad without your body becoming hypoxic (severely deprived of oxygen). For example, people who experience contractions very early on clearly have more oxygen in their body. When the body is actually low on oxygen, there will be other warning signs and contractions are not the best indicator of one’s hypoxic state.

Instead, check if one’s lips and face are a healthy pink colour. If they are, then the body is not low on oxygen. If a freediver is hypoxic, their lips will usually turn a pale blue or purple. There are individuals who won’t experience their contractions until after three or four minutes, and others who get them within 30 seconds, but instead focusing on the contractions, look at the colour of one’s face and lips to know how they are really doing.

How to Increase CO2 Tolerance

CO2 tolerance

It’s not a good idea to practice any form of over-breathing, such as hyperventilating, to temporarily increase your CO2 tolerance. Hyperventilating reduces the amount of CO2 in the blood which delays the brain’s signal to breathe. This can delay diaphragm contractions until much later, making the breath-hold seem easier, but at significant risk.

Since your body is not exhibiting the usual symptoms that it is running low on oxygen, it can be difficult for you to gauge your actual condition. By hyperventilating, the oxygen bonds more strongly to haemoglobin (the oxygen transporting cell found in blood), increases the heart rate which uses up oxygen faster, decreases blood flow to the brain, and thus drastically increases the chances of sudden blackouts.

Since your urge to breath is significantly delayed when over-breathing, you won’t know to leave the water until it’s too late. A better way of going about this is to train your body to be more tolerant of higher than normal levels of CO2 so that it can eventually adapt to it. That is how you can delay the onset of diaphragm contractions until much later.

In order to increase CO2 tolerance the proper and safe way, we recommend training with CO2 tables, dry static breath-holds, apnea walking, as well as other CO2 tolerance exercises. Incorporating cardiovascular training such as interval training (e.g. alternating between short periods of sprinting and resting) are a great way to increase CO2 tolerance.

Additionally, remember to stay relaxed and keep warm in order to feel confident and comfortable enough to perform at your best.

Learning from an instructor or an experienced buddy that you trust can make the training go a lot smoother. Regularly practicing breath-hold training and progressing at your own pace are key to effectively managing your diaphragm contractions.

Don’t Fight the Contractions

This is something that is hard to do, but the sooner you accept that contractions are a natural part of freediving, the faster you will grow as a freediver. You cannot avoid the contractions, merely delay their arrival.

Even if a contraction happens faster than you expected, it doesn’t matter. As long as you realize that a contraction is a natural reaction from your body, it shouldn’t affect your mental game because you know that it is bound to happen at some point anyways. Keep your wits about you and stay calm, otherwise it will ruin your dive.

Coping With Diaphragm Contractions

Everyone has different methods that they use to cope with contractions. Some can simply endure it through sheer force of will and adaptation. Others try to distract themselves by singing a song in their mind or thinking relaxing thoughts to stay calm. However, these methods all share a certain perspective: that contractions are bad and must be avoided.

One way to cope with contractions is to think about it in a completely different way. Stop thinking of them as the enemy or something to be avoided. Instead, think of contractions as your friends. After all, a contraction is just your body warning you that you are entering the struggle phase. It also means that your body is utilizing the mammalian dive reflex (or diving response) to preserve oxygen.

Most importantly, it means your body is protecting you from a blackout by improving the oxygenation of your blood using the oxygen still remaining in your lungs. The body also increases blood pressure which strengthens the bond between blood and tissue, and oxygenates the brain with its oxygen reserves.

In other words, a diaphragm contraction is like your body shifting gears and going into survival mode to help you stay conscious longer. Stop looking at contractions like a threat, but think of them as a massive injection of oxygen into your brain. When you think of contractions as something beneficial, it may help you cope with them better psychologically.

Freediving Contractions Summary

To summarize, it’s natural to experience diaphragm contractions when freediving or during static apnea. Many beginner freedivers struggle with contractions because it causes them to panic and lose focus. It can also feel extremely uncomfortable to an untrained individual and forces them to resurface.

One should never get rid of their freediving contractions by hyperventilating. Any kind of over-breathing is a false economy. You may feel like you are benefiting in the short term, however you have not trained your lungs or regulated your heart rate in any way. Over-breathing simply removes or at least delays when the diaphragm contractions occur which puts you at risk of blacking out.

Instead, one should strive to improve their CO2 tolerance by practicing with CO2 tables, dry static apnea, and high intensity interval training. If you are practicing in the water, you must always have a dive buddy or an instructor watching your back.

Over time, you can train enough so that the diaphragm contractions come later. You can also learn how to better cope with them by relaxing your mind and diving when you’re warm. Try to reframe the way you are thinking about contractions by seeing them as your body helping you stay conscious longer underwater.

By framing it differently, instead of feeling panicked when they appear, you can more easily stay calm and continue your breath-hold for much longer. It is only when you lose the healthy pink color in your lips and face does it mean you are becoming hypoxic.

Freediving Fins vs. SCUBA Fins: Which Should You Get?

Whether you’re freediving, SCUBA diving, or snorkeling, one piece of equipment you’ll need for each activity is your fins. With that said, that doesn’t mean you can use the same fins for each one. Fins come in numerous shapes and sizes, and using the wrong fin for the sport you are participating in can drastically reduce your performance.

With so many fins on the market, it can be overwhelming for a beginner to know which one to get. Contrary to popular belief, bigger is not always better, and it largely depends on what kind of diving you plan on doing. Since fins are specifically designed for performance at various depths, the length and material of your fins will affect how maneuverable it is underwater. This is where knowing the difference between freediving and SCUBA fins will make a big difference.

Freediving Fins and SCUBA Fins

Comparing freediving fins to SCUBA fins is not as straightforward as it may seem.

For one, freediving fins are significantly longer than SCUBA fins. Thus, freediving fins require more leg power to kick with and can restrict fine movement underwater. However, the length of the freediving fins is also what allows it to generate so much thrust with each kick.

With SCUBA fins, you will not feel as much propulsion compared to freediving fins. You can use them in tighter spaces, and can perform more precise kicks and turns underwater. Additionally, an open foot pocket design is recommended for SCUBA fins since you’ll want to wear dive boots with it, whereas freediving fins must maximize performance, therefore a full-foot pocket design is the optimal choice.

If I can only pick one, which should I get?

If you freedive and SCUBA dive and want only one pair of fins to use for both activities, then we recommend buying a pair of freediving fins. Freediving fins are very powerful and can help you swim against strong currents.

Furthermore, they are more efficient when it comes to air consumption if you are just cruising along. After all, freedivers only have one breath to work with, so you know that each piece of equipment worn only serves to be as air efficient as possible.

Next, the speed and energy efficiency of the freediving fins make them ideal to use, especially  if something were to go wrong and you need to resurface immediately. When you use freediving fins, your legs may feel sore initially, but once you acclimate to them and adopt a slower, wider amplitude kick, you will jet through the water easily.

So whether you are SCUBA diving or freediving, you can use freediving fins to great effect. However, if you tried to use SCUBA fins for freediving, you will feel sorely lacking in terms of power and speed, which can be dangerous when you are deep underwater and fighting against the negative buoyancy.

Lastly, a piece of advice: do NOT freedive after SCUBA diving. If you want to do both activities in one day, freedive first, SCUBA second. The reason being, after spending some time in the water the residual nitrogen in your blood from your SCUBA session combined with the rapid ascents while freediving can easily result in decompression sickness.

SCUBA Diving Fins

scuba diving fins

SCUBA fins are a step up from snorkeling fins, and they are designed to withstand the pressure at deeper depths while giving you adequate power, though not as much as freediving fins. Keep in mind that the volume and weight of your SCUBA gear will make you less hydrodynamic, so stiffer fins that generate more thrust is necessary.

The blade length and flexibility of SCUBA fins is generally longer than snorkeling fins, and they measure between 25 to 30 inches (64 to 76 cm). SCUBA fins may feature various designs that increase their control and kick efficiency. For instance, innovations such as a split fin design or integrated channels allow the diver to kick rapidly while kicking fatigue to a minimum.

Due to their length, diving fins will feel stiffer and more rigid, which helps to increase the propulsion you can get. However, your leg muscles will get worked harder to move them; this is especially true for freediving fins, which are very long.

SCUBA diving fins typically have an open heel design so that dive boots can be worn with them for increased insulation and comfort.

Overall, SCUBA fins feature a more streamlined design, medium length blades (longer than snorkeling fins, shorter than freediving fins), thick and stiff materials, spacious foot pockets for dive boots, and decent thrust with each kick.

Freediving Fins

Left: Monofin. Right: Bi-Fins. Photo Credit: Emma Farell CC By 2.0

Freediving bi-fins are highly recognized thanks to their extremely long blade length. The most basic freediving fins measure anywhere from 31 to 38 inches (79 to 97 cm) and that’s excluding the foot pocket length.

The reason for their excessive length is so that freediving fins can displace the greatest amount of water per kick. In other words, the freediver can propel themself rapidly through the water like a torpedo. They can cover greater distances faster, with less energy and oxygen used so that they can stay underwater for longer.

Unfortunately, such long fins are difficult to maneuver. First of all, forget trying to walk around with them on land. Second, maneuvering them to do precise movements requires a significant amount of experience.

As for its flexibility, freediving fins are very stiff. However, thanks to their long blade length, this means that when it “snaps” back after each kick, you will jet through the water easily. Unfortunately, the stiffness makes it difficult to kick without strong legs. Starting out, you will need to improve your finning technique and strengthen your leg muscles in order to maximize these fins.

The blade material is typically constructed from plastic, fiberglass, or carbon. Performance is key while freediving, so the foot pocket is going to be full foot.

To summarize, freediving bi-fins feature very long blades that are typically made from plastic, fiberglass, or carbon. They typically come with a full foot pocket design. Due to the stiffness of the blades, they can help you perform powerful kicks that need skill and strength to do properly. Since freediving fins are so long, they don’t fit in most fin bags and are difficult to travel with.

Freediving Monofin

Freedivers who intend to compete against the best of the best will eventually switch to using a monofin. As the name suggests, it is a single large fin with a pair of foot pockets attached so that you can wear it with both feet. Its shape is reminiscent of a dolphin’s tail, which is what it is based on.

Switching from bi-fins to a monofin isn’t easy; there is sure to be a learning curve one must overcome. However, it is worth learning and getting used to because monofins are the most efficient fins one can use to propel themselves through the water.

Similar to freediving bi-fins, monofins are made using similar materials: plastic, fiberglass, and carbon. The thickness is greater towards the foot pockets and thinner towards the ends. A stiff blade is harder to kick with but gives you the most thrust. A softer blade will be easier to use but will not provide the same performance.

How to Select the Right Freediving Fins

You don’t want to buy the first freediving fin you see without doing some research. Particularly if you are on a tight budget, you want to get the best bang for your buck, since freediving fins can also be used for SCUBA diving as well. Once you get yourself some gear that is specifically geared towards freediving, you will have a hard time going back to your old SCUBA or snorkeling fins.

Material

The three main materials that freediving fins are constructed out of are plastic, fiberglass, and carbon. That is the order of each type of fin in ascending price brackets.

Let’s start with plastic first. Plastic blades are rugged and inexpensive. If you’ve never owned a freediving fin before, then this is likely what you will start with. For beginner divers and spearos, they are good enough for you to get used to the size and handling of a freediving fin. The goal is to upgrade to either fiberglass or carbon fiber later on.

Fiberglass composites provide superior performance but are more expensive than plastic. Similarly, carbon fins are the next step up from fiberglass. Due to their prohibitively expensive price, all but enthusiast freedivers will likely pass due to the price alone.

They are generally reserved for competition use, or for the most intense spearfishing or pleasure-diving use. The high price is justified thanks to its responsiveness and energy efficiency that cheaper materials cannot match.

Gearing Up

Freediving sounds simple enough;just hold your breath and dive, right? Anyone who has actually dived down to deep depths knows that it is much more than that. And the same is true of freediving gear; specific gear is needed in order to get the best performance while staying safe.

Whether the aim is to dive, fish, or to enter a competition, one needs to purchase gear that is suitable for their capabilities. It is important to know what the intended use is, and what experience level the user is at in order to benefit the most from a pair of freediving fins.

Getting the Right Fit

Figuring out the sizing of a full-foot fin can be cumbersome, and unfortunately sizing may be an issue for freediving fins as well. In fact, when it comes to freediving fins, it is crucial that they fit perfectly on a diver’s foot as if they were an extension of it in order to get top performance from the fins.

Otherwise, a fin that is even slightly loose can cause you to worry that it will slip off as well as waste energy with each kick. Additionally, there are sizing differences between each manufacturer, so you should find the company’s sizing chart as well as consult customer reviews or ask the manufacturer directly for details.

Generally dive boots are worn when using fins with open foot pockets. Full foot pockets can be worn barefoot but this may cause discomfort. Wearing neoprene underwater socks can help you get a more comfortable fit while keeping your feet warm. Some manufacturers assume that you will be wearing neoprene socks of a particular thickness (around 1.5-3mm).

Once again, consult the sizing chart or read customer reviews to get an idea of how they might fit on your feet. Decide whether you plan on wearing neoprene socks or going barefoot and pick an appropriate size. When going barefoot, we recommend looking for fins that have soft rubber on contact areas by the foot pocket.

Some manufacturers sell insoles that can be put inside the foot pocket to essentially make the fins a smaller size to help you get a tighter fit. You can also use them if you have thinner socks than normal and need something to pad the space.

If it seems like people go through a lot of trouble to get the perfect fit, that’s because the perfect fit is essential and worth the headache you will get by doing so much trial and error. Freediving fins that are too small will cramp and pinch your feet. Too large, and you might slip out of them when kicking hard. You will also waste precious energy because the energy transfer is not as efficient when your foot is sliding around in the fin.

Freediving Fins vs. SCUBA Fins – Summary

Both freediving fins and SCUBA fins are designed for their respective sports. However, freediving fins can potentially be used for SCUBA diving as well. The long fin blades of the freediving fins make them harder to kick with, however they provide the greatest thrust and will help you conserve oxygen and energy.

Freediving fins are not good when it comes to precise movements, since they are so large and long. As such, they are not ideal for use in shallow water or around coral. If you’re looking to buy a pair of freediving fins, start off with a pair of plastic ones and then upgrade to fiberglass later on.

Using SCUBA fins while freediving is not recommended. Due to their short length, you will not be able to generate much thrust. You will find yourself kicking rapidly, wasting precious energy, while not traveling very far for the energy that you spent. During the ascent when you must fight against negative buoyancy, divers with SCUBA fins will struggle to resurface.